Clipping on Twitch is one of the fastest ways to grow your audience, share standout moments, and keep viewers coming back for more. If you have ever watched a streamer pull off something incredible and thought, "I need to save that," you already understand why knowing how to clip on Twitch matters. This article walks you through the entire process in 20 minutes or less, covering everything from capturing live stream highlights to sharing short video clips across platforms like YouTube and TikTok.
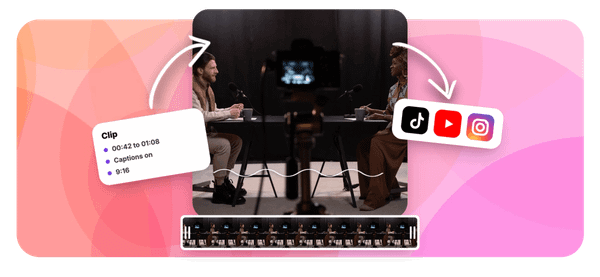
Once you have your Twitch clips ready, tools like Crayo's clip creator can take it further by turning raw moments into polished, shareable content without any editing experience. Think of it as your shortcut from raw footage to finished product, similar to how the best AI podcast clip generator tools help podcasters pull the most engaging segments from long recordings and package them for social media. Crayo handles the heavy lifting so you can focus on streaming, building your channel, and connecting with your community.
Table of Contents
- Why Streamers Struggle to Clip Twitch Moments
- The Hidden Cost of Clipping Twitch Streams Without a System
- 7 Ways to Clip on Twitch
- The 20-Minute Workflow to Create a Twitch Clip
- Turn Your Best Twitch Moments Into Short Videos With Crayo
Summary
- Clipping on Twitch takes about 30 seconds once you know where the button is, but the real friction starts immediately after. Streamers routinely miss standout moments because nobody marked the timestamp during the stream, and the capture window is far narrower than most people assume. Clipping mechanics aren't the obstacle; the lack of a consistent process around them is.
- Twitch enforces a strict 60-second maximum per clip, which catches many creators off guard when they try to save longer sequences like multi-stage comebacks or extended community conversations. The fix isn't to stretch the clip, but to identify the core 40 to 60 seconds that includes the setup, the peak moment, and the reaction. Anything longer belongs in a Highlight or an exported file edited separately.
- VOD retention windows create a hard deadline that informal systems consistently miss. Twitch stores broadcasts for 7 days on standard accounts, 14 days for Affiliates, and 60 days for Partners and Prime users. A creator who plans to clip "later this week" and checks on day nine is not dealing with a clipping problem; they are dealing with a planning failure that no tool can fix after the footage is gone.
- Auto-generated captions look finished the moment they appear, which is exactly what makes them risky. The World Wide Web Consortium notes that automatically generated subtitles regularly require accuracy review because a single misrecognized word can reverse a sentence's meaning. Assuming 16 clips revised per month at six minutes each, that adds up to over 90 minutes of rework that a pre-publish review would eliminate.
- The short-form clip market has become significantly more competitive. YouTube alone draws 600 million daily live viewers according to the LiveReacting Blog's 2026 live streaming statistics, and Twitch has over 7 million unique streamers broadcasting each month. A missed retention window or a poorly framed portrait crop is not just a minor inconvenience; it is lost ground in an already crowded distribution environment.
- Clips that build an audience aren't the ones created fastest; they are the ones that go through a consistent process on every stream, not just the memorable ones. The Wistia 2026 State of Video report, which surveyed more than 900 video professionals and analyzed over 13 million videos, confirms that review and handoff steps are where time and quality are most often lost, even at professional scale.
Crayo's clip creator tool fits in after a clip is approved, handling format conversion, portrait cropping, and caption generation in one pass rather than treating each as a separate manual task.
Why Streamers Struggle to Clip Twitch Moments

Clipping on Twitch takes about thirty seconds once you know where the button lives.
- Open a live stream or past broadcast
- Select the Clip icon
- Trim your moment to a maximum of 60 seconds
- Add a title
- Publish
Twitch can also generate a portrait version for mobile. The mechanics are not the obstacle. The real friction starts the moment you realize the Clip icon is only the beginning of a much longer process. Streamers routinely miss standout reactions because nobody marked the timestamp during the stream. A viewer gets excited, opens the clip tool, and the moment is already three minutes in the past, buried under new content. The window is narrow, and most people think it's wider than it is.
Why the 60-Second Limit Catches People Off Guard
The failure point is usually a mismatch between what happened and what Twitch allows.
- A three-minute comeback sequence
- A long community conversation
- A multi-stage boss kill
None of these fits a single Twitch Clip. Twitch enforces a strict 60-second maximum per clip, so anything longer belongs in a Highlight or an exported video file. The fix isn't to stretch the clip; it is to identify the 40-second core that includes the setup, the peak moment, and the reaction, then let the rest go.
Eliminating the Distribution Bottleneck
Most teams handle this by trying to capture everything and editing later. The hidden cost is that "later" rarely comes. Clips accumulate in the Clips Manager:
- Without titles
- Without context notes
- Without a clear destination platform
A clip creator tool can bridge that gap by turning raw captured moments into formatted, shareable content without a separate editing workflow, keeping the process moving instead of stalling at the distribution step.
What Breaks the Portrait Crop
Twitch generates a vertical companion clip automatically, but automatic does not mean accurate. The algorithm estimates where the camera and gameplay regions sit, and it is often wrong, cutting off the HUD, the facecam, or the teammate that makes the moment make sense. Previewing the portrait layout and switching to Full or Stacked when available takes ten seconds and prevents a clip from looking broken on a phone.
Permission issues add another layer:
- Channels can restrict clipping by follower status
- Subscriber tier, or category
- Viewers can't override those controls from their end
Bridging the Gap Between Capture and Distribution
The deeper problem is that even a perfectly framed, correctly cropped clip still needs a title, a destination, and a review cycle before it does any real work for a channel. Creating the clip is the capture step. The shareable content comes from choosing an understandable moment, confirming the frame tells the whole story, and running a consistent distribution workflow after every stream, not just the ones that felt memorable in the moment. But what happens when that workflow never gets built, and clips keep piling up without a system behind them?
Related Reading
- Best AI Podcast Clip Generator
- What Is An Audiogram Podcast
- How Long Does It Take To Trim A Zoom Recording
- Content Repurposing Examples
- Webinar To Short Clips AI
- Clipping a YouTube Video
- Podcast Clips For Social Media
- Video Clipping For Social Media
- How Do I Repurpose My Interview To Social Media
- Sermon Clips AI
The Hidden Cost of Clipping Twitch Streams Without a System

Clips accumulate faster than decisions do. The real drain isn't the 30 seconds it takes to trim a highlight in Twitch's clip editor. It is every minute spent rewatching unmarked VODs, correcting auto-cropped verticals that cut off the kill cam, and chasing down footage that expired before anyone thought to save it.
Where Time Actually Disappears
The failure point is usually upstream from the clip itself. An editor receives a two-hour broadcast with no timestamp, no brief, and a vague instruction to "find the good stuff." So they scrub. They rewatch. They guess. If a team produces 12 clips a month and spends even eight unplanned minutes locating each source moment, that is 96 minutes of recoverable waste per month, not from clipping, but from searching. Multiply that across a full year, and you have nearly 20 hours spent on a problem that a simple timestamp log during the stream would eliminate entirely. The same pattern shows up with VOD retention. Twitch documents storage windows:
- 7 days for standard accounts
- 14 for Affiliates
- 60 for Partners and Prime users
A creator who plans to clip "later this week" and checks on day nine is not dealing with a clipping problem. They are dealing with a planning problem that no clip tool can fix after the fact. The footage is gone. The moment cannot be recovered. That is a structural gap, not a technical one.
Formalizing Upstream Clip Selection Processes
Most teams handle this by relying on memory and good intentions, trusting that someone will remember to save the VOD or note the timestamp before the window closes. As channel output grows and streams happen more frequently, that informal system breaks under its own weight. Tools like Crayo address part of this by accelerating the clip creation and formatting step, but the upstream work, knowing what to clip and when to act, still requires a deliberate process. According to the LiveReacting Blog's 2026 live streaming statistics, YouTube alone draws 600 million daily live viewers, which signals how competitive the short-form clip market has become. A missed window is not just lost content. It is lost ground.
What Bad Captions Actually Cost
Auto-generated captions look finished the moment they appear. That is the trap. The World Wide Web Consortium's accessibility guidance is direct: automatically generated subtitles regularly require an accuracy review because a single misrecognized word can reverse a sentence's meaning.
A clip where the punchline is captioned wrong does not just underperform. It misrepresents the streamer. Fixing it after publishing means pulling the clip, correcting the file, and re-uploading, which is three steps that a 90-second review before posting would have prevented. Assume 16 clips revised per month at six minutes each, and you have over an hour and a half of rework that a checklist eliminates.
Prioritizing Process Over Speed in High-Volume Video Workflows
The Wistia 2026 State of Video report, which surveyed more than 900 video professionals and analyzed over 13 million videos, confirms that video production and distribution are large, active workflows with significant coordination overhead. Even for teams working at professional scale, the review and handoff steps are where time and quality are most often lost. For a Twitch creator working with a small team or alone, that overhead does not shrink. It just becomes invisible until something goes wrong publicly. The clips that build an audience are not the ones created fastest. They are the ones that went through a consistent process, every stream, not just the memorable ones. And that consistency starts with knowing which method to use before you ever hit record.
Related Reading
- Church Reels Editing
- Podcast Shorts
- How To Start Clipping On Instagram
- Best Video Clipping Tool For YouTube
- Repurposing Content For Social Media
- How To Add Audio To A Video
- How To Repurpose Webinar Content For Marketing
7 Ways to Clip on Twitch

Seven methods exist for clipping on Twitch, and choosing the right one before you start is what separates a usable asset from a frustrating near-miss. The method depends on a single variable: where the source footage lives and how long it is. A live stream, saved VOD, mobile device, or a sequence longer than 60 seconds each calls for a different tool.
1. Clip a Live Stream on Desktop
The fastest capture window is the one you use while the moment is still happening.
- Open the stream
- Click the Clip icon in the player
- Adjust your start and end points within the 60-second boundary
- Write a specific title
- Publish
The streamer must have clipping enabled, and an unsaved draft is not a published asset, so complete the process before you close the tab.
2. Clip a Saved VOD
When the moment passes you during a live broadcast, the VOD is your second chance to get it right.
- Open the creator's Past Broadcasts
- Seek to the exact moment
- Use the same Clip Creator to select up to 60 seconds
The advantage here is context: you can watch the 30 seconds before and after the moment to choose cleaner boundaries than you would under live pressure.
3. Create a Twitch Clip on Mobile
The failure point with mobile clipping is usually hesitation. Streamers assume desktop is required, wait until they are back at a computer, and the moment loses its urgency.
- Tap the video
- Select Clip
- Trim your portion
- Add a title
- Publish
Portrait-layout editing isn't available on mobile yet, so plan to refine framing later in the Clips Manager if vertical format matters for your distribution channel.
4. Use the Clips Manager to Fix a Near-Miss
Most creators treat a badly timed clip as a loss. It rarely is. The Clips Manager inside your Creator Dashboard lets you:
- Adjust trim points
- Update the title
- Reframe the portrait layout after the fact
Moving a clip boundary three seconds earlier so the setup lands before the reaction is the difference between a clip that makes sense out of context and one that only works if you watched the stream.
Organizing Clip Libraries to Prevent Friction
The familiar approach is to publish quickly and move on, leaving dozens of untitled or poorly cropped clips sitting in the dashboard. As the library grows, those clips become impossible to search, share, or repurpose without spending an hour reconstructing what each one was about. Clip management tools like Crayo address this kind of accumulating friction, helping creators organize, title, and prepare clips for distribution without treating each one as a separate manual project.
5. Choose Full or Stacked Portrait Layout
According to the Top4Smm Blog, Twitch has over 7 million unique streamers broadcasting each month, so vertical-format clips compete for attention on the same short-form feeds as every other creator in that pool. Twitch's native portrait controls give you two layout options:
- Full (one source fills the frame)
- Stacked (gameplay above, facecam below, or reversed)
Neither is automatically correct. Preview the result on a phone-sized window before saving, because Twitch's suggested crop frequently cuts off HUD elements or places the reaction outside the visible area.
6. Capture a Moment With Voice Clipping
When your hands are on the controller and something worth saving just happened, saying "Twitch, Clip That" triggers a clip without breaking your focus. The clip generates automatically and lands in your Clips Manager for review.
That review step is not optional: voice-triggered clips capture the right moment roughly, not precisely, and the start point often needs a small adjustment to include the setup that makes the reaction make sense.
7. Create a Highlight or Export a VOD for Longer Sequences
The 60-second clip limit is a distribution format, not a storytelling limit. When the moment is:
- A coaching explanation
- A multi-stage comeback
- A match sequence that requires two minutes to land
Twitch's Video Producer lets you create a Highlight or download an authorized broadcast for editing in a separate tool. The practical workflow is to build the longer piece first, then derive a 45-to-60-second social clip from it, rather than trying to compress the full story into a clip and losing the narrative.
Why the Order of Operations Matters
The sequence you follow changes the quality of the result, not just the speed.
- Capturing first (live, mobile, or voice)
- Then reviewing the complete moment
- Then titling and framing
- Then saving the approved asset produces a clip that works
Reversing any of those steps, publishing before reviewing or titling after sharing, creates a clip that technically exists but does not function as a reusable asset. Each of these seven methods removes a different bottleneck. Live and mobile capture prevent missed moments. VOD clipping improves selection quality by giving you the full context. The Clips Manager and portrait controls improve the output after capture. Voice clipping keeps gameplay uninterrupted. Highlights protect stories that cannot survive a 60-second cut. Together, they cover every scenario a Twitch creator faces across a full broadcast cycle.
The 20-Minute Workflow to Create a Twitch Clip

This workflow completes one clean, reviewed Twitch clip in 20 minutes when the moment is easy to find, and clipping is enabled. Longer searches, permission issues, or large file exports will push that number higher. The structure below assumes you already know the moment you want.
Minute 0 to 3: Confirm Access Before Anything Else
The failure point most creators hit is not the clip itself. It is discovering at the export stage that they never had permission to share the content in the first place.
- Open the stream or VOD
- Check that the Clip icon appears
- Verify your sharing rights before touching anything else
If the icon is missing, the streamer may have restricted clips through Creator Dashboard settings, and there is no workaround worth pursuing. Confirm your usage boundary in one sentence before moving forward. Does the footage include licensed music, another creator's gameplay, or a private conversation? Those three categories create the most common sharing problems, and catching them at minute two costs nothing. Catching them at minute eighteen costs the whole session.
Minutes 3 to 6: Write the Story Before You Clip It
The critical difference between a clip that lands and one that confuses viewers is whether the setup, payoff, and reaction all survive the cut. Watch the surrounding footage, then write one sentence that captures all three. An example that works: "Teammate predicts the loss, last-second save happens, entire squad reacts." An example that does not work: "funny moment from stream." That one sentence becomes your editing guide. If your planned start and end points do not contain every element in the sentence, adjust the boundaries before you ever open the clip tool. Most avoidable recuts happen because the editor checked only the exciting middle and skipped the setup entirely.
Minutes 6 to 10: Create and Title the Clip
- Select the Clip button
- Adjust the timing slider to match your planned boundaries
- Watch the selected portion once through
- Publish with a descriptive title
"Last-second save wins the entire match" is a title. "OMG!!!" is a placeholder that will make the clip unsearchable and unshareable in any meaningful context. If you are working from a VOD rather than a live stream, confirm the file is still within its retention window before investing time in the clip. Twitch VOD storage limits vary by account type, and you can't recover a clip created from an expired or deleted VOD after the fact.
Minutes 10 to 14: Review the Four Things That Actually Break Clips
Most creators skip this step because the clip is already published and feels done. It is not done. Open it in Clips Manager and check four specific things:
- Whether a first-time viewer can understand the setup
- Whether the key reaction or gameplay moment is fully visible
- Whether the portrait crop keeps the important screen elements in frame
- Whether any captions present are accurate
The portrait crop check matters more than most people expect. Twitch's automatic vertical framing is optimized for a face cam, not for a HUD or a scoreboard. If the layout hides gameplay that the story depends on, use the Full or Stacked layout option and adjust before moving forward. Fixing this at minute 12 takes 90 seconds. Fixing it after publication takes a full recut.
Minutes 14 to 17: Choose One Sharing Route and Write One Hook
A clip that is playable on Twitch is not automatically ready for distribution.
- Check the destination platform's format requirements
- Music rights rules
- Attribution expectations before selecting a sharing route
Twitch's share menu options vary depending on clip ownership and channel settings, so the path is not always the same twice. Write one hook sentence tied to the story you identified in minutes three through six. Attribute the channel when appropriate. The hook is not a description of the clip. It is the reason a stranger should stop scrolling and watch it.
Standardizing Multi-Platform Export Pipelines
Most creators distribute clips by copying the Twitch URL and pasting it wherever feels convenient. That approach works until the link breaks, the clip expires, or the destination platform buries it for format non-compliance. Tools like Crayo address this by providing a structured path from raw clip to platform-ready short, handling format conversion and caption generation in the same step rather than treating them as separate manual tasks.
Minutes 17 to 20: Log It So the Next Session Starts Faster
A complete clipping and review workflow like this runs approximately 20 minutes when the source material is clean and accessible. That number holds only if you complete the final step: logging the clip.
- Record the source date
- Timestamp
- Hook sentence
- URL
- Destination platform
- Clip owner in a simple tracker
It takes three minutes and prevents the next session from starting with another blind search through hours of untagged footage.
Calibrating Content Performance via Retention Metrics
After publishing, compare views and completion rates against your previous clips, not as a vanity check but as a calibration tool.
- A clip that performs poorly on view count but holds 80 percent completion tells you the hook failed, not the content.
- A clip with high views and low completion tells you the opposite.
Together, those two data points are more useful than either one alone.
The Before and After in Plain Terms
Before this workflow: search an old VOD, click a reaction moment that felt funny, accept the default crop, publish without a real title, lose the link within a week.
After this workflow: confirm access, identify the complete story, publish with a descriptive title, inspect the crop and captions, choose one sharing route, log the result.
The time savings do not come from moving faster through each step. They come from never having to repeat a step because you skipped the one before it. The next question most creators face is not how to clip more efficiently, but what happens to those clips once they exist.
Turn Your Best Twitch Moments Into Short Videos With Crayo
Those clips you have now selected and approved are only useful if they reach an audience. The workflow covered earlier handles the Twitch side cleanly. What happens next, turning a 45-second clip into a captioned vertical video ready for Shorts or Reels, is where most creators rebuild the same editing setup from scratch every single time. That repeated rebuilding is the real time cost, not the clipping itself.
Optimizing Clips With Data-Driven Iteration
Crayo fits here, after you have chosen the moment, as the finishing layer where you trim the lead-in, adjust the portrait crop so the action stays visible, and edit captions before anything goes public. Open one authorized Twitch clip in Crayo's browser-based editor, review the full cut, and publish to one platform. Compare its watch-through rate against your last three similar clips. That single comparison tells you more about what your audience actually wants than any amount of pre-publish guessing. If you are ready to stop rebuilding the same editing setup and start finishing clips faster, Crayo is where that next step begins.