
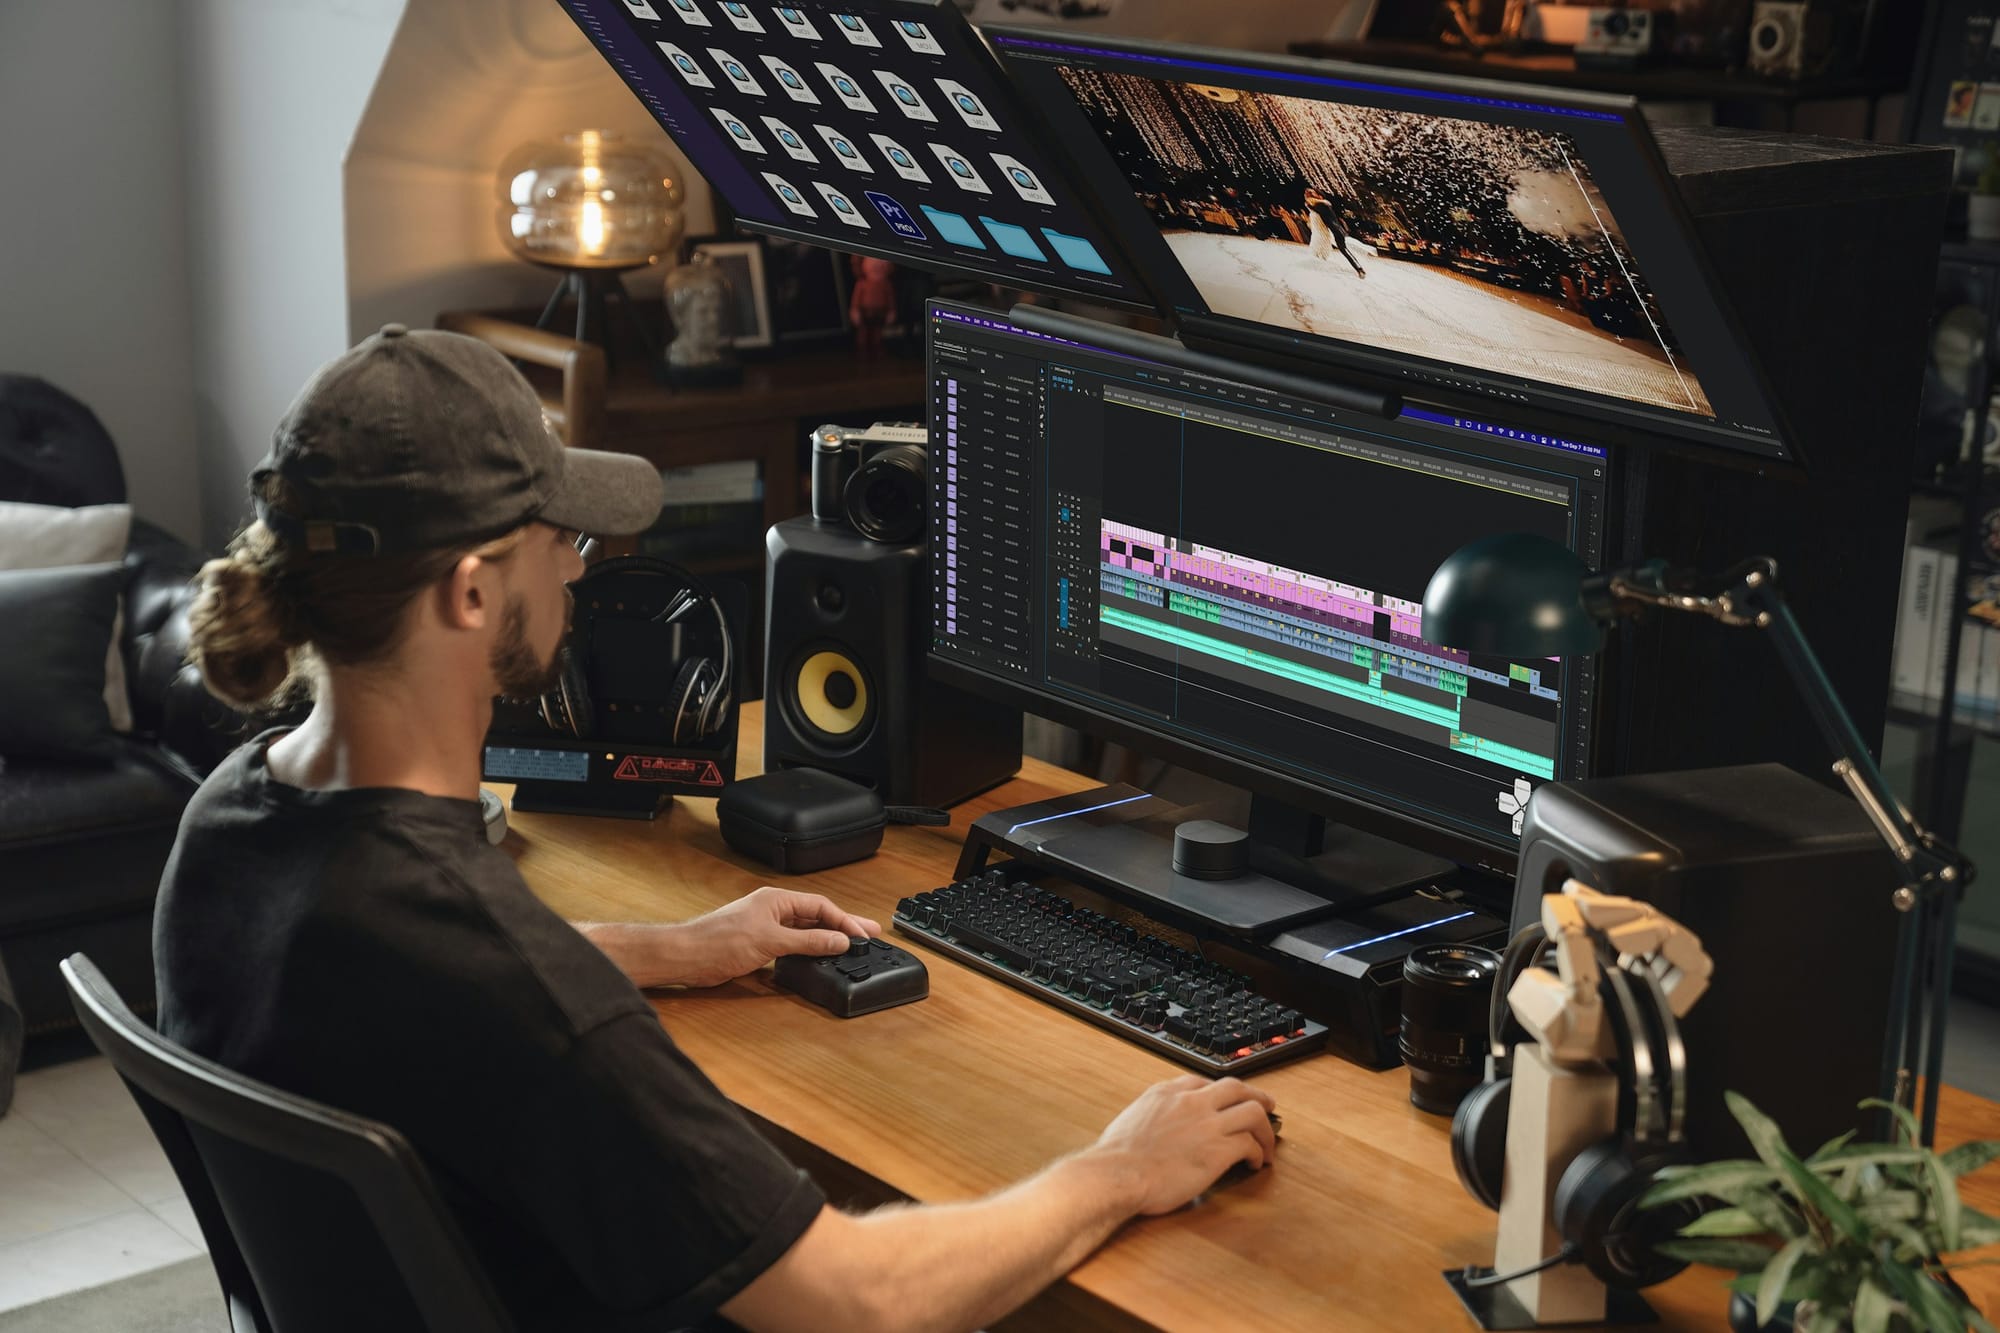
Overlays add depth and clarity to video content by merging text, icons, and motion graphics to highlight key moments and guide viewer attention. What is an overlay in video editing? This technique transforms static clips into dynamic visual stories, ensuring each element—from blend modes to chroma key—is carefully aligned with the narrative, making it one of the essential Types of video editing used in modern visual storytelling.
Precise overlay integration enhances engagement and shareability without distracting from the core message. Editors balance creativity with technical finesse to produce refined results that resonate with audiences. Crayo's clip creator tool brings AI-driven suggestions, precise trimming, and motion tracking together to streamline the editing process and boost video quality.
Summary
- Overlays are now standard practice in video production, with over 70% of editors using them to add context, captions, and visual cues that change a clip's meaning and boost shareability.
- Carefully placed overlays deliver measurable lift, with studies showing video overlays can increase viewer engagement by up to 50%.
- Design discipline matters, for example, keep on-screen copy readable for at least 1.5 seconds per short clause and test captions at half speed to confirm legibility.
- Manual placement does not scale, and adopting template-driven workflows can compress review cycles from days to hours while reducing alignment and timing errors.
- Mobile and interaction rules are concrete, plan touch targets larger than 48 pixels, and export at platform resolutions such as 1080p or higher to preserve crisp overlays after compression.
- Choose tools by the constraint you cannot compromise, balancing three core decisions about speed, motion control, and platform, and the article compares 8 tools to show typical tradeoffs between automation and granular control.
- This is where Crayo's clip creator tool fits in; it addresses this by centralizing overlay templates, auto-aligning assets to platform-safe areas, and suggesting captions and motion tracking, so teams can compress review cycles from days to hours.
What Is an Overlay in Video Editing
An overlay in video editing is a separate visual or interactive layer placed on top of your base footage. It adds information, guides attention, or lets viewers interact without changing the original clip.It can be anything like a color filter, a lower-third title, a second video playing in a corner, or an embedded hotspot that viewers can click. For those looking to enhance their content, our clip creator tool helps provide customizable overlays that can boost viewer engagement.
Several key factors are considered overlays in video editing.
What kinds of things are considered overlays?
1. Core definition and role.
An overlay is an element added to the original video track. This lets the original footage remain unchanged while adding context, branding, or features. Think of it as a layer that doesn't damage the original and can be changed separately from the main clip, enabling better versioning and updates.
2. Visual treatment overlays
Visual treatment overlays are graphic layers that change how a video looks or feels. This includes things like color filters, animated frames, logos, or vignette effects.These overlays help set the mood and focus without changing the original shot, allowing for quick changes or replacements of visual treatments.
3. Text, titles, and captions
Text, titles, and captions include lower-thirds, full-screen titles, subtitles, and on-screen annotations. All of these are overlays that provide clear information. These elements improve clarity and accessibility for viewers.When made as separate items, they can also be easily translated or changed for different platforms. This removes the need to re-render the main footage.
4. Picture-in-picture and secondary video
Picture-in-picture and secondary video refer to a technique in which one video appears within another. This method is often used for reaction cams, tutorial cutaways, or simultaneous viewpoints.If you're interested in creating engaging content, exploring our clip creator tool can enhance your storytelling.
Since the inset is an independent element, users can control its scale, position, timing, and opacity separately from the main camera feed.
5. Static images and graphics
Static images and graphics are essential to video production. Stills, diagrams, icons, and animated SVGs can be put above footage to show details or improve branding. They work especially well for instructional content, where a diagram or label can save time compared to verbal explanation.
6. Interactive overlays and hotspots.
Clickable buttons, links, timestamps, and interactive cards let viewers act inside the player. These layers transform watching into participation and can route traffic or trigger secondary content without altering the file beneath.
7. Functional overlays: progress markers, timers, and trackers
Functional overlays include progress markers, timers, and trackers. They add useful context by providing features such as live counters, chapter markers, and progress bars. These overlays are especially helpful in applications such as training, product demos, and livestreams, where temporal cues are crucial.
Why do editors add overlays, and what do they gain?
8. Make content reusable across formats.
First, they make content reusable across formats. By keeping overlays separate from the base footage, the same core video can be turned into social clips, long-form episodes, and localized versions by swapping or repositioning layers.
9. Add explicit context without re-editing.
Overlays also allow editors to add clear context without re-editing. They make it easy to add clarifying information, captions, or corrections after shooting. This removes the need for reshoots to explain changes or updates.
10. Increase engagement and action.
Overlays increase engagement and action. Because they can be interactive, overlays create measurable touch points within the video experience.This ability is one reason why over 70% of video editors use overlays to enhance their content, according to VSPAGY. This shows that overlays are not just a special addition; they have become a common practice.
11. Preserve future flexibility.
Designing them as replaceable assets makes videos ready for future changes.For example, a legal notice, product price, or sponsor logo can be updated without re-exporting the entire project, saving time and keeping consistency across versions.
What practical problems do overlays actually solve in production?
12. Consistency across many deliverables.
When teams launch a campaign across multiple channels, overlays help maintain brand consistency and messaging.This allows format-specific changes to occur only within the layer, reducing the need for manual edits and preventing version drift. To enhance this process, using a clip creator tool can streamline production and maintain brand integrity.
13. Error-reduction in assembly.
After creating reusable templates for multi-format campaigns, it was clear that editors often spend time fixing misaligned overlays or mismatched scales across scenes.This is similar to the frustration creators feel when putting together multi-page maps without guides. Without alignment controls and template rules, small mistakes can add up to hours of extra work.
How does the traditional way of working with overlays break down?
The familiar way teams use overlays often leads to problems. Most teams add overlays to the timeline by hand because this method is easy and doesn't require a new workflow. While this approach may be fine for one deliverable, it becomes problematic as variations increase. Placement errors, inconsistent timing, and duplicate fixes are starting to pop up, slowing the review process and increasing the amount of rework needed.Platforms like Crayo centralize overlay templates, apply global updates, and provide auto-alignment and version control. This means teams can update a single layer and apply consistent changes across all outputs.
What measurable effects do overlays have for viewers?
14. Measurable lift in attention and action.
Research shows a clear boost in attention and action. Carefully placed overlays can greatly change how viewers behave.This measurable effect is why VSPAGY, "Video overlays can increase viewer engagement by up to 50%." In simple terms, overlays are not just for decoration; they really enhance how viewers respond and interact when used thoughtfully.
What quick design note can save time?
A quick design note that saves time: when building overlay systems, include alignment guides, snap-to rules, and a naming convention for assets. This small practice helps prevent the assembly headaches editors face when aligning repeated elements across many frames. Adding these elements removes dozens of tiny, tiring decisions from each edit.
What consequential question should you consider about overlays?
That practical power hides an even more important question: how should you choose and use overlays effectively?
Related Reading
- Types of Video Editing
- Long Does It Take to Edit a YouTube Video
- How Long Does It Take to Edit a Music Video
- Is CPU or GPU More Important for Video Editing
- Can I Edit a YouTube Video After Posting
- Is Video Editing a Good Career
- Can You Edit Video in Photoshop
- Beginner’s Guide to Video Editing
- Video Editing Basics
Use Cases of Overlay in Video Editing

Overlays play practical roles in production, marketing, and learning. They help with many things, like narrative, brand, information, style, composition, corrections, creativity, and interactivity. Each situation has its own rules and trade-offs. Important use cases include actionable guidance that can be applied right away. With our clip creator tool, you can easily implement these strategies in your video projects.
1. Enhanced storytelling
When you need the viewer to understand a complex idea over time, use overlays that act like visual breadcrumbs. Use motion-timed annotations, progressive reveals, and micro-cutaways so one frame can carry layers of context without stopping the flow, and treat overlays as tools for pacing, not just decorations.Practically, time text and callouts to match the beats of sentences, keep the onscreen text readable for at least 1.5 seconds per short clause, and use gentle motion to draw attention rather than flashing elements that compete with the actor.
2. Branding and identity
The common problem is inconsistent logos, fonts, and colors across cuts, which muddies recognition and weakens campaigns.Build a minimal overlay system: a lightweight vector logo, a single brand-color overlay with adjustable opacity, and one title template for each format. Store these as reusable assets so updates can be applied, and choose placement zones that respect platform-safe areas so the brand survives cropping without dominating the composition.
According to VSPAGY, "Over 70% of video editors use overlays to enhance their content." That prevalence shows overlays are now part of standard production hygiene, not an optional flourish.
3. Information and annotations
Information and annotations. When audio doesn't workor viewers skim, overlays must clearly and easily convey the message.Use short captions, numbered callouts, and timecode-linked labels that match the transcript. It's important to test them at 50 percent playback speed to ensure they are easy to read.
Also, prepare for localization by keeping text in separate overlay files so translations do not require re-exports.Pick high-contrast color pairs that meet readability standards, and avoid placing text over busy motion unless you add a semi-opaque backing.
4. Visual effects and stylistic treatment
Visual effects and stylistic treatment overlays can help achieve a consistent look across scenes without harmful edits. To do this, apply global adjustment overlays, like LUT layers, grain plates, and vignette sheets, which you can easily turn on and off. Using blending modes and lower opacity helps retain natural skin tones while aligning color temperatureacross different cameras.On the technical side, it is important to keep these overlays at high bit depth to avoid banding. Rendering them as GPU-accelerated passes ensures that changes happen quickly.
5. Simultaneous display of multiple elements
Showing multiple sources at once is a design choice aimed at attention, not just fitting in more content. You can use techniques like grids, picture-in-picture, or split-screen overlays to compare before-and-after, show the instructor and the demonstration simultaneously, or present data alongside footage.Think like a stage manager, putting the main action in the biggest frame and secondary elements in safe areas. Also, make responsive presets so the layout automatically switches from 16:9 to vertical formats without having to manually move things around.
6. Correction and enhancement
Correction and enhancement. When a shot has a specific problem, it is often better to cover it with an overlay rather than regrade the whole clip. You can track a corrective plate to a moving subject and add shadow fills or highlight suppression as different layers, leaving the original clips unchanged.This method makes it easy to go back or reuse the clips later. It reduces the need for reshoots and keeps color pipelines steady. However, it might increase render costs for tracked overlays, so planning proxies during editing is important for smooth playback.
How can teams effectively manage overlay placement?
Most teams handle overlay placement manually, which is easy and doesn’t require new tools. However, as projects grow and the number of deliverables increases, this habit leads to fragmented templates, alignment errors, and the need for repeated fixes across versions.Tools like the clip creator tool help bring together overlay templates, make global updates, and automatically align assets. Because of this, teams can shorten review times from days to hours while ensuring every version remains consistent.
7. Creative expression
When aiming for a trademark visual voice, use overlays as modular style elements instead of one-off effects. Assemble a kit of particles, animated masks, and typographic motion that editors can combine, test, and swap for each campaign.A/B test a stylistic overlay across a group to measure retention differences. Treat each stylistic overlay as a hypothesis to validate, while keeping a minimal rule set. This approach ensures the creative remains bold without becoming cluttered.
8. Interactive elements and calls to action
Interactive elements and calls to action are very important for driving behavior. Overlays offer direct actions, such as clickable hotspots, time-limited CTAs, and chapter markers, turning passive viewing into measurable steps.
To make interactions more effective, they should focus on one main idea at a time. Think about putting primary CTAs in the lower third of the safe area after the story's payoff. It's also important to use event tracking on overlays to link clicks with views.
For mobile interfaces, design hot zones larger than 48 pixels and avoid placing multiple interactive elements on top of each other simultaneously, as this can split attention and reduce conversions.
What is the significance of overlays in video editing?
Think of overlays like lighting on a stage; they do not change the actor, but they help direct what the audience sees. When a scene is overlit, details can get lost. Overlays should be used to shape focus, not to create noise.
This choice between guiding attention and adding clutter is the fulcrum every editor faces.
The harder part is making those overlay decisions repeatable and fast enough for real campaigns. This will be the focus of the next steps.
How to Add an Overlay Smoothly in Videos in 10 Steps
Smooth overlays come from treating the overlay as a separate, planned element: import the clip, place the asset above the footage, and then adjust scale, timing, style, and motion until it feels like part of the scene. Work with predictable spacing, short lengths, and mobile-friendly placement so the overlay helps the story without taking attention away. For those looking to enhance their editing capabilities, our clip creator tool can simplify adding overlays and effects.
1. Load your footage into the project
Open your editor, bring the primary video file into the media bin, and drop it onto the main timeline (track 1). Keep a clean project structure so you can find the base clip fast when you swap variants or revisit the edit.
2. Decide what role the overlay will play
Choose whether the overlay is labeling, calling attention, branding, or motion embellishment. Being explicit about the overlay’s purpose before you place it prevents adding elements that compete with the shot.
3. Put the overlay on its own track
Import the overlay asset and place it on a higher video track above the main clip. That separation means you can adjust or replace the overlay without affecting the base footage, making iteration faster and safer.
4. Size and place the overlay thoughtfully
Select the overlay layer, then scale and drag it in the program monitor so it avoids faces and key action. Think of the overlay like a decal on a moving painting: if it’s too large or poorly positioned, it hides what matters.
5. Time the overlay precisely
Trim and nudge the overlay on the timeline so it appears and disappears at the exact frame you need, synced to a spoken word, a sound hit, or an on-screen action. This is where most edits fail; abrupt or off-beat overlays break flow, so err on precise in-and-out points.
6. Make the overlay readable and on-brand
For text, pick a legible typeface, high-contrast colors, and subtle outlines or backplates. For graphics, use clean vectors, match brand hues, and lower opacity when the image competes with the shot. Styling should clarify, not complicate.
7. Add restrained motion
Apply simple entrances, such as soft fades, quick slides, or a small-scale pop. Use keyframes for subtle position or size shifts that follow the subject. Keep motion short and natural so the eye moves to the content, not to the effect itself.
8. Respect platform and caption safe areas
Keep critical overlays away from the bottom and sides where captions, UI, or cropping may cover them. Test a vertical crop and a 16:9 crop to confirm nothing is lost on phones or social players.
9. Review on mobile and with sound off
Play the sequence on a phone and mute the audio to check legibility and visual balance. If an overlay needs squinting or the scene feels crowded, remove or simplify it.
10. Export with the right frame size and quality
Choose the correct aspect ratio for the destination and export at full resolution, typically 1080p or higher for most platforms. Preserve quality so overlays remain crisp and readable after compression.
What finishing tips can improve overlays?
- Use one clear overlay per scene when possible; place secondary elements in fixed areas to reduce visual conflict.
- Prefer PNGs or vector assets for sharp edges; avoid low-resolution JPGs that look blurry when scaled.
- Keep a small kit of approved fonts, colors, and animation presets to ensure your overlays remain consistent across videos.
- Avoid sudden, jarring overlays by softening opacity or using fade transitions to blend assets into the footage.
- Preview on multiple devices before publishing to catch any cropping or UI collisions.
What challenges might you face with overlays?
When timing and placement become pain points, editors often face big challenges. This issue shows up in short edits and tutorials: editors spend too much time adjusting overlays because timing and position need very accurate adjustments.This makes simple edits feel slow and can leave creators feeling worn out. A single misplaced label might need many rounds of review.
Most teams still use manual placement because it is familiar and doesn't need a new setup. However, as projects increase, this habit leads to template fragmentation and creates many small alignment fixes, costing hours in review and rework.Platforms like Crayo reduce this issue by bringing overlay templates together, automatically aligning assets to safe zones, and providing versioned templates. As a result, teams often find they can shorten review cycles from days to hours while keeping consistency across versions.
What should you do before finalizing the video?
After adjusting the placement, timing, and style, test the video one last time at full speed on the device. Then, export the final cut.
Something unexpected is coming: the right tool does more than speed up the work; it shows which parts of your workflow have been wasting time all along.
Related Reading
- Video Editing Workflow Checklist
- PC Specs for Video Editing
- How To Start Editing Videos
- How To Practice Video Editing
- Mac Vs Pc For Video Editing
- How To Make A Video Editing Portfolio
- Video Editing Tips And Tricks
- How To Make Money Video Editing
- Best Free Video Editing Apps For Android
- How To Organize Video Files For Editing
- How To Edit Video In Google Drive
- Creative Video Editing Techniques
8 Best Tools to Add Overlays to Videos
These eight tools cover all the different needs for overlays. They range from hands-off automation for short posts to frame-by-frame VFX control for longer projects. You can pick a tool based on how often you use it, the platform, and the level of customization you want. Below is a list of each tool, with a clear description, practical strengths, and the trade-offs you should expect.
1. Crayo
Crayo earns its place when speed and scale matter. It automates captioning, text placement, background clips, music beds, and on-screen effects in a single pass, so you can move from a brief prompt to a finished, platform-ready short without slaving over frame-by-frame placement. When teams push to daily reels or Shorts, the savings compound: what used to be repetitive, manual timing becomes a template-driven flow.
Pros
- True automation for short-form overlays, reducing manual alignment and caption timing
- One-step workflow that outputs multiple platform formats
- Templates tuned for silent playback and attention hooks
2. PowerDirector 365
PowerDirector balances approachability with deep capability. You get straightforward picture-in-picture, reliable chroma-key, sky replacement, particle controls, and a mask designer that lets you animate cutouts without a steep learning curve. It renders quickly, which keeps iteration tight during busy edit sessions.
Pros
- Beginner-friendly interface with a large effect library
- Fast exports and real-time previews
- Good set of practical overlays for social and broadcast
Cons
- Some advanced features are missing or limited on Mac systems
- UI can feel crowded when you push into complex composites
3. HitFilm Pro

HitFilm Pro is built for compositors who want particles and procedural effects without leaving the editor. Its particle engine and compositing controls let you craft everything from subtle dust to complex holographic overlays and animated emitters. If your overlays must behave like physical systems, this is the place to build them.
Pros
- Expansive VFX toolkit, including advanced particle systems
- Strong compositing and layered export options
Cons
- The interface feels dated and can slow discovery
- Requires a powerful GPU and CPU to avoid playback stalls
4. Adobe Premiere Pro
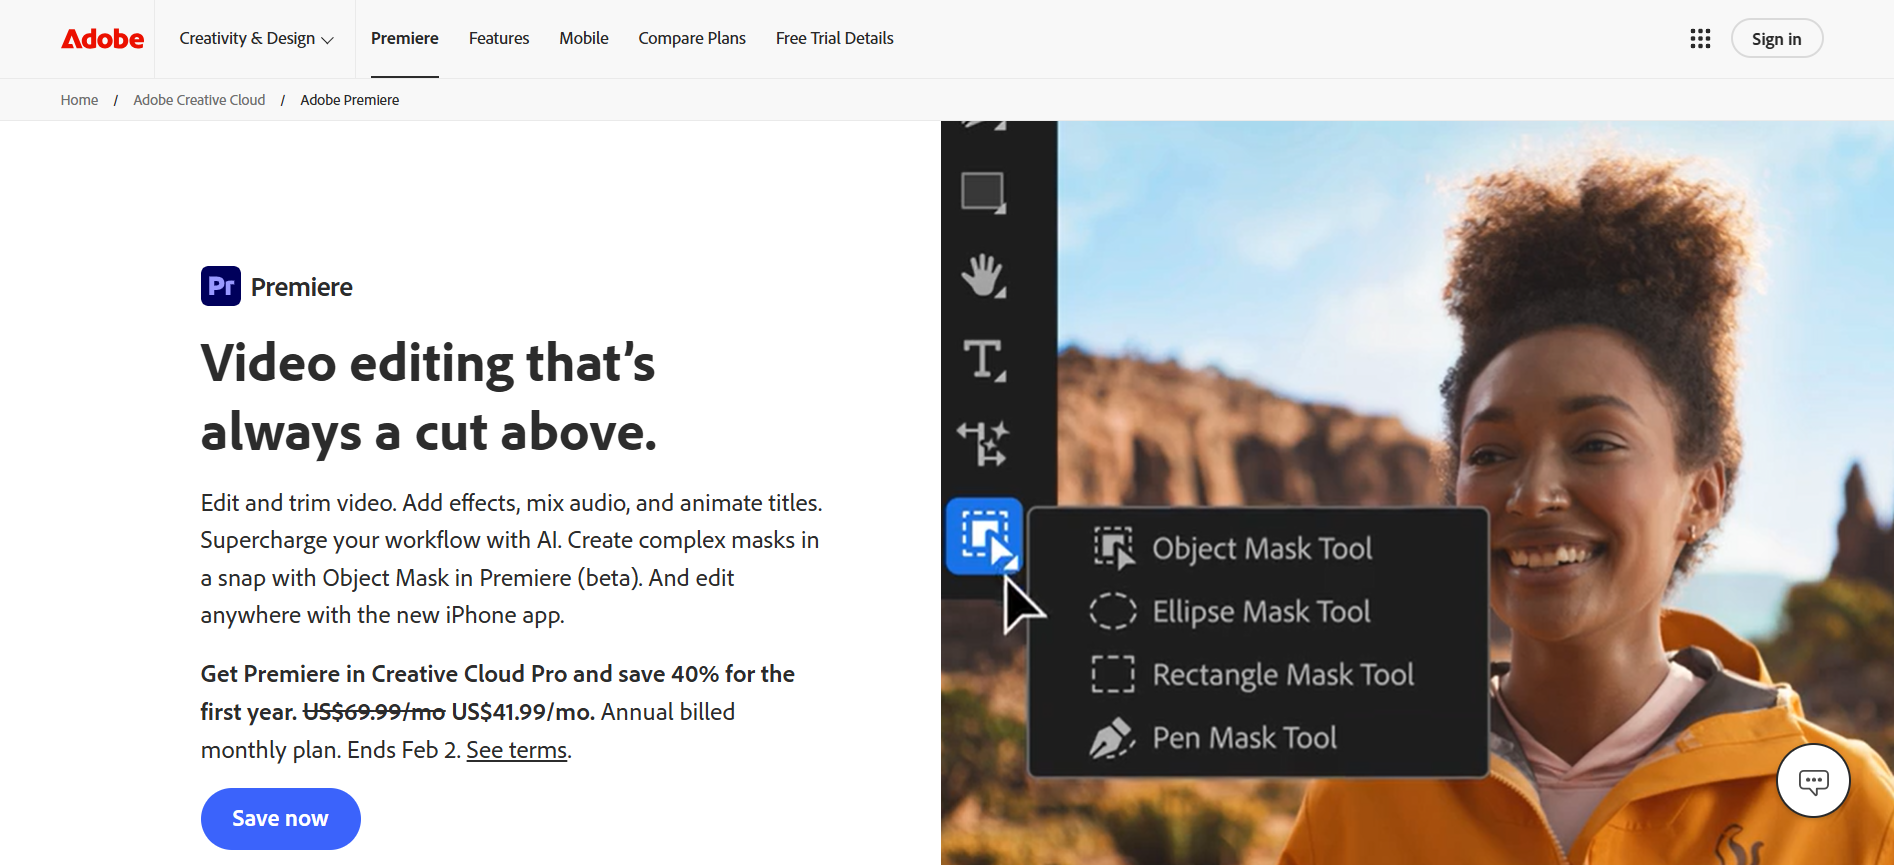
Premiere Pro is the workhorse for deliverables that need precision editing plus flexible overlays. It gives you full control over Opacity, Blend Modes, and multi-track compositing while fitting into an Adobe pipeline for motion, graphics, and audio finishing. For editors producing long-form and short-form variants, its asset linking and sequence nesting keep overlays manageable.
Pros
- Professional timeline control, suitable for 8K projects
- Tight integration with After Effects, Photoshop, and Audition
Cons
- Steep learning curve for new users who only need simple overlays
- Stock assets and some plug-ins carry extra costs
5. Adobe After Effects
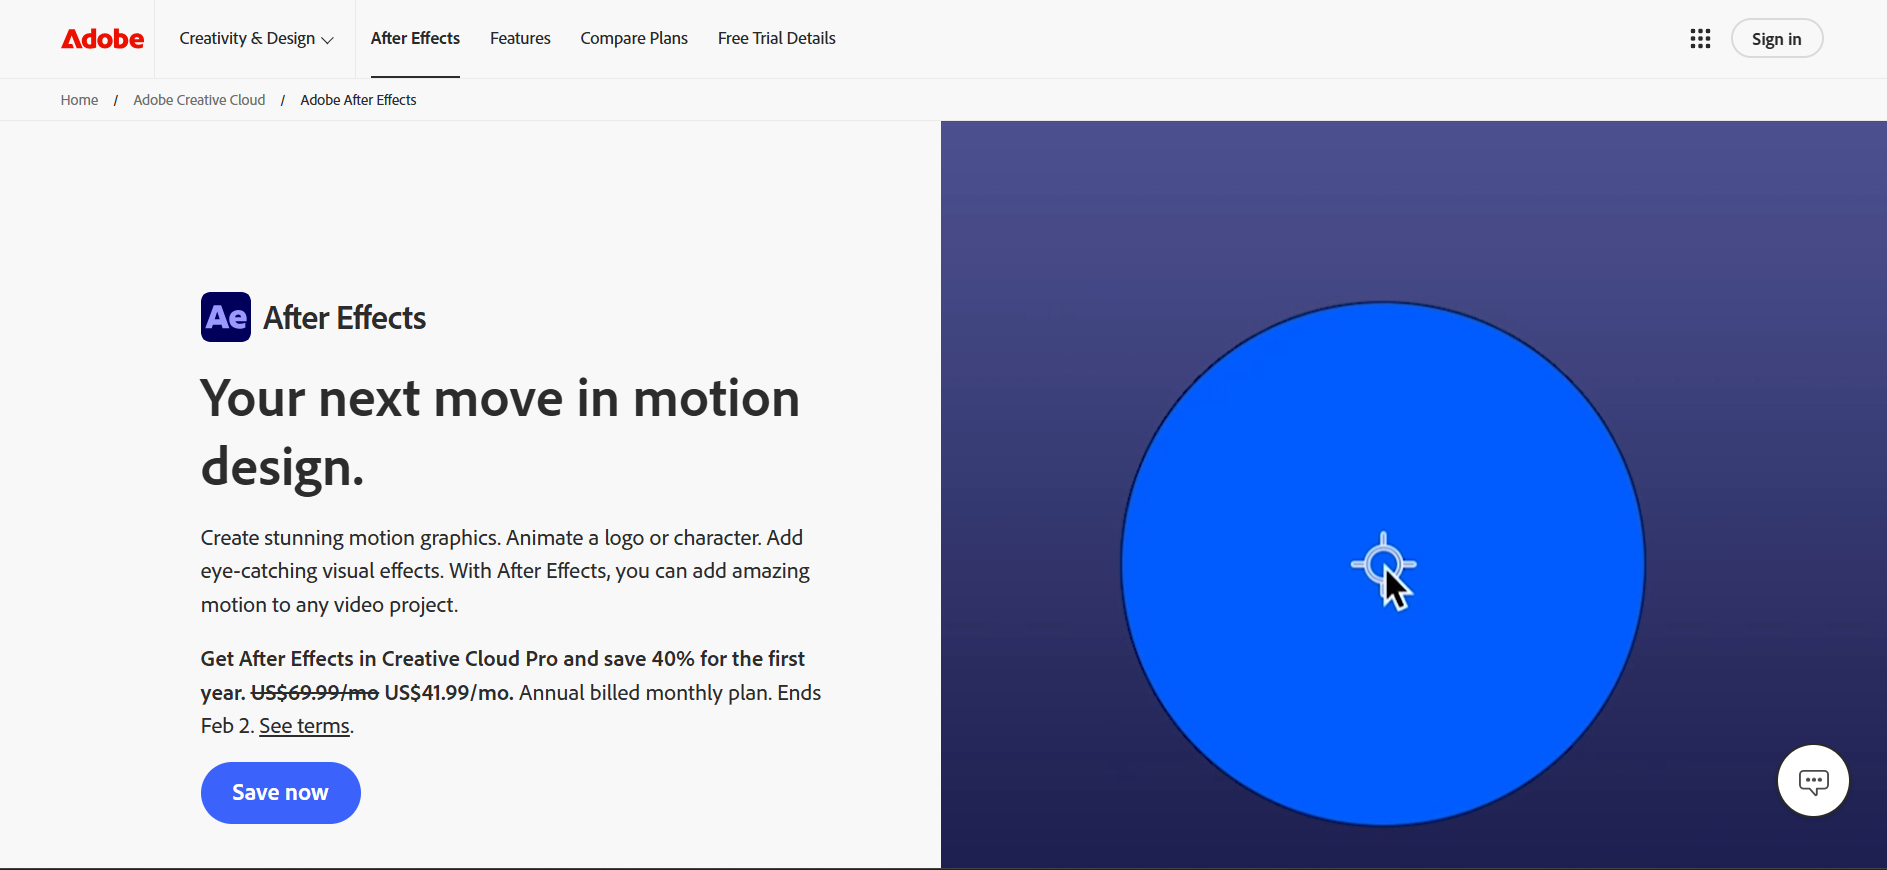
After Effects is the atelier for animated overlays. Use it when overlays must move with intent, when you need keyframed motion graphics, rotoscoping, or frame-accurate tracking. You can build reusable animated templates that export into Premiere, but don’t expect it to replace a dedicated NLE for assembly work. For voice and avatar experiments, remember that many localization and avatar services scale globally; for example, Synthesia supports over 120 languages.
Pros
- Industry‑grade motion design and compositing
- High fidelity rendering and multiframe acceleration
Cons
- Costly and has a steep learning curve
- Not designed as a standalone timeline editor for long assemblies
Most teams place overlays manually because it feels immediate and familiar. That approach works at first, but as content variants grow, manual placement fragments into dozens of tiny, repetitive fixes that delay launches and create review chaos. Teams find that platforms which centralize templates, auto-align safe zones, and propagate updates across variants compress review cycles from days to hours, restoring time for iteration and strategy.)
6. Final Cut Pro
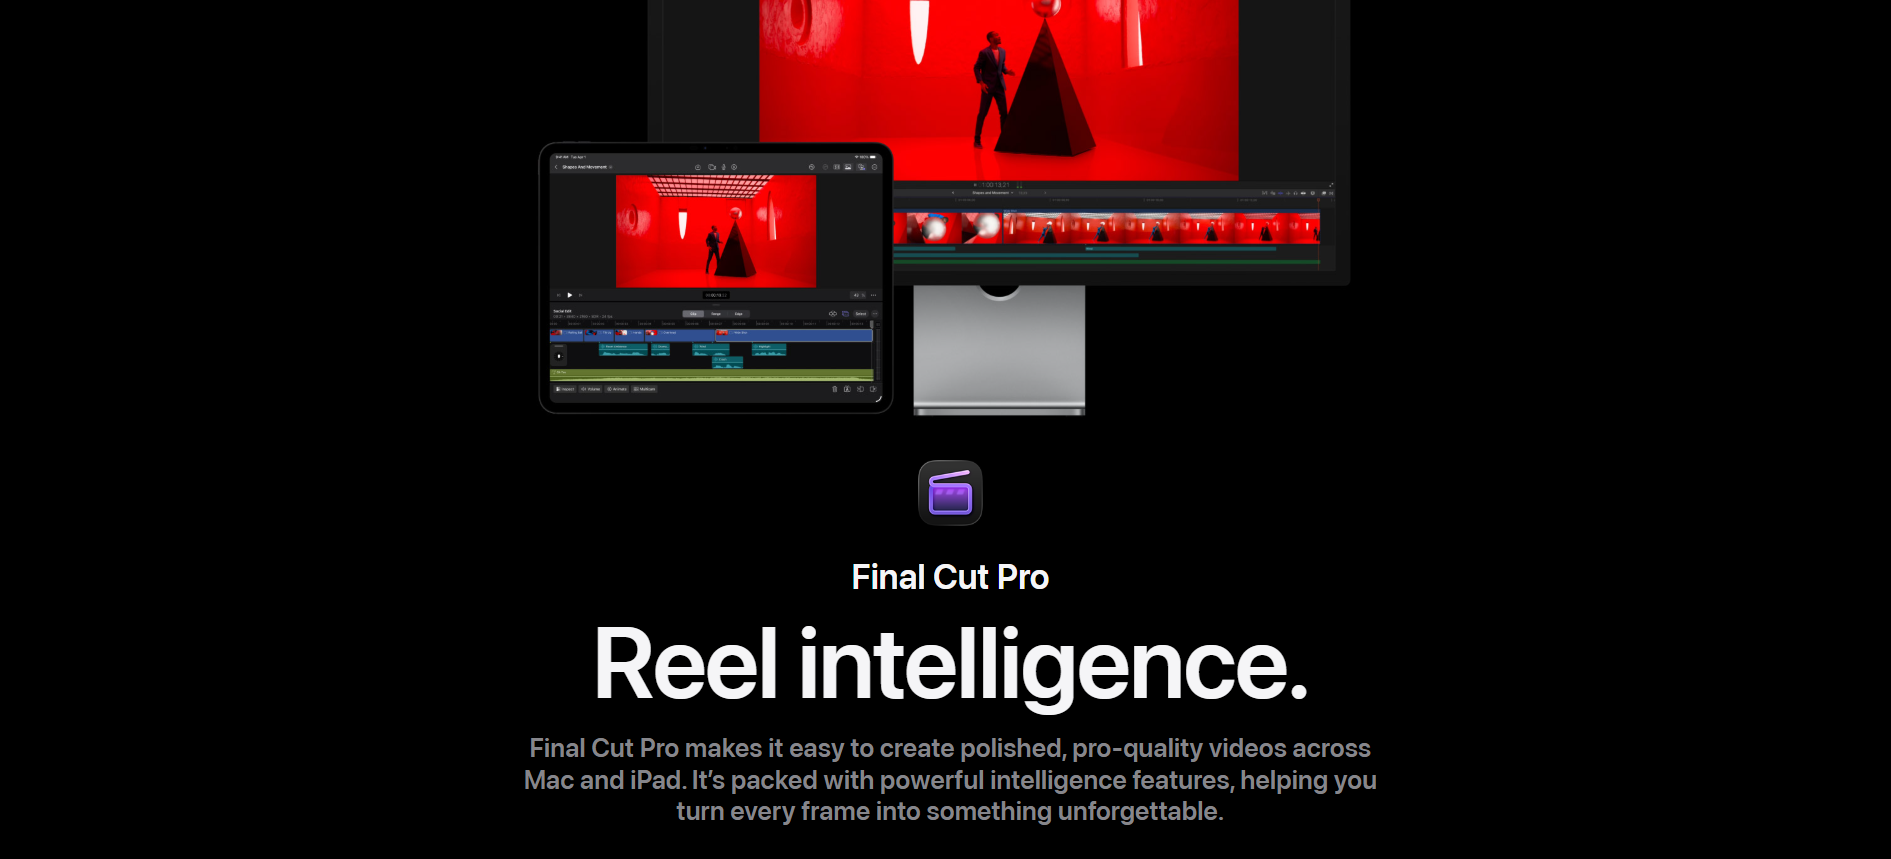
Final Cut Pro rewards Mac-centric shops with optimized performance and tight integration with the Apple ecosystem. Its magnetic timeline and native Apple Silicon acceleration make large projects snappy, and the PiP and transform tools let you craft clean overlays once you get used to its workflow. Expect to lean on third-party overlay packs for stylistic elements.
Pros
- Exceptional performance and media management on Mac
- Robust PiP controls and smooth playback on Apple hardware
Cons
- A different workflow that takes time to master if you come from track-based NLEs
- Relies on add-on effects for many stylized overlays
7. iMovie
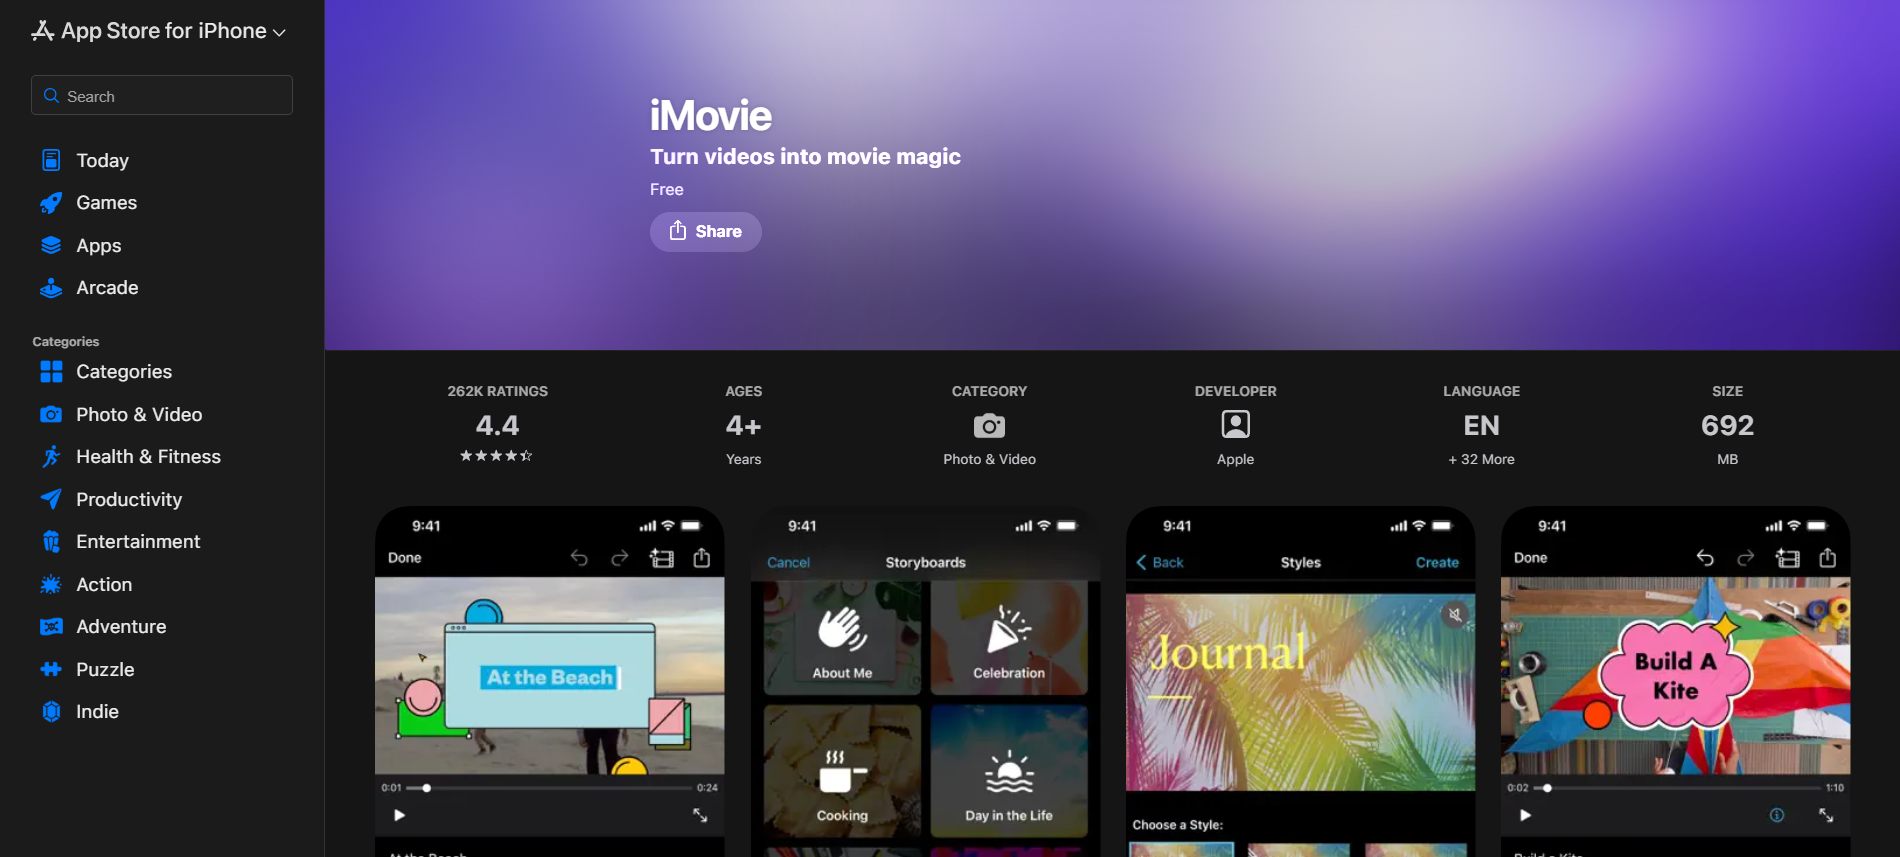
iMovie is the pragmatic starter tool when you need simple overlay work without a budget. It handles picture-in-picture, split screens, and basic green-screen compositing, and it ships free on macOS devices so you can teach basics or prototype quickly. For creators testing format or pacing ideas, it keeps the friction near zero.
Pros
- Free and easy to learn, with ready-made themes and templates
- Good for quick prototypes and beginner projects
Cons
- Limited to basic overlay types, no motion tracking or complex compositing
- Not suitable for professional multi-track workflows
8. Blender
Blender gives you pro-level compositing and particle systems at zero license cost. Use it when overlay effects cross into 3D, when you need camera and object tracking blended with simulated particles, or when every element must be authored from scratch. It is powerful, but the interface and workflow demand discipline and time to master.
Pros
- Free, open-source, and deeply customizable for effects-heavy overlays
- Full suite for animation, tracking, and procedural particles
Cons
- Very steep learning curve for editors focused on cuts and captions
- Rendering complex overlays can be slow without optimized hardware
Practical pairing tip: if localization and captions are a hard requirement for your output cadence, pair your editor with AI caption services to scale languages quickly. For example, HeyGen offers AI captions in 175+ languages.
Which tool you pick depends on three clear constraints: how fast you must publish, whether you need pixel‑perfect motion control, and which platform your team uses. Choose an editor that aligns with the constraint you cannot compromise, and accept tradeoffs in the other two.
The part that surprises almost every team is how little time you actually gain from switching tools until you change the workflow that creates overlays. Once that hidden step breaks, everything else becomes faster.
That apparent solution feels tidy, but the thing that actually eats entire afternoons is still waiting.
Stop Wasting Hours Manually Adding Overlays to Shorts
Slow edits, messy text placement, and poorly timed captions can steal views and waste time. Creators deserve a faster way to gain attention. Try Crayo’s free clip creator to automatically produce clean, high-retention overlays, captions, effects, backgrounds, and music for TikTok, Reels, and Shorts in seconds, no account required; click Try Now on our homepage. clip creator tool
Related Reading
- Best Drone Video Editing Software
- Best Video Editing Software For Music Videos
- Best Video Editing Software For Sports Highlights
- Best Video Editing Software For Content Creators
- Best Video Editing App For Pc
- Best Paid Video Editing Software
- Best App for Video Editing on iPad
- Best Songs For Video Editing
- Best Video Editing Software For Vlogging
- Autopod Alternative