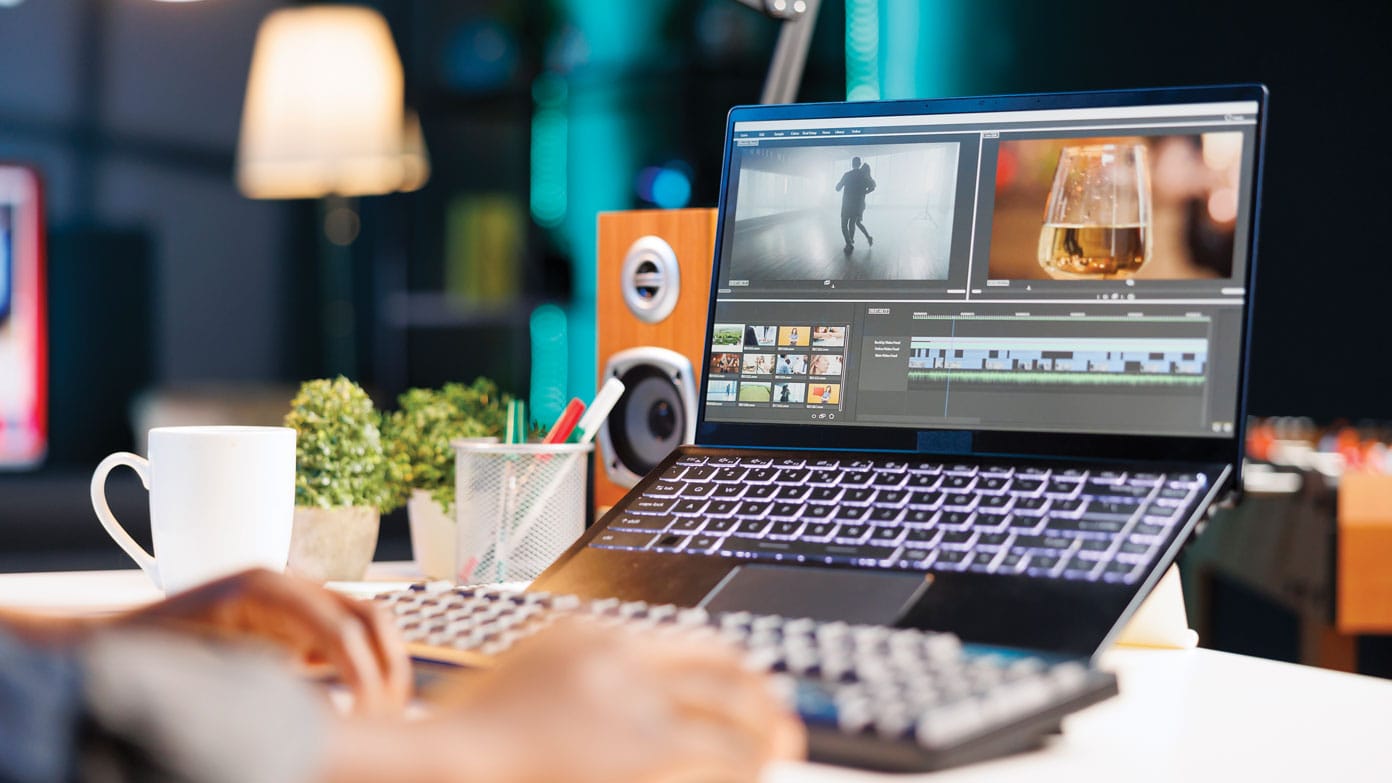
You've shot hours of footage on your phone, but now it sits there collecting digital dust because you're not sure where to start. Understanding the types of video editing is essential for any beginner who wants to transform raw clips into content that actually connects with an audience. This guide breaks down the fundamentals of video editing software, from basic cuts and transitions to color grading and audio mixing, giving you a clear path to creating polished videos that stand out.
The good news is you don't need years of experience or expensive software to start making engaging content today. Crayo AI's clip creator tool helps beginners bypass the steep learning curve by automating tedious editing tasks, letting you generate scroll-stopping reels and TikToks in minutes instead of hours. Whether you're working with templates, experimenting with different editing techniques, or just trying to figure out the timeline, having smart tools that understand what works on social media platforms can turn your raw footage into shareable videos faster than traditional editing methods ever could.
Summary
- Beginners reach practical competence quickly, with learners gaining measurable confidence in just 20 to 40 hours of focused practice, according to a 2023 Skillshare study.
- Attention is decided almost immediately: over 70 percent of viewers decide whether to keep watching within the first 5 seconds, making strong opening hooks essential.
- Video outperforms other formats for engagement, with 72 percent of marketers reporting that video boosts engagement more than any other content type.
- Shorter videos dramatically improve completion rates: 90 percent of viewers watch a video to the end when it is under 2 minutes, so length discipline matters more than production polish.
- Pacing and sound require explicit rules, for example, high-energy clips benefit from 2 to 4 second cuts, while explanatory pieces work better at 6 to 10 seconds, and audio mixes should aim for dialogue peaking around negative six decibels with music nearer negative twelve.
- Production priorities should favor volume and polish where it counts, given that professional editors spend about 30 percent of their time on color grading, and video content has been shown to generate up to 1200 percent more shares than text and images combined.
- This is where Crayo AI's clip creator tool fits in: it automates clip selection, transitions, captioning, and platform formatting, so creators can publish more frequently without wrestling with timelines.
Is Video Editing Easy for Beginners
Video editing is easier for beginners now than it's ever been. You don't need film school training or expensive software to start making polished videos. Free tools like DaVinci Resolve, CapCut, and iMovie give you professional-grade capabilities right away, and most people can learn the basics (trimming, transitions, audio syncing) in just a few days of focused practice.
The myth that editing requires technical genius keeps too many creators from starting. I've watched people delay for months, convinced they need to master every effect and keyboard shortcut before publishing anything. That perfectionism costs them momentum. The truth is, editing becomes intuitive once you understand a few core principles: pacing, visual flow, and how to guide attention. Everything else is just iteration.
According to YouTube's 2025 Creator Insider report, over 70 percent of viewers decide whether to keep watching within 5 seconds. That statistic changes how you think about editing. You're not crafting a short film. You're designing a hook, a rhythm, and a payoff that keeps someone from scrolling. Beginners who grasp this can outperform technically skilled editors who don't understand audience psychology.
Modern Tools Remove Technical Barriers
Most editing software today anticipates what you're trying to do. Drag a clip onto the timeline, and it snaps into place. Trim the ends by pulling handles. Add music from a library that auto-syncs to your video length. The interface feels less like engineering and more like arranging puzzle pieces.
CapCut and iMovie were built for people who've never opened editing software before. They offer templates, automatic captions, and one-click effects that previously required manual keyframing. DaVinci Resolve gives you Hollywood-level color grading and audio mixing without charging a subscription. These aren't compromised "beginner" versions. They're legitimate tools that professionals use for quick edits and passion projects.
Visual learning accelerates the process. Waveform editing lets you see where someone pauses or stumbles in their speech, so you can cut dead air without rewatching the clip ten times. Text-based editing (where you edit a transcript and the software trims the video to match) turns a two-hour task into a fifteen-minute one. You're not wrestling with the software. You're shaping the story.
Quick Wins Build Confidence Faster Than Theory
A 2023 Skillshare study found that learners gain confidence in video editing within 20 to 40 hours of practice. That's less than a month of casual weekend work. You don't need a semester-long course. You need to edit something, publish it, and notice what worked.
The first video you finish will feel clunky. The pacing might drag, the cuts might feel abrupt, and you'll spot a dozen things you'd fix if you started over. That discomfort is progress. Every creator I know who built an audience started with work they now find embarrassing. Peter McKinnon, who teaches millions of people about filmmaking, began with basic tools and rough cuts. His early videos weren't technically flawless. They were energetic, clear, and consistent. He built his audience over one to two years by showing up and improving in public.
Most beginners overestimate how much technique matters and underestimate how much clarity does. A simple video with a strong hook and tight pacing will always outperform a technically complex one that loses the viewer's attention. You learn that by making things, not by watching tutorials forever.
Why Beginners Can Make Impactful Content Immediately
Research shows that 72% of marketers report video boosts engagement more than any other content format. That means even rough, beginner-level videos outperform polished blog posts or static images in capturing attention. You don't have to be great to be effective. You just have to be clear, quick, and consistent.
The demand for video content has outpaced the supply of skilled editors. Brands, influencers, and small businesses need more videos than they can produce in-house, creating opportunities for beginners who can deliver decent work quickly. You're not competing with Spielberg. You're competing with people who haven't started yet.
The traditional editing workflow (import footage, organize clips, manually trim and arrange, add effects, export, and hope it works) breaks down when you're trying to publish daily or even weekly. That's where most beginners run into friction. You spend more time managing files and troubleshooting exports than actually creating.
Crayo AI helps beginners skip past the tedious setup and file management by automating clip selection, transitions, and formatting. Instead of wrestling with timelines, you can focus on finding the moments worth sharing and letting the tool handle the assembly. That shift (from technician to curator) makes editing feel less like a chore and more like storytelling.
Where Beginners Actually Struggle
The learning curve isn't in the software. It's developing taste. Knowing when a cut feels too fast, when a transition feels cheesy, or when the music overwhelms the dialogue. That only comes from repetition and honest feedback.
Most beginners also underestimate how long rendering and exporting take. You finish editing, hit export, and then wait twenty minutes only to realize the audio is out of sync or the resolution is wrong. Those small failures teach you more than any tutorial ever could. You learn to check your settings before exporting, to save multiple versions, and to test your video on the platform you're publishing to before announcing it.
Another common mistake is over-editing. Beginners discover effects and transitions, and use them all at once. The video becomes visually noisy. Restraint is harder to learn than technique. The best edits are invisible. The viewer doesn't notice the cuts because they're absorbed in the content.
But knowing where people struggle doesn't mean editing has to feel overwhelming. Thousands of creators have gone from zero experience to monetized channels in less than a year. The difference wasn't talent. It was a willingness to publish imperfect work and improve with each video.
But learning the mechanics is only half the challenge. Knowing what to learn first and how to practice efficiently changes everything.
Related Reading
- Types of Video Editing
- Long Does It Take to Edit a YouTube Video
- How Long Does It Take to Edit a Music Video
- What Is an Overlay in Video Editing
- Is CPU or GPU More Important for Video Editing
- Can I Edit a YouTube Video After Posting
- Is Video Editing a Good Career
- Can You Edit Video in Photoshop
- Video Editing Basics
How to Learn Video Editing as a Beginner
Learning video editing means choosing a tool, practicing with real projects, and refining your instincts through repetition. You don't need a curriculum or certification. You need a workflow that lets you make something today, notice what feels awkward, and improve tomorrow. The path forward isn't about mastering every feature. It's about building confidence through small, finished projects that teach you what matters.
The mistake most beginners make is waiting until they feel ready. They watch hours of tutorials, bookmark dozens of articles, and convince themselves they need to understand color grading before they can trim a single clip. That delay costs momentum. Editing becomes real when you open the software, import footage, and start cutting. Everything else is preparation that postpones the actual learning.
Choose Your First Editing Software
Your first tool should match your workflow, not your ambitions. If you're editing on your phone between meetings, CapCut makes sense. If you're creating YouTube videos on a laptop, DaVinci Resolve offers professional-grade capabilities without a subscription. If you're on a Mac and want something intuitive, iMovie removes friction. The software matters less than whether it lets you finish projects without fighting the interface.
Crayo AI works differently. Instead of manually arranging clips on a timeline, you select moments worth sharing and let the tool handle formatting, transitions, and captioning. That shift (from assembling to curating) removes the tedious setup that stops most beginners from publishing consistently. You focus on finding the hook, not wrestling with export settings.
DaVinci Resolve offers Hollywood-level color grading and audio mixing for free. It's not a stripped-down beginner version. It's the same software used on major films, available without cost. The interface feels dense at first, but once you understand nodes and timelines, you have access to tools that used to require expensive subscriptions.
CapCut was built for mobile-first creators who need to edit quickly and publish to TikTok or Instagram within minutes. It includes templates, automatic captions, and one-click effects that previously required manual keyframing. The speed matters when you're trying to publish daily or respond to trends before they fade.
HitFilm Express bridges the gap between simple editing and visual effects. If you want to experiment with motion graphics, green screen compositing, or animated text without learning After Effects, it gives you enough power to create polished intros and transitions. The learning curve is steeper than iMovie, but shallower than professional VFX software.
Start with one tool and resist the urge to switch every time you hit a limitation. Every platform has quirks. Learning to work within constraints teaches you more than constantly chasing the "perfect" software.
Learn the Basics
Core skills matter more than advanced techniques. Cutting and trimming clips teaches you pacing. Adding transitions shows you how to guide attention without jarring the viewer. Working with audio (music, voiceovers, ambient sound) reveals how much emotional weight sound carries. Adding text and captions makes your content accessible and keeps people watching even when they're scrolling without sound. Exporting in the right format ensures your video actually plays on the platform you're targeting.
According to Nielsen Norman Group, modern audiences visually re-scan screens every 2.8 seconds. That statistic changes how you think about visual rhythm. You're not just trimming dead air. You're designing moments that reset attention and keep people engaged through micro-hooks (text overlays, cuts, sound cues) that happen faster than conscious thought.
YouTube channels like Peter McKinnon, Justin Brown (Primal Video), and Think Media teach these fundamentals without overwhelming you with jargon. They show you what buttons to press, but more importantly, they explain why certain cuts feel smooth and others feel abrupt. That intuition (knowing when something feels off) develops faster when you watch someone else make decisions in real time.
Practice with Real Projects
Theory collapses under the weight of a real deadline. Make a one to two-minute video about something you care about. A product review, a quick tutorial, a recap of your weekend. The topic matters less than the act of finishing. You'll discover which parts of the process feel intuitive and which parts make you want to quit.
Experiment with different cuts, transitions, and music. Try a version with fast cuts and energetic music, then try the same footage with slower pacing and ambient sound. Notice how the emotional tone shifts. That comparison teaches you more than any tutorial about the relationship between rhythm and feeling.
Recreate simple YouTube or TikTok videos to understand editing patterns. Pick a video you admire, watch it multiple times, and try to match the pacing, transitions, and text placement. You're not copying the content. You're reverse-engineering the structure. That exercise reveals techniques you wouldn't notice as a passive viewer.
Learn Shortcuts and Workflow Tips
Keyboard shortcuts turn editing from a slow, deliberate process into something that feels fluid. Learning to cut (C), select (V), and ripple delete (Shift+Delete in most tools) means you stop hunting through menus every time you want to trim a clip. Speed compounds. Saving thirty seconds per cut adds up when you're making hundreds of cuts per video.
Organize files in folders (video, audio, assets) before you start editing. Future you will thank past you when you're searching for that one B-roll clip at 11 p.m. the night before a deadline. Chaos in your file structure creates chaos in your timeline.
Save frequently and use project versioning. Export a rough cut, save it as "v1," then keep editing and save "v2." If you accidentally delete something important or make a change you regret, you can revert without starting over. That safety net makes you bolder in trying new approaches.
Explore Advanced Features Gradually
Once you're comfortable with basic cuts and pacing, color grading and correction add polish. A simple adjustment (lifting shadows, warming highlights) can make phone footage look cinematic. You don't need to become a colorist. You just need to understand how color influences mood.
Motion graphics and simple animations (kinetic text, animated logos, lower thirds) make your videos feel more professional without requiring advanced skills. Most editing software includes templates you can customize. Start there before trying to build animations from scratch.
Sound design and effects separate amateur work from polished content. Adding subtle background music, room tone, or sound effects (a whoosh during a transition, a click when text appears) creates texture that holds attention. The viewer doesn't consciously notice good sound design. They just feel more engaged.
Multi-camera editing becomes relevant when you're filming interviews, podcasts, or events with multiple angles. Learning to sync and switch between cameras adds production value, but it's not essential until your projects demand it.
Seek Feedback and Iterate
Share your videos with friends or online communities like Reddit's r/VideoEditing. Ask for constructive feedback and be specific about what you want to improve (pacing, audio mix, color). General praise feels good, but doesn't teach you anything. Specific critiques (the intro drags, the music overwhelms the dialogue, the cuts feel jarring at 1:32) give you something actionable.
Apply feedback selectively. Not every suggestion will align with your vision. But when multiple people point out the same issue, that pattern reveals something you're missing. Your instincts improve when you learn to separate personal taste from actual problems.
Consistency Is Key
Editing skill improves with daily practice, but 'daily' doesn't mean 'hours'. Fifteen minutes of focused work (trimming one scene, syncing audio, experimenting with one transition) builds capability faster than sporadic weekend marathons. The repetition creates muscle memory. Your hands learn where the tools are. Your eyes learn to spot awkward cuts.
Aim for at least one small project per week. That frequency keeps your skills sharp and prevents the intimidation that builds when you haven't opened the software in weeks. Consistency beats intensity. A dozen finished videos teach you more than one perfect video you spent a month perfecting.
But knowing what to practice is different from knowing how to practice efficiently. The next steps separate people who improve steadily from those who plateau after a few months.
Beginner's Guide to Video Editing (12 Practical Tips)

Practical tips matter more than theoretical knowledge when you're starting out. These aren't abstract principles. They're the decisions that separate footage sitting on your hard drive from videos people actually watch. Each tip addresses a specific friction point that stops beginners from finishing projects or makes their work feel amateurish, even when the idea is solid.
Organize Footage Before You Edit
Most editing frustration comes from poor file management, not la ack of skill. When you're searching through 47 unnamed clips trying to find that one three-second moment, you're not editing. You're wasting creative energy on digital archaeology.
Create a project folder before you import anything. Inside it, make subfolders for raw footage, audio files, music, graphics, and B-roll. Name your clips descriptively (interview_sarah_intro, product_closeup_02, office_exterior) instead of leaving them as IMG_4387. Those ten minutes of organization save hours during the edit when you're trying to locate specific moments under deadline pressure.
This structure also protects you when files go missing or you need to move the project to another computer. Everything lives in one place. You can zip the folder, transfer it, and keep working without hunting for assets scattered across your desktop and three different external drives.
Make Tough Choices About What to Cut
Beginning editors fall in love with footage. You spent an hour getting that shot perfectly lit, so it feels wrong to cut it. But if it doesn't serve the story or slows the pace, it's dead weight.
Your job isn't to showcase every good shot you captured. It's to build something that holds attention from the first frame to the last. That means trimming scenes that drag, removing redundant clips, and cutting moments that feel self-indulgent. According to Imagine.Art's video editing research, 90% of viewers watch videos until the end when they're under 2 minutes. Length discipline matters more than production value.
Close-ups add visual intensity but strip away context. Wide shots establish the setting but can feel distant. Balance both. Show the viewer where they are, then bring them close to what matters. That rhythm (establish, focus, establish, focus) creates visual breathing room and keeps the frame from feeling claustrophobic or disorienting.
Use Transitions to Maintain Flow, Not Impress
Flashy transitions scream amateur. Star wipes, page curls, and spinning cubes distract from your content and instantly date your video. The goal is smooth progression between scenes, not a showcase of every effect your software offers.
Stick to cuts, fades, and dissolves for 95% of your transitions. A straight cut works when the content flows naturally. A fade to black signals a shift in time or location. A dissolve softens the change between similar scenes. These feel invisible because viewers encounter them constantly in professional work.
Save dramatic transitions (whip pans, zoom blurs) for moments that need emphasis. A sudden shift in tone, a reveal, a before-and-after comparison. Used sparingly, they add energy. Overused, they make your video feel like a PowerPoint presentation from 2003.
Control Pacing to Match Emotional Tone
Pacing determines how your video feels, not just what it says. Fast cuts with quick shots create urgency and excitement. Longer clips with fewer cuts feel contemplative or tense. You're conducting rhythm, and every cut is a beat.
For high-energy content (sports highlights, product launches, event recaps), cut every two to four seconds. The rapid changes keep adrenaline high and attention locked. For explanatory content or emotional storytelling, let shots breathe for six to ten seconds. Give the viewer time to absorb what they're seeing and feeling.
Watch your video without sound. If the visual rhythm feels monotonous (all cuts at the same interval, all shots the same length), you've lost texture. Vary your pacing intentionally. A burst of quick cuts, followed by a longer-held shot, creates contrast that resets attention.
Choose a Color Scheme That Enhances Mood
Color grading isn't just about making footage look pretty. It's about emotional manipulation. Warm tones (oranges, yellows) feel inviting and nostalgic. Cool tones (blues, teals) feel clinical or melancholic. Desaturated looks feel gritty and realistic. Oversaturated looks feel energetic or surreal.
Most editing software includes color correction tools that let you adjust exposure, contrast, and white balance. Start there before experimenting with creative grading. Fix technical problems (underexposed shadows, blown-out highlights, inconsistent skin tones) first, then apply stylistic choices.
Professional editors spend 30% of their time on color grading, according to Imagine.Art's workflow analysis. That statistic reflects the extent to which color influences perceived quality. Footage shot on a phone can look cinematic with thoughtful grading. Expensive camera footage can look flat and amateur without it.
Prioritize Audio Quality Over Visual Polish
Poor audio drives viewers away faster than shaky footage or imperfect lighting. People will tolerate grainy visuals if the story is compelling and the sound is clear. They won't tolerate muffled dialogue, distracting background noise, or music that drowns out speech.
Balance your audio levels so dialogue sits at the front of the mix. Background music should enhance mood without competing for attention. Sound effects (ambient noise, footsteps, door closes) add realism but shouldn't overpower the primary audio. Use your software's audio meters to keep levels consistent. Dialogue should peak around negative six decibels, music around negative twelve.
Remove mouth clicks, heavy breathing, and long pauses unless they serve a purpose. Those sounds feel natural in conversation but become grating in an edited video. A simple noise reduction pass and some strategic muting clean up most amateur audio without requiring advanced sound design skills.
Choose music that matches your video's emotional arc. Upbeat tracks work for tutorials and product demos. Ambient instrumentals suit vlogs and thoughtful content. Dramatic scores fit storytelling and documentary work. Make sure your music is royalty-free or properly licensed. Copyright strikes kill channels faster than poor editing ever will.
Add Text Elements for Accessibility and Retention
Subtitles and captions aren't optional anymore. Most social media users watch videos in public spaces, during meetings, or late at night, often with the sound muted. Without text, you lose them in the first five seconds.
Adding captions also improves retention for viewers who do have sound on. Text reinforces what's being said, making information easier to process and remember. It highlights key phrases and creates visual anchors that guide attention.
Annotations (arrows, circles, text callouts) direct focus to specific details. Use them when you need viewers to notice something small or important. A product feature, a subtle reaction, a piece of data on screen. Don't overdo it. Too many annotations create visual clutter that feels desperate for attention.
Handle Backgrounds Thoughtfully
Messy or distracting backgrounds pull focus from your subject. A cluttered room, random people walking through the frame, or a bright window blowing out the exposure all weaken your video's impact.
If you can't control the background during filming, you have options in post. Blur the background to create a depth-of-field effect that mimics professional cameras. Crop tighter to eliminate distracting elements. Use masking tools to darken or desaturate problem areas.
For talking-head content or product demos, consider removing the background entirely and replacing it with a clean gradient, subtle texture, or relevant B-roll. This works best when your subject is well-lit and clearly separated from the original background. Green screens make this easier, but modern software can handle background removal without one if the lighting cooperates.
Add Branding Without Being Intrusive
If you're building a channel or creating content for a business, consistent branding builds recognition. A logo watermark in the corner, a standard intro sequence, or branded lower thirds (the text bars that show names and titles) create visual continuity across videos.
Keep your logo small and semi-transparent. It should be visible but not dominant. Bottom corners work best because they don't compete with captions or on-screen action. Make sure it doesn't overlap important visual elements or text.
Your intro should be short (three to five seconds maximum) and skippable without losing context. Viewers will tolerate a brief branded moment, but a fifteen-second intro sequence makes them click away before your actual content starts.
Remove Distracting Breathing and Mouth Noises
Heavy breathing, lip smacking, and tongue clicking happen naturally during recording. In the edited video, they become magnified and distracting. Your job is to make speech feel clean and effortless, which means removing the biological noise that real conversation includes.
Most editing software includes waveform displays that visually show audio. You can see breathing as small bumps between spoken words. Zoom in, select those sections, and either mute them or lower their volume significantly. This takes patience but transforms amateur audio into something that feels professionally produced.
Don't remove every breath or pause. Some breathing is necessary for pacing and realism. You're removing the loud, distracting instances, not creating an inhuman vocal track. If someone takes a dramatic pause before a key statement, that breath adds weight. If they're gasping between sentences because they talked too fast, cut it.
Use B-Roll to Add Context and Visual Interest
B-roll (supplementary footage that plays while narration or dialogue continues) solves two problems. It covers awkward jump cuts when you remove parts of an interview, and it adds visual variety that keeps viewers engaged.
When someone talks about their morning routine, show clips of coffee brewing, a sunrise, or someone getting dressed. When explaining a process, show hands performing the steps. B-roll translates abstract concepts into concrete visuals, making information easier to absorb.
The mistake beginners make is using B-roll that doesn't match the content. Random pretty shots that have no connection to the narrative feel like filler. Every piece of B-roll should either illustrate the current point or provide relevant environmental context.
Experiment with Keyframing and Masking for Advanced Control
Once basic editing feels comfortable, keyframing and masking open new creative possibilities. Keyframing lets you animate properties over time (position, scale, opacity, rotation). You can make text slide in from the side, zoom into a specific part of the frame, or fade elements in and out with precise timing.
Masking lets you isolate parts of your frame for individual adjustments. Brighten someone's face without affecting the background. Blur a license plate or logo. Track a moving object and apply effects only to that area. These techniques require more time investment but dramatically expand what you can achieve without switching to dedicated motion graphics software.
Start simple. Animate a text element to fade in over two seconds. Scale up a product shot to emphasize a feature. Track a person's face and add a subtle glow. Once you understand how keyframes work (setting start and end points and letting the software interpolate between them), you can build increasingly complex animations.
Traditional editing workflows make beginners choose between creative control and speed. You either spend hours manually assembling clips or accept templates that feel generic. Crayo AI changes that equation by automating tedious assembly work (syncing clips, adding transitions, formatting for platforms) so you can focus on selecting the moments worth sharing. That shift (from technician to curator) means you can publish more frequently without sacrificing the creative decisions that make your videos feel distinct.
But knowing these techniques only matters if you're using tools that support them efficiently without overwhelming you with options.
8 Best Video Editing Tools for Beginners
Your first editing tool should remove friction, not add complexity. The right software lets you focus on storytelling instead of troubleshooting export codecs or hunting through nested menus. These eight tools were chosen because they help beginners finish projects without requiring a month of tutorial watching.
1. Crayo
Crayo eliminates the timeline entirely. Instead of dragging clips, trimming frames, and manually syncing captions, you select the moments that matter and let AI handle assembly. The tool automatically generates subtitles, applies transitions, formats for vertical platforms, and matches pacing to current social media trends. This approach works because it shifts your role from technician (arranging pixels and audio waves) to curator (choosing what's worth sharing).
Who It's For
People launching TikTok, Reels, or Shorts channels without prior editing experience will find that Crayo removes the learning curve that stops most beginners. The platform was built by creators running channels with over 1 million subscribers, so it understands viral pacing and attention dynamics rather than treating editing as a purely technical process.
Freelancers building portfolios can produce client-ready content in minutes rather than hours, enabling more iteration cycles and faster skill development. Marketers creating product clips or promotional shorts get consistency across videos without memorizing brand guidelines or template systems.
Pros
The speed matters most. Videos export in seconds, not the twenty-minute render times typical of traditional editors. Auto-generated captions mean you're not manually typing timestamps and correcting transcription errors. Effects and music sync with the content's emotional arc without keyframing or audio-mixing knowledge.
Portfolio building accelerates when you publish frequently rather than perfecting a single video for weeks. The vertical format optimization means your content actually fits the platforms where audiences live (TikTok prioritizes 9:16 aspect ratios and punishes horizontal uploads, reducing their reach).
Cons
Creative control trades off against speed. You're working within Crayo's style framework rather than building entirely custom looks. Advanced editors who want granular color grading or complex motion graphics will outgrow the tool's capabilities, though that's not the target user.
2. PowerDirector
PowerDirector balances power and approachability better than most enthusiast-level editors. The interface uses familiar timeline layouts but includes AI features (auto-captioning, face blurring, anime effects) that previously required professional software. According to Wyzowl, 87% of video marketers say video has increased traffic to their website, which explains why tools like PowerDirector prioritize features that help content perform (text overlays, quick exports, template systems) over cinematic complexity.
Who It's For
Business video producers creating presentation content, explainer videos, or internal communications will appreciate the professional output without needing a dedicated video team. The stock media library and AI generation tools help when you lack filming resources or studio access.
YouTube creators benefit from audio and video generation capabilities that let them produce compelling content without hiring actors or renting equipment. Video enthusiasts making family documentaries or hobby projects get enough creative control to make polished work without fighting the interface.
Pros
Rendering speed outpaces most competitors at this price point. The interface stays organized even when timelines get complex (multiple video tracks, layered effects, color adjustments). Multicam support and motion tracking features usually cost hundreds more in competing software.
A strong effects library means you're rarely hunting for third-party plugins. AI tools automate tedious tasks (captioning takes seconds, not hours), leaving more time for creative decisions.
Cons
The sheer number of options overwhelms some beginners initially. You're presented with dozens of effects, transitions, and adjustment options before you understand which ones actually matter. That breadth becomes valuable as skills develop, but creates decision paralysis early on.
3. Apple iMovie
iMovie removes almost all technical friction for Mac and iOS users. The Storyboard feature guides you through project structure by suggesting shot types and sequences, teaching storytelling fundamentals as you edit. iPhone Cinematic mode effects carry over smoothly, preserving the depth-of-field adjustments you made during filming.
Who It's For
Families sharing vacation footage or life events appreciate the simplicity and quick sharing options. The app syncs projects across Apple devices, so you can start editing on your phone during lunch and finish on your laptop that evening.
Video hobbyists get enough tools (audio filters, chroma keying, picture-in-picture) to experiment without feeling limited. The learning curve stays shallow, but the ceiling is high enough for interesting, creative work. Transitioning to Final Cut Pro later feels natural since both share similar organizational logic.
Pros
Template quality exceeds that of most free software. The shot guidance actually teaches composition and pacing through practice. Chroma-keying (green screen) tools work surprisingly well for consumer-grade software, enabling creative backgrounds without expensive plugins.
Cons
The two-video-track limitation frustrates users who want complex layering. Multicam editing and motion tracking don't exist, which limits certain project types (interviews with B-roll, sports analysis, tutorial overlays).
4. Adobe Premiere Pro
Premiere Pro represents the industry standard, which matters if you're building professional skills or collaborating with teams. Recent AI additions (auto-transcription, text-based editing, generative clip extension) modernize workflows that previously required manual frame-by-frame work. The Color Manager unifies color treatment across projects, solving consistency problems that plague multi-video campaigns.
Who It's For
Professional editors and serious amateurs who want workplace-relevant skills should learn Premiere. Studio collaboration features (shared projects, client review tools, Creative Cloud integration) make team workflows smoother than passing files back and forth via Dropbox.
People editing 360 VR content get specialized tools that consumer software lacks. The learning resources (tutorials, forums, templates) dwarf what's available for smaller platforms, which accelerates skill development when you're stuck.
Pros
Interface flexibility lets you customize workspace layouts for different tasks (editing, color grading, audio mixing). Performance stays responsive even with 4K footage and complex effect stacks. Stabilization tools salvage shaky footage better than most alternatives.
Unlimited multicam angles support means you can edit concerts, panels, or sporting events with dozens of camera feeds. Organization tools (bins, metadata tagging, search functions) prevent chaos as project libraries grow.
Cons
Subscription costs accumulate. You're paying monthly forever rather than owning the software outright. Some techniques (advanced motion graphics, complex audio mixing) still require external applications (After Effects, Audition), which adds learning overhead.
5. Final Cut Pro
Final Cut's trackless timeline feels strange at first, but becomes intuitive once you grasp magnetic clip behavior. Instead of manually managing track assignments, clips snap together intelligently. The interface modernizes editing conventions that haven't changed since the 1990s, which polarizes users (some love the innovation, others prefer familiar patterns).
Who It's For
Apple ecosystem users benefit from tight integration with iPhones, iPads, and Vision Pro. The iPad version (requiring a separate subscription) syncs smoothly with desktop projects, enabling mobile editing that doesn't feel compromised.
Amateur enthusiasts graduating from iMovie find the transition smooth since organizational logic carries over. Pro editors working on high-end content (Hollywood features and prestige television) use Final Cut regularly and get the tools they need without subscriptions.
Pros
Organization capabilities (keyword tagging, smart collections, metadata filtering) handle massive libraries without slowing down. Performance optimization for Apple Silicon chips delivers faster rendering than cross-platform competitors. Masking and chroma-keying precision rival dedicated compositing software.
360-degree footage support and wide color space handling future-proof projects as formats evolve. Multicam editing handles complex shoots (concerts, interviews, events) elegantly.
Cons
Import and export workflows feel less intuitive than competitors. Some advanced techniques require separate applications (Motion for graphics, Compressor for specialized encoding), fragmenting the workflow.
6. Adobe Premiere Elements
Elements hides Premiere Pro's complexity behind Guided Edits that walk you through effects step by step. You're achieving professional results (motion tracking, color correction, animated titles) without understanding the underlying technical concepts. The three-year license limit feels restrictive compared to perpetual licenses, but it still costs less than ongoing Premiere Pro subscriptions.
Who It's For
Beginners intimidated by professional software can produce quality work immediately. The interface is similar enough to Premiere Pro that transitioning later doesn't require relearning everything.
Memory keepers (Adobe's term for people preserving family moments) get templates and effects designed for personal storytelling rather than commercial production. The tool assumes you care about results, not mastering editing theory.
Pros
Cross-platform support (Mac and Windows) means you're not locked to one ecosystem. The 360 VR editing tools democratize immersive content creation. Rendering speeds rival those of more expensive software.
Interface similarity to Premiere Pro builds transferable skills. The Effects library provides enough variety for most personal projects without overwhelming beginners.
Cons
The three-year license expiration forces an eventual repurchase or migration. Multicam support doesn't exist, limiting interview or event coverage options.
7. DaVinci Resolve
Resolve's free version includes capabilities that cost thousands in competing software. Node-based color grading provides Hollywood-level control, and the integrated audio editor (Fairlight) eliminates the need for external sound design tools. AI features (auto-captioning, text-based editing) match the recent additions in Premiere Pro. G2 reports that video content generates 1200% more shares than text and images combined, which explains why even free tools now prioritize features that boost engagement (captions, quick exports, social formatting).
Who It's For
Budget-conscious editors get professional capabilities without subscription fees. Studio professionals and aspiring Hollywood editors should learn Resolve, as it's already industry-standard for color grading and increasingly common in full post-production workflows.
People interested in color science will appreciate the depth of grading tools and color space management. The collaboration features support team workflows without forcing everyone onto paid tiers.
Pros
Motion graphics and audio editing live within the same application, reducing context switching. Deep color tools provide precision that photo editors will recognize and appreciate. Render performance stays fast even with complex timelines.
AI automation (scene detection, smart reframing, voice isolation) speeds up repetitive tasks. The free version's generosity lets you build strong skills before deciding whether the paid features justify the cost.
Cons
System resource demands run high. You need a capable computer (a dedicated GPU and 16GB+ RAM) for smooth performance. The learning curve steepens more quickly than with simpler tools, requiring patience through the initial confusion.
8. Microsoft Clipchamp
Clipchamp runs in your browser, removing installation friction and making it accessible from any computer. The integration with Windows (photo libraries, screen capture tools) streamlines content gathering. AI voice-overs convert text to speech in multiple styles, enabling narration without recording equipment. Templates for intros and outros provide structural guidance that teaches pacing through repetition.
Who It's For
Web-based editing appeals to people who work across multiple computers or who prefer not to install software. Windows users get instant access without downloads or configuration.
Marketers benefit from brand kit features (consistent colors, fonts, logos) and extensive stock media libraries. Social creators targeting Facebook, Instagram, TikTok, or YouTube find templates optimized for each platform's specifications and audience expectations.
Pros
Interface elegance makes the tool approachable immediately. Template variety covers most common video types (tutorials, promos, vlogs, announcements). Text and soundtrack options offer enough creative flexibility to create engaging content.
Effects and transitions feel modern without overwhelming beginners. Windows integration means less time importing and organizing files.
Cons
Some features require subscriptions (4K export, expanded storage, full brand kit access). Templates tend toward shorter formats and don't specify shot types as clearly as competitors, which limits their educational value for learning composition.
Effect control stays relatively basic compared to desktop editors. Advanced users will hit the ceiling quickly, though that's intentional for the target audience.
Traditional editors force you to choose between speed and creative control, between templates that feel generic and timelines that require hours of learning. But what if that tradeoff was never necessary in the first place?
Related Reading
- Video Editing Workflow Checklist
- PC Specs for Video Editing
- How To Start Editing Videos
- How To Practice Video Editing
- Mac Vs Pc For Video Editing
- How To Make A Video Editing Portfolio
- Video Editing Tips And Tricks
- How To Make Money Video Editing
- Best Free Video Editing Apps For Android
- How To Organize Video Files For Editing
- How To Edit Video In Google Drive
- Creative Video Editing Techniques
Struggling to Edit Videos as a Beginner? Crayo Makes It Easy.
If you're just starting with video editing, figuring out cuts, captions, effects, and music can feel overwhelming. Crayo AI solves this by letting you create short videos in seconds. You write a prompt, pick a style, and the platform automatically adds captions, effects, backgrounds, and music. No experience required. No timeline wrestling. No hours spent watching tutorials before you can publish your first video.
The platform turns beginner-level ideas into viral-ready shorts because it was built by creators running channels with over 1 million subscribers. They understand what makes content perform, not just what makes it technically correct. That knowledge is baked into how Crayo structures pacing, selects transitions, and formats videos for TikTok, Instagram, and YouTube Shorts. You're not learning editing theory. You're tapping into patterns that already work.
Most beginner tools force you to choose between simplicity and results. Templates feel generic. Manual editing feels impossible. Crayo removes that tradeoff by automating the technical decisions (caption timing, effect placement, audio sync) while keeping you focused on the creative ones (what story to tell, which moments to emphasize, what style fits your brand). You move from idea to published video in minutes, not days.
The speed matters because consistency builds audiences faster than perfection. Publishing three decent videos this week teaches you more than spending three weeks perfecting one. Crayo lets you iterate quickly, test what resonates, and refine your instincts without getting stuck in render queues or export errors. You learn by doing, not by troubleshooting software.
Start making your first viral shorts today with Crayo. Turn your ideas into polished videos in minutes and even tap into the TikTok Creator Fund without struggling through traditional editing. The barrier between you and an audience isn't talent. It's the friction that stops you from starting. Crayo removes that friction so you can focus on what actually matters: finding ideas worth sharing and building the confidence to share them consistently.
Related Reading
- Best Drone Video Editing Software
- Best Video Editing Software For Music Videos
- Best Video Editing Software For Sports Highlights
- Best Video Editing Software For Content Creators
- Best Video Editing App For Pc
- Best Paid Video Editing Software
- Best App for Video Editing on iPad
- Best Songs For Video Editing
- Best Video Editing Software For Vlogging
- Autopod Alternative