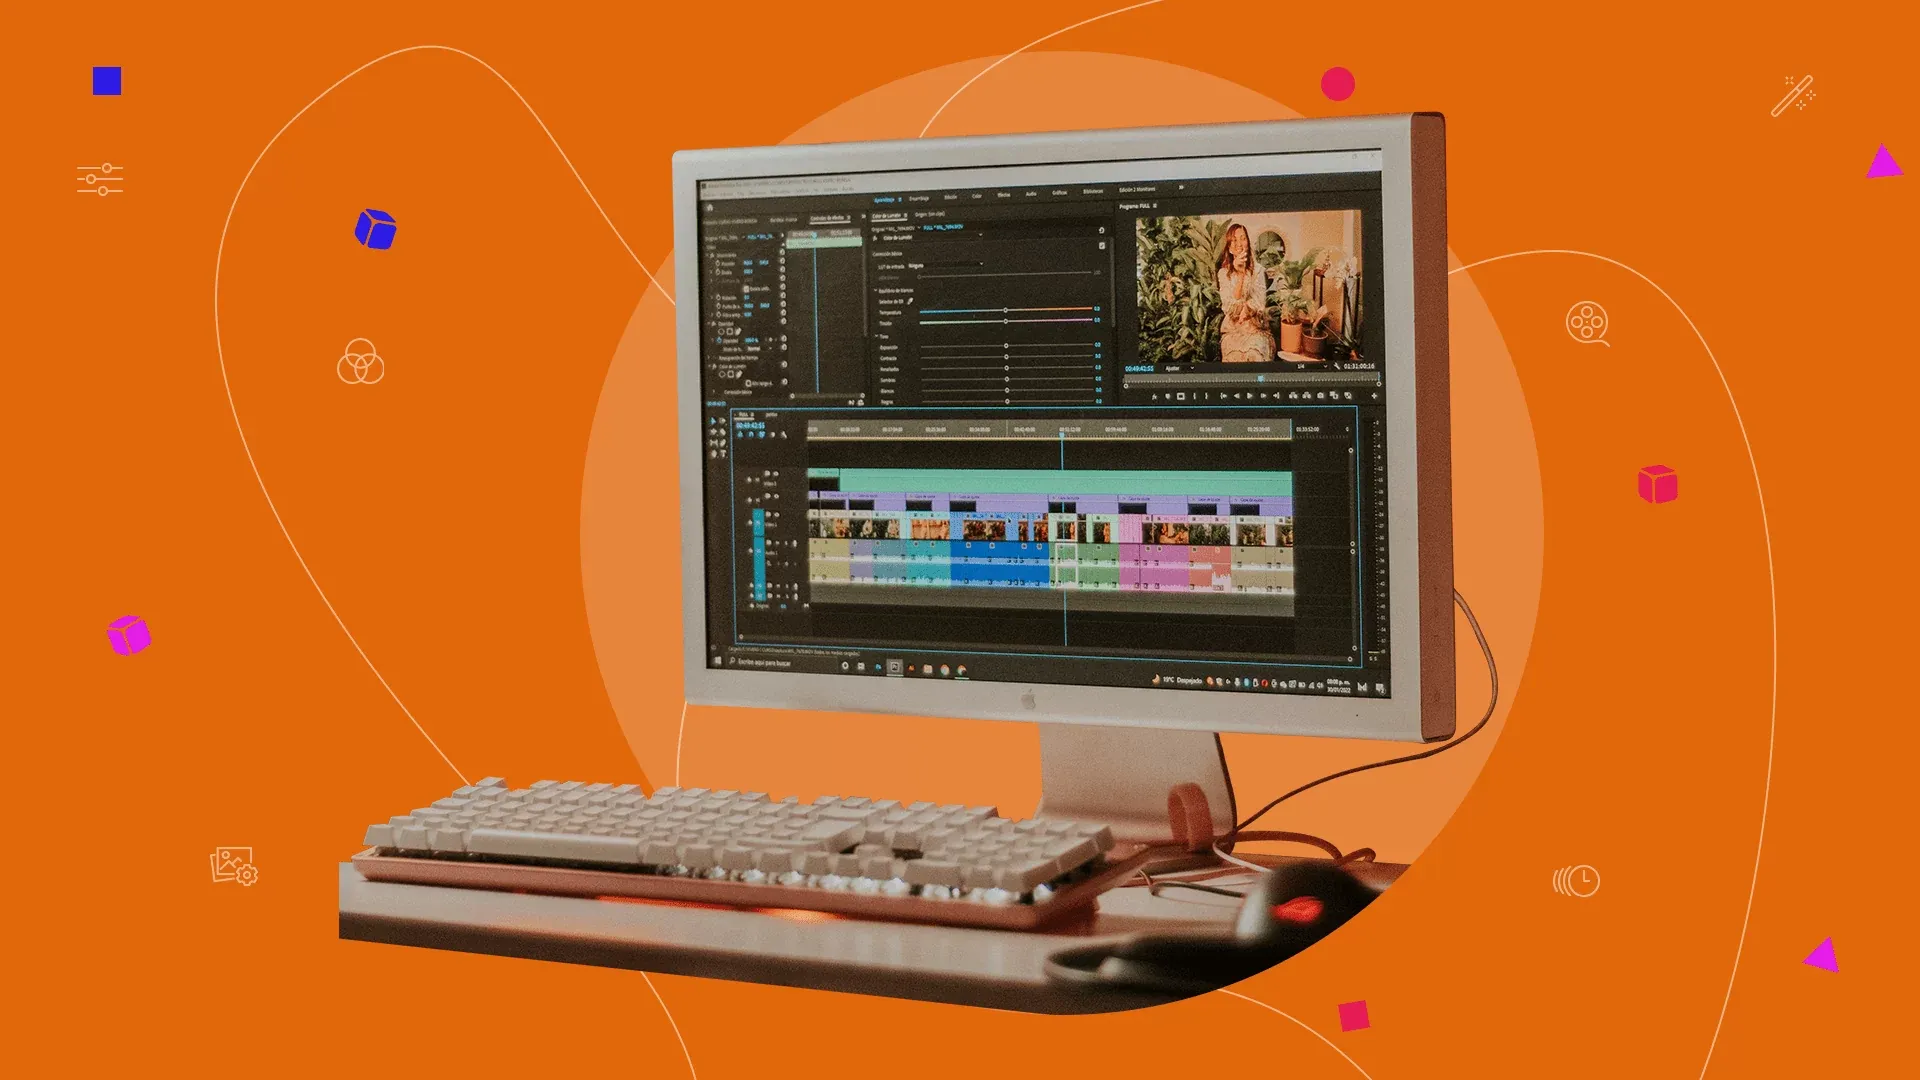
You've captured that perfect moment on your phone, but the raw footage looks flat and uninspiring. Understanding the types of video editing transforms those ordinary clips into content that stops thumbs mid-scroll. This guide breaks down the basics of video editing, from cuts and transitions to timing and effects, giving you the foundation to create viral reels and TikToks with AI-powered tools.
What if you could skip the steep learning curve of traditional editing software? Crayo AI's clip creator tool handles the technical heavy lifting for you, automatically adding captions, effects, and music while you focus on the creative decisions that make content shareable. The platform streamlines everything from trimming clips to adding engaging elements, helping you produce polished short-form videos that capture attention and drive engagement across social platforms.
Summary
- Modern editing software has compressed what used to require 20 to 40 hours of focused practice into workflows that are immediately accessible. Beginners can now produce polished content on day one, rather than spending weeks mastering timeline mechanics, keyboard shortcuts, and rendering codecs before publishing. The barrier to entry has shifted from technical mastery to simply starting.
- Video content drives 72% higher engagement than other formats according to marketing data, and that performance advantage extends to solo creators using free software and smartphones, not just brands with production budgets. The collapse of technical barriers means monetizable, audience-building content now happens on laptops in coffee shops rather than requiring teams and expensive gear.
- AI-powered platforms have separated creative decision-making from technical execution in video editing. Instead of learning how codecs work or where to place keyframes, creators now focus on pacing, tone, and structure while software handles caption syncing, effect layering, and export settings automatically. This redesign accelerates the feedback loop between creation and audience response.
- Short-form vertical video requires fundamentally different capabilities than horizontal long-form content. Tools optimized for Instagram Reels and TikToks prioritize fast turnaround, mobile-friendly workflows, and 9:16 templates, while YouTube essay creators need robust timeline management and multi-track audio mixing that mobile-focused platforms can't handle efficiently.
- Subscription models make economic sense at different usage densities. A $20 monthly subscription costs $1.67 per video when editing three times weekly, but $20 per video when editing monthly. The value equation inverts completely based on how frequently you actually produce content, not which software has the longest feature list.
- Browser-based editors process video in the cloud, removing local hardware constraints but introducing network bandwidth dependencies. You can edit 4K footage on a low-powered Chromebook because computational work is handled on remote servers, though slow internet connections can cause laggy previews and longer upload times.
- Crayo's clip creator tool automates caption syncing, effect layering, and music integration for short-form content, letting creators focus on creative decisions around pacing and messaging rather than frame-by-frame technical adjustments.
Is Video Editing Easy for Beginners

Video editing is absolutely approachable for beginners, especially now. Modern software has stripped away much of the complexity that once kept newcomers out. Free tools like DaVinci Resolve, CapCut, and iMovie offer interfaces designed for people who've never touched a timeline before. You don't need expensive equipment or years of training to create content that looks polished and performs well.
The learning curve exists, but it's shorter than most people expect. According to Trint, beginners can build confidence in essential editing skills within 20 to 40 hours of focused practice. That's a few weeks of evening work, not years of film school. The barrier isn't talent or technical genius. It's usually just the willingness to start messy and learn through repetition.
Why Starting Feels Easier Than You Think
Most modern editing apps anticipate your confusion and guide you through it. CapCut walks you through trimming clips with visual cues. iMovie surfaces drag-and-drop simplicity that feels intuitive within minutes. Even DaVinci Resolve, which professionals use for color grading and advanced compositing, offers a beginner mode that hides the overwhelming features until you're ready.
The quick wins arrive faster than you'd consider. You can learn to trim awkward pauses, cut between angles, and layer background music in a single afternoon. These aren't advanced techniques. They're the foundation of watchable content, and they're accessible within days of opening the software for the first time.
Visual learning tools accelerate this process. Waveform editing lets you see where audio peaks and dips, making it obvious where someone started or stopped speaking. Text-based editing, where you edit a transcript instead of scrubbing through video, removes the guesswork from finding mistakes. You highlight the sentence you want gone, delete it, and the video adjusts automatically. It's editing that feels less like technical work and more like cleaning up a document.
The Shift From Technical Skill to Creative Workflow
What's changed isn't just the software. It's the entire philosophy of what editing requires. Traditional workflows demanded mastery of complex tools before you could produce anything worth sharing. You learned keyboard shortcuts, rendering codecs, and color space conversions before you ever thought about storytelling or pacing.
That model is fading. The truth is, most creators don't need to understand how a codec works to make engaging content. They need to understand what holds attention, what builds momentum, and what makes someone stop scrolling. Those are creative decisions, not technical ones.
AI-powered platforms now handle the mechanical parts. Automated captioning, background removal, and scene detection happen in the background while you focus on the elements that actually drive engagement. This isn't about dumbing down the craft. It's about removing friction from the path between idea and execution.
For creators who want to focus on finding great clips and understanding trends rather than wrestling with keyframes, tools like the clip creator tool compress what used to take hours into seconds. Automated captions, effects, and music integration let you produce polished short-form videos without mastering traditional editing mechanics. The platform handles the technical decisions while you make the creative choices that determine whether content goes viral or gets ignored.
Proof That Beginners Can Build Momentum Quickly
Creators like Peter McKinnon started with basic tools and grew audiences into the millions within one to two years. They didn't wait until they mastered every feature. They published consistently, learned from what performed, and improved incrementally. The feedback loop between creation and audience response taught them faster than any tutorial ever could.
The market validates this approach. 72% of marketers report that video content boosts engagement more than any other format. That's not just big brands with production budgets. That includes solo creators using free software and a smartphone. The barrier to impactful, monetizable content has collapsed. What used to require a team and expensive gear now happens on a laptop in a coffee shop.
The emotional hurdle is often bigger than the technical one. It's exhausting when you open editing software for the first time and see dozens of menus, tracks, and buttons you don't recognize. That overwhelm is real, but it's also temporary. Most beginners overestimate what they need to know and underestimate what they can learn by simply starting.
You don't need to understand every tool in the toolbar. You need to know how to trim a clip, add a transition, and export a file. Everything else builds from there. The creators who succeed aren't the ones who wait until they feel ready. They're the ones who start before they feel ready and let the process teach them.
But knowing that editing is accessible doesn't mean you know where to start or which techniques actually matter when you're staring at a blank timeline.
Video Editing Basics (12 Practical Tips for Beginners)
The fundamentals that separate watchable content from abandoned drafts aren't complicated. They're about organization, intentional choices, and understanding what holds attention. Most beginners assume editing mastery comes from knowing every feature in the software. It doesn't. It comes from building habits that keep your workflow clean and your story clear.
These twelve techniques form the foundation. They won't make you an expert overnight, but they'll prevent the most common mistakes that make early projects feel chaotic and overwhelming.
1. Organize Your Footage Before You Edit
A scattered project file guarantees frustration. When clips, audio tracks, and graphics live in random folders with generic names like "Video_Final_V3," you waste time hunting instead of creating. Establish a clear folder structure from the start. Create one main project folder, then separate subfolders for raw footage, audio files, graphics, and exports. Label everything descriptively. "Interview_Sarah_Take2" beats "IMG_4782" when you're scanning through dozens of files at midnight.
This system isn't about perfectionism. It's about reducing cognitive load. When you know exactly where every asset lives, you spend less mental energy on logistics and more on creative decisions that improve the final product.
2. Be Ruthless About Shot Selection
The hardest part of editing isn't cutting bad footage. It's cutting footage you worked hard to capture. A shot might look stunning in isolation, but if it disrupts pacing or confuses the narrative, it doesn't belong in the final cut. Your goal is coherent storytelling, not a highlight reel of your favorite moments.
Include shots that advance context. Close-ups add visual detail, but without wider establishing shots, viewers lose spatial awareness. Mix perspectives intentionally. Show the subject, then pull back to reveal the environment. That rhythm helps audiences orient themselves while maintaining visual interest.
3. Use Transitions to Maintain Flow, Not Distract
Flashy wipes and spinning transitions feel exciting when you discover them in the effects menu. Then you watch the playback and realize they pull attention away from what you're actually saying. Subtle transitions like fades, dissolves, and simple cuts keep the focus on content rather than technique.
The best transitions are invisible. They guide the viewer from one scene to the next without announcing themselves. Save the dramatic effects for moments where you intentionally want to signal a shift in tone or time. Otherwise, simplicity wins.
4. Control Pacing Through Editing Rhythm
Pace determines how your content feels. Fast cuts create energy, tension, and urgency. Longer shots build contemplation, intimacy, or calm. Neither approach is inherently better. What matters is whether your pacing matches the emotional tone you're building.
For high-energy scenes, use rapid cuts between angles and tight shots. For reflective moments, let clips breathe. Hold on to a subject's face. Linger in a landscape. The rhythm you establish trains viewers on how to feel, often more powerfully than dialogue ever could.
5. Apply Color Grading to Set Mood
Color isn't just about correcting exposure. It's about establishing atmosphere. Warm tones feel inviting and nostalgic. Cool tones suggest detachment or professionalism. Most editing software includes built-in color correction tools that let you adjust contrast, saturation, and temperature with a few slider movements.
Consistency matters more than perfection. If one clip looks washed out and the next looks oversaturated, the visual discontinuity breaks immersion. Aim for a unified palette across your entire project, even if individual shots weren't captured under identical lighting conditions.
6. Balance Audio Levels So Music Supports, Doesn't Overpower
Poor audio quality drives viewers away faster than shaky footage. According to Video Editing Tips for Beginners, 85% of social media videos are watched without sound, but that doesn't mean audio doesn't matter for the remaining 15%. When someone does turn sound on, muddy dialogue or overpowering background music signals amateur production.
Layer your audio intentionally. Dialogue sits at the front. Sound effects add texture in the middle. Music fills the background. Adjust volume levels so each layer occupies its own space without competing. If viewers strain to hear what someone's saying because a soundtrack is too loud, they'll scroll past.
Choose music that aligns with your content's emotional tone. Upbeat tracks accelerate pacing. Ambient soundscapes create space for reflection. The wrong music doesn't just feel off; it feels wrong. It actively undermines the message you're trying to deliver.
7. Add Subtitles and Text Elements for Accessibility
Captions aren't optional anymore. They make content accessible to viewers who are deaf or hard of hearing, people watching in sound-sensitive environments, and non-native speakers who benefit from reading along. Beyond accessibility, text elements guide attention. Annotations highlight key points. Lower-thirds identify speakers. On-screen text reinforces calls to action.
Placement and styling matter. Subtitles should be large enough to read on mobile screens without obscuring important visual elements. Use high-contrast colors so text remains legible against varying backgrounds. Keep font choices simple and consistent throughout the project.
8. Replace or Enhance Backgrounds Strategically
Blurry, cluttered, or distracting backgrounds undermine otherwise strong footage. If the background adds nothing or actively detracts, consider removing it. But don't leave your subject floating in empty space. Replace problematic backgrounds with dynamic alternatives or subtle gradients that maintain visual context without competing for attention.
Stretching a single background image across an entire video creates repetitive visual monotony. Use dynamic backgrounds that shift slightly or incorporate subtle motion. This keeps the frame feeling alive without overwhelming the primary subject.
9. Position Logos Without Obscuring Content
If you're creating branded content, your logo establishes credibility. But if it covers someone's face or blocks on-screen text, it becomes a distraction. Place logos in the corners so they remain visible without interfering with key visual elements. Resize appropriately. A logo that dominates the frame signals insecurity rather than professionalism.
Consistency builds recognition. Choose one position and stick with it across all your content. Viewers will start associating that visual signature with your work without needing to consciously notice it.
10. Remove Distracting Breathing and Mouth Noises
Audible breathing, lip smacking, and tongue clicks pull focus away from what's being said. Most viewers won't consciously register these sounds, but they'll feel the content as less polished. Trim or mute sections where these noises occur, unless they serve a specific creative purpose, such as building tension or intimacy.
Be surgical, not excessive. Removing every breath makes dialogue feel robotic and unnatural. Target the loud, distracting sounds while preserving the human quality that makes spoken content feel authentic.
11. Integrate B-Roll to Add Context Without Distraction
B-roll footage provides visual variety and contextual depth. It covers awkward jump cuts, illustrates abstract concepts, and gives viewers something to look at while voiceover or dialogue continues. But overusing B-roll fragments the narrative. Every insert should serve a clear purpose: clarify a point, establish a location, or maintain visual momentum.
Strategic B-roll enhances storytelling. Random B-roll feels like filler. Before inserting a shot, ask whether it adds meaning or just fills time. If you can't articulate why it belongs, cut it.
12. Explore Keyframing and Masking for Precision
Keyframing lets you animate elements over time. A logo can fade in gradually. Text can move across the screen. Zoom effects can emphasize specific details. Masking allows finer adjustments to individual components within a shot. You can isolate a subject, adjust exposure on one part of the frame, or create custom transitions that feel unique to your style.
These techniques sit on the advanced end of the beginner spectrum, but they're worth exploring once you've mastered the basics. They unlock creative possibilities that make your content feel intentional and polished rather than assembled from templates.
For creators who want to bypass the mechanical complexity of manual keyframing, effects layering, and caption syncing, platforms like the clip creator tool automate these precision tasks. What used to require frame-by-frame adjustments now happens instantly, letting you focus on creative decisions around pacing and tone rather than technical execution.
These twelve techniques form the foundation of competent editing. Master them, and you'll produce content that looks intentional, feels cohesive, and holds attention. But knowing the techniques doesn't answer the bigger question: which software actually lets you execute them without drowning in complexity or cost.
Related Reading
- Types of Video Editing
- Long Does It Take to Edit a YouTube Video
- How Long Does It Take to Edit a Music Video
- What Is an Overlay in Video Editing
- Is CPU or GPU More Important for Video Editing
- Can I Edit a YouTube Video After Posting
- Is Video Editing a Good Career
- Can You Edit Video in Photoshop
- Beginner’s Guide to Video Editing
How to Choose the Best Video Editing Tools
Choosing the right video editing tool starts with matching software capabilities to your actual workflow, not chasing feature lists you'll never use. The best tool for you depends on three things: what kind of content you create, how often you create it, and whether you're building skills or shipping finished work. A YouTuber producing weekly tutorials needs different capabilities than someone cutting viral TikToks daily or editing a single wedding video per month.
The market splits into three distinct tiers. Professional suites like Adobe Premiere Pro and DaVinci Resolve offer comprehensive control over every frame, color grading, and audio layers. Mid-tier options like Filmora and PowerDirector balance capability with accessibility, giving you advanced features wrapped in interfaces that don't require certification courses. Then there's the emerging category of AI-powered platforms that automate technical decisions entirely, letting you focus on creative choices rather than mechanical execution.
Most people choose wrong because they optimize for the wrong variable. They pick software based on what professionals use or what has the longest feature list, then spend weeks learning tools they don't need while neglecting the fundamentals that actually improve their content. The right choice isn't about finding the most powerful software. It's about finding the tool that removes friction from your specific creative process.
Matching Software to Content Format
Short-form vertical video requires different capabilities than horizontal long-form content. If you're creating Instagram Reels, TikToks, or YouTube Shorts, you need fast turnaround, mobile-friendly workflows, and built-in templates optimized for 9:16 aspect ratios. Software like CapCut excels here because it's designed around the constraints of mobile-first content creation.
Long-form creators working on YouTube essays, documentaries, or narrative projects need robust timeline management, advanced audio mixing, and precise color grading. These projects involve hundreds of clips, multiple audio tracks, and complex layering that mobile-focused tools can't handle efficiently. This is where DaVinci Resolve or Premiere Pro becomes necessary, not excessive.
Podcast editors need entirely different priorities. Waveform-based editing, noise reduction, and multi-track audio management matter more than visual effects or color correction. Tools like Descript, which let you edit audio by editing a transcript, collapse hours of scrubbing through waveforms into minutes of text editing. The interface looks nothing like traditional video editing software because the workflow is fundamentally different.
Understanding Feature Necessity vs. Feature Availability
Free versions of professional software often restrict export resolution to 720p, which made sense when most viewing happened on desktop monitors. Today, when 85% of social media video gets consumed on mobile devices with high-resolution screens, that limitation becomes a real constraint. According to research from Moody's published in March 2025, 68% of viewers perceive 720p content as lower quality, even on small screens, which affects engagement and perceived credibility.
You need to distinguish between features you'll use daily and features you might need once. Motion tracking sounds impressive until you realize you've never needed to attach an object to something moving in your footage. Multicam editing becomes essential when you're cutting between three camera angles of the same event, but it's irrelevant if you're working with single-camera setups. Every unused feature adds complexity to the interface without enhancing your workflow.
The gap between what software can do and what you actually need creates decision paralysis. Beginners often assume they need professional-grade tools to produce professional-quality results. That's rarely true. Professional quality comes from understanding pacing, composition, and storytelling. The software just executes your decisions. A mediocre editor using Premiere Pro will produce worse content than a skilled editor using iMovie.
Evaluating Learning Investment Against Output Goals
Time spent learning software is time not spent creating content. If your goal is to publish consistently and build an audience, spending three months mastering advanced color grading might be the wrong investment. That's three months of content you didn't ship, feedback you didn't receive, and momentum you didn't build.
Professional editors justify steep learning curves because their livelihood depends on mastering comprehensive toolsets. They need frame-accurate control, advanced compositing, and the ability to handle client requests that span the full spectrum of video production. Their time investment pays back across hundreds of projects over the years.
Content creators face different math. You're optimizing for volume, consistency, and audience growth. The editing process is a means to an end, not the end itself. Every hour spent on technical execution is an hour you didn't spend researching trends, analyzing what content performs, or developing your on-camera presence.
The traditional model treats editing as a craft requiring years of technical mastery before you can produce anything worth sharing. That made sense when editing required expensive equipment and specialized knowledge. It doesn't make sense anymore. Modern workflows separate technical execution from creative decision-making. You can make smart choices about pacing, tone, and structure without knowing how to manually keyframe motion paths or color-match footage across different cameras.
For creators focused on short-form content where speed and consistency matter more than technical perfection, platforms like the clip creator tool handle the mechanical complexity automatically. Automated captioning, effects, and music integration mean you're making creative decisions (which clip to use, what tone to set, how to structure the narrative) rather than technical ones (how to sync captions frame by frame, where to place keyframes, which export codec to choose). The output looks polished because the platform handles precision tasks that used to require specialized knowledge.
Assessing Interface Logic and Workflow Efficiency
Software interfaces either match how you think or force you to adapt to how engineers think. iMovie feels intuitive to beginners because it hides complexity behind visual metaphors. Drag a clip to the timeline. Click to trim. The interface anticipates confusion and guides you through common tasks. DaVinci Resolve offers vastly more power but presents you with dozens of panels, tabs, and options simultaneously. The flexibility is extraordinary once you understand the system. The initial experience is overwhelming.
Some tools optimize for speed through keyboard shortcuts and streamlined workflows. Others prioritize visual clarity through spacious layouts and labeled buttons. Neither approach is superior. What matters is whether the interface logic matches your working style. If you're editing dozens of videos per week, learning keyboard shortcuts saves cumulative hours. If you're editing occasionally, a clean visual interface helps you remember where features live between sessions.
Rendering and export speed directly impact how quickly you can iterate. Slow exports mean you can't test small changes without committing significant time. You make fewer iterations, accept mediocre results more often, and learn more slowly because the feedback loop stretches from minutes to hours. Software that exports a three-minute video in under a minute lets you test ideas rapidly. That speed advantage compounds over dozens of projects.
Weighing Subscription Models Against Usage Patterns
Monthly subscriptions make sense when you're editing regularly and need continuous access to updates and cloud features. Adobe Creative Cloud at $54.99 per month becomes economical for professionals billing clients hundreds or thousands per project. The cost disappears into project overhead.
Occasional creators face different economics. Paying $660 annually for software you use sporadically feels wasteful. One-time purchase options like Final Cut Pro ($299.99) or perpetual licenses for older software versions shift the math. The upfront cost is higher, but the long-term expense is lower if your usage is inconsistent.
Free options eliminate financial risk but introduce other constraints. DaVinci Resolve offers remarkable capability at no cost, but the learning curve is steep, and community support, while extensive, isn't as structured as paid customer service. CapCut provides free access to templates and effects but monetizes through premium features and in-app purchases that accumulate over time.
The frequency calculation matters more than most creators realize. If you're editing three videos per week, a $20 monthly subscription costs roughly $1.67 per video. That's negligible. If you're editing one video per month, that same subscription costs $20 per video. The value equation inverts completely based on usage density.
Platform Compatibility and Hardware Constraints
Mac users have access to Final Cut Pro and iMovie, both optimized specifically for Apple hardware. That optimization translates to faster rendering, better battery efficiency, and tighter integration with other Apple ecosystem tools. Windows users have broader software options but fewer platform-exclusive advantages. Cross-platform tools like Premiere Pro and DaVinci Resolve work on both systems, though performance can vary based on how well the software is optimized for each operating system's architecture.
Mobile editing has evolved from novelty to a legitimate workflow option. Adobe Premiere Rush, CapCut, and Kinemaster offer surprisingly capable editing on smartphones and tablets. You can shoot, edit, and publish entirely from a mobile device. That flexibility matters when you're traveling, working between locations, or simply prefer touch interfaces over mouse and keyboard.
Hardware limitations constrain software choices more than features do. Running Premiere Pro smoothly requires at least 16GB of RAM, preferably 32GB for complex projects. Trying to edit 4K footage on an older laptop with 8GB of RAM creates frustration regardless of which software you choose. The software isn't the bottleneck. Your hardware is.
Browser-based editors like Clipchamp and WeVideo remove hardware constraints by processing video in the cloud. You can edit on a low-powered Chromebook because the heavy computational work is handled by remote servers. The tradeoff is internet dependency. Slow connections lead to laggy previews and longer upload times. You're trading local hardware requirements for network bandwidth requirements.
Testing Before Committing
Trial versions exist because software companies know their interfaces aren't universally intuitive. What feels logical to one person feels alien to another. The only way to know whether software matches your working style is to use it on real projects, not theoretical examples.
Most professional tools offer 7- to 30-day trials with full-feature access. That's enough time to complete several projects, encounter real workflow challenges, and determine whether the software accelerates or impedes your process. Don't just test basic features. Push into the areas you'll actually use. If you need multicam editing, test it with real footage from multiple angles. If color grading matters, import poorly lit clips and see how the tools handle correction.
Free tiers with limitations serve a different purpose. They let you explore the interface and basic functionality without time pressure, but export restrictions or watermarks prevent you from shipping real content. You can learn, but you can't publish. That's useful for pure skill-building, but frustrating if you're trying to maintain a publishing schedule while evaluating software.
Community forums and tutorial availability signal how much support you'll have when you get stuck. Popular software like Premiere Pro has thousands of YouTube tutorials covering every conceivable technique. Niche tools might have sparse documentation and small user communities. That isolation doesn't mean the software is inferior, but it does mean you'll solve problems more slowly when you encounter them.
But understanding what to look for in software only matters if you know which specific tools actually deliver on these criteria without burying you in unnecessary complexity.
User Feedback
Your previous response included content that was already covered in earlier sections. Please ensure your new response:
1. Does not repeat any of these already-covered topics:
- organizing footage before editing (already covered in section 2)
- color grading and its purpose (already covered in section 2)
- audio balancing and layering (already covered in section 2)
- subtitle/caption importance and formatting (already covered in section 2)
- B-roll purpose and integration (already covered in section 2)
- transition types and when to use them (already covered in section 2)
- pacing through editing rhythm (already covered in section 2)
- project complexity matching software features (already covered in section 2)
- free vs paid software considerations (already covered in section 2)
- learning curves for different skill levels (already covered in section 1)
- desktop vs mobile editing capabilities (already covered in section 2)
- cross-platform compatibility (already covered in section 2)
- output quality and resolution requirements (already covered in section 2)
2. Focuses exclusively on NEW angles about choosing video editing tools that haven't been discussed, such as:
- Specific decision frameworks for tool selection
- How to evaluate tools based on content type (vlogs vs tutorials vs social media)
- Assessing whether you need cloud-based vs local software
- How to test and compare tools effectively
- Understanding what features you actually need vs marketing hype
- When to upgrade from beginner to professional tools
- Evaluating customer support and community resources
- Understanding licensing models and long-term costs
- How to match tools to your production volume
- Assessing integration with other tools in your workflow
Remember: This section should provide completely fresh insights about the tool selection process itself, not repeat editing techniques or general software considerations already covered.
Related Reading
- Video Editing Workflow Checklist
- PC Specs for Video Editing
- How To Start Editing Videos
- How To Practice Video Editing
- Mac Vs Pc For Video Editing
- How To Make A Video Editing Portfolio
- Video Editing Tips And Tricks
- How To Make Money Video Editing
- Best Free Video Editing Apps For Android
- How To Organize Video Files For Editing
- How To Edit Video In Google Drive
- Creative Video Editing Techniques
8 Best Video Editing Tools for Beginners
Specific tools solve specific problems. The eight platforms below represent distinct approaches to video editing, each optimized for different workflows, skill levels, and content formats. Some prioritize speed and automation. Others emphasize creative control. A few focus exclusively on short-form social content while others handle feature-length projects. Understanding what each tool does well and what it doesn't prevents you from choosing based on popularity rather than fit.
1. Crayo
Beginners struggle most with the gap between vision and execution. You know what you want the final video to feel like, but translating that feeling into timeline edits, caption syncing, and effect layering requires technical knowledge most newcomers don't have. Crayo eliminates that translation step entirely.
You start with an idea or prompt, and the platform generates a polished short-form video automatically, handling captions, visual effects, background footage, music, and pacing without requiring you to understand how any of those elements work mechanically.
This isn't simplified editing. It's a different model entirely. Instead of learning where buttons live and which settings control motion blur, you make creative decisions about tone, messaging, and clip selection.
The software handles technical execution. That distinction matters because it lets you produce publishable content immediately, rather than spending weeks learning software mechanics before you can share anything.
Who It's For
People new to video editing who feel paralyzed by the complexity of professional software will find that Crayo removes the initial friction entirely. You're creating content on day one, not studying tutorials. Short-form content creators focused on TikTok, Reels, or Shorts benefit most, as the platform's templates, captions, and pacing are optimized for vertical, attention-driven formats. Career starters and freelancers can build portfolios rapidly without technical friction slowing output. Marketers and solopreneurs who need a consistent social media presence value speed and repeatability over cinematic complexity.
Pros
Crayo's beginner accessibility stems from removing timeline complexity entirely. AI auto-generates captions, effects, music, and visuals based on your input, compressing what traditionally takes hours into seconds. The optimization for TikTok, Reels, and Shorts means output formats match platform requirements without manual adjustment. Portfolio building happens quickly because you're producing finished work immediately. No advanced editing skills are required, which means you avoid the steep learning curves that make traditional software feel overwhelming.
Cons
The automation that makes Crayo accessible also limits granular control. If you want frame-by-frame precision or highly customized effects, the platform's automated approach constrains what's possible. It's built for specific content formats, which means long-form horizontal videos or complex narrative projects fall outside its intended use case.
2. PowerDirector
PowerDirector occupies the middle ground between beginner-friendly interfaces and professional-grade capabilities. You get keyframed effects, multicam editing, VR footage support, and robust timeline tools without the interface intimidation of Premiere Pro. CyberLink has consistently added generative AI features, such as anime video effects, auto-captioning with text-based editing, and auto-face-blurring without motion tracking. The feature set rivals professional tools, but the interface remains navigable for people still learning editing fundamentals.
Who It's For
Business video producers creating presentation videos, proposals, or internal communications will find that PowerDirector delivers polish without requiring a dedicated editing specialist. Video enthusiasts who want to maximize home videos with background music, intros, outros, text, transitions, and color correction have access to everything they need. YouTubers benefit from AI video and audio generation tools, plus included stock media, which removes the need for actors or studio setups.
Pros
Project rendering happens fast, which tightens the feedback loop between edits and final output. The interface stays clear and usable despite extensive capabilities. Loads of effects and AI tools provide creative options without requiring manual implementation. Multicam and motion tracking support handle scenarios that simpler tools can't address. Built-in screen recording eliminates the need for separate capture software.
Cons
The sheer number of options can overwhelm beginners initially. Having access to every feature doesn't mean knowing which features matter for your specific project. That abundance creates decision fatigue until you develop enough experience to recognize what you actually need.
3. Apple iMovie
Simplicity defines iMovie's entire design philosophy. The Storyboard features guide you through crafting compelling digital movies from scratch, which helps when you're unsure how to structure a project. If you shoot with an iPhone, iMovie preserves the proprietary Cinematic mode effects in your footage, preserving depth-of-field adjustments and focus transitions. The app includes advanced tools like audio filters, chroma keying, and picture-in-picture, but they're tucked behind straightforward interfaces that don't demand technical expertise to use effectively.
Who It's For
Family video sharers with Apple devices who want to create vacation compilations or sports highlights find iMovie strikes the right balance between capability and accessibility. Video hobbyists get sufficient editing tools and effects to stay satisfied, with a clear upgrade path to Final Cut Pro as their skills outgrow iMovie's limitations.
Pros
The simple interface reduces cognitive load, letting you focus on storytelling rather than navigating the software. The chroma-keying tool works well for basic green-screen effects. Unique support for iPhone video features means Cinematic mode, ProRes, and other iOS-specific formats transfer smoothly. Excellent movie templates with shot guidance help structure projects when you're uncertain how to begin.
Cons
iMovie lacks multicam and motion-tracking capabilities, which limit the complexity of projects. You're restricted to two video tracks, which constrains layering and compositing possibilities compared to more advanced software.
4. Adobe Premiere Pro
Premiere Pro represents the industry standard among professional video editors. It offers collaboration capabilities, color tools, effects, and output options that professionals require for client work and studio production. Recent updates added AI audio auto-tagging, auto-captioning, text-based video editing, and a unified Color Manager, along with the ability to extend video clips using generative AI. The importing and exporting pages have become more intuitive, though the learning curve remains steep. Premiere Pro is subscription-only, which means long-term costs exceed most alternatives.
Who It's For
Collaborators working on team video projects, utilizing other Adobe Creative Cloud applications, or sending projects for client review and approval will find Premiere Pro's ecosystem integration essential. Professional video editors need all the tools and workplace compatibility that Premiere Pro provides. Serious amateurs moving up from basic apps benefit from streamlined interfaces for getting started and sharing projects, though prior studio experience isn't required. 360 VR media editors gain access to cutting, effects, titles, and transitions for 360 content, though support is limited to stitched 360 clips rather than stereoscopic 180-degree formats.
Pros
The clear, flexible interface adapts to different workflows and preferences. Responsive performance and fast rendering maintain momentum during complex projects. Auto-transcribing and text-based editing compress hours of manual captioning into minutes. The stabilization tool effectively salvages shaky footage. Unlimited multicam angles handle elaborate multi-camera setups. Organization and collaboration tools support team workflows and version control.
Cons
Some techniques require external applications like After Effects or Audition, which fragments the workflow and increase software costs. The subscription model accumulates significant expenses over the years of use.
5. Final Cut Pro
Final Cut Pro's modern interface features a trackless timeline that feels alien initially but becomes flexible once you understand its logic. The app offers comparable capabilities to competitors with a more traditional interface option as well. The iPad version dovetails nicely with the desktop application, supporting multicam editing and requiring a $4.99 monthly subscription separate from the desktop license.
Who It's For
Amateur video enthusiasts familiar with iMovie who want something more advanced should feel at home with Final Cut Pro's design language. Apple product users with iPads, iPhones, Macs, and Vision Pros benefit from enhanced input and output support across the ecosystem. Professional video editors get everything they need, plus plugin support. Some top Hollywood movies and shows are produced using Final Cut Pro workflows.
Pros
Superb organization tools keep large projects manageable. Fast performance maintains responsiveness even with complex timelines. The magnetic, trackless timeline offers flexibility once you adapt to its unconventional approach. Support for 360-degree footage and wide color spaces future-proofs projects. Excellent multicam editing handles complex multi-camera scenarios. Powerful masking and chroma keying rival dedicated compositing software.
Cons
Import and export experiences could be clearer, especially for users transitioning from other platforms. Some techniques require additional software, such as Motion and Compressor, which adds cost and complexity.
6. Adobe Premiere Elements
Premiere Elements makes advanced effects accessible by cloaking complexity behind Guided Edits and simplified features. If you want results without stressing over keyframes and timecodes (though they're available if needed), Premiere Elements delivers. A license now limits usage to three years, down from unlimited previously, but that still works out better economically than full Premiere Pro subscriptions. Premiere Elements runs on both macOS and Windows.
Who It's For
Aspirants to Premiere Pro find Premiere Elements serves as an excellent lower-cost stepping stone. Beginners in video editing can create compelling videos with intriguing effects without investing significant time in learning professional software. Memory keepers, Adobe's term for people creating quality videos of events and trips to share with family, find Premiere Elements matches their needs perfectly.
Pros
The interface resembles Premiere Pro, making eventual transitions to the professional version easier. Ample video effects and control provide creative options without overwhelming complexity. Cross-platform support works on both Mac and Windows. 360 VR editing tools handle immersive content. Good rendering speeds maintain workflow momentum.
Cons
The three-year limit on product licenses creates ongoing costs, though they are still lower than those of subscription models. No multicam support limits complex multi-camera projects.
7. DaVinci Resolve
DaVinci Resolve offers high-end video editing capabilities, with a generous free version that appeals to both amateurs and professionals. The node-based editing workflow provides ultimate control over effects, and the software includes robust audio, color grading, and keyframing tools. Recent additions include advanced AI-powered editing features, such as auto-captioning and text-based editing, that directly compete with Premiere Pro's offerings. DaVinci Resolve isn't the easiest app to learn, but its capabilities justify the investment for serious creators.
Who It's For
Hollywood wannabes and studio professionals already use DaVinci Resolve widely in the industry. Its prevalence and good collaboration capabilities make it worthwhile to learn, especially for aspiring professionals or those working in studios. Video editors on a budget appreciate the generous free version, which offers capabilities no other pro-minded alternative provides at no cost. You'll likely encounter some features requiring the paid version, but the free tier remains remarkably capable.
Pros
Plenty of editing tools provide precise control over every aspect of your project. Including motion graphics and audio editing eliminates the need for separate applications. Deep color-grading tools rival dedicated color correction software. AI features automate processes that traditionally required manual execution. Fast render performance maintains productivity during complex projects.
Cons
DaVinci Resolve requires significant system resources, which limits usability on older or less powerful hardware. The learning curve is steep, especially for the node-based workflow and advanced color grading features.
8. Microsoft Clipchamp
Clipchamp serves as the default Windows video editor and works on all major platforms. It handles basic clip joining, as well as more advanced features such as effects, captions, and background music. It's a solid choice for making screen-cam videos, with or without webcam narration. Templates for intros and outros help give projects a cohesive form.
AI-powered speech-to-text auto-captioning tools work in the opposite direction of AI voice-overs, turning captions into dialogue in many styles. According to That Creative Hub, Clipchamp's accessibility and template variety make it particularly valuable for beginners who need quick results without extensive learning. Cool effects boost production values. Much functionality is free, but subscriptions add cloud storage, more stock content, brand kit features, and increase output resolution to 4K.
Who It's For
Web-based video editors that don't require installation can be used directly in a browser on macOS or Windows PCs. Anyone with a Windows PC has Clipchamp ready for quick video editing, with integration to the OS's photo and screen capture tools, plus direct screen and webcam recording. Marketers benefit from brand kits, templates, and stock media resources. Social creators posting on Facebook, Instagram, TikTok, or YouTube find that Clipchamp simplifies creating eye-catching content with templates and stock assets.
Pros
Included with Windows eliminates installation friction. The slick interface feels modern and approachable. Generous template selection provides starting points for various content types. Stylish effects and transitions enhance visual appeal. Good text and soundtrack options support diverse creative needs.
Cons
Some features require a subscription, which limits free-tier capabilities. Templates tend to be short and don't specify shot types, which limits guidance for complex projects. Limited control over effects compared to professional software.
Traditional editing software assumes you want to learn the craft. AI-powered platforms assume you want to ship content. That philosophical difference determines which approach fits your actual goals, not your aspirational ones.
Struggling to Edit Videos as a Beginner? Crayo Makes It Easy.
If you're just starting with video editing, the gap between what you want to create and what you know how to execute feels paralyzing. You understand pacing when you watch content, but translating that instinct into cuts, caption timing, and effect placement requires knowledge you haven't built yet. The mechanical complexity of traditional software turns what should be creative decisions into technical obstacles that slow you down before you've published anything.
The friction isn't about a lack of talent. It's about workflow design. Traditional editing assumes you'll invest weeks learning where buttons live, how timelines work, and which settings control motion before you can ship your first piece of content. That model made sense when editing required specialized equipment and professional training. It doesn't make sense when your goal is consistent publishing and audience growth, not technical mastery.
Most beginners optimize for the wrong variable. They choose software based on what professionals use, then spend months studying tutorials while their content calendar sits empty. The creators who build momentum fastest aren't the ones who master every feature. They're the ones who remove friction from the path between idea and published video, focusing energy on creative choices that actually determine whether content performs.
Short-form content creation particularly suffers under traditional workflows. When you're producing daily TikToks or Reels, spending two hours manually syncing captions, searching for background footage, and layering effects makes consistency impossible. The mechanical tasks consume time that should go toward analyzing what's trending, testing different hooks, or developing your on-camera presence. Every hour spent on technical execution is an hour not spent on the creative decisions that drive virality.
Platforms like Crayo solve this by collapsing mechanical complexity into automation. You start with an idea or prompt, select a style, and the system automatically generates captions, effects, backgrounds, and music. What traditionally required frame-by-frame adjustments now happens in seconds. The output looks polished because the platform handles precision tasks that used to demand specialized knowledge. You're making creative decisions about tone and messaging while the software executes the technical implementation.
This approach doesn't simplify editing. It redesigns the entire workflow around a different assumption. Instead of treating video production as a craft requiring years of skill development, it treats it as a creative problem, with AI handling execution while you focus on what actually makes content connect with audiences. The result is that beginners produce viral-ready shorts on day one, not after months of software training.
The emotional barrier often exceeds the technical one. Opening editing software for the first time and seeing dozens of unfamiliar panels creates genuine overwhelm. That feeling is real, but it's also a signal that you're optimizing for the wrong outcome. If your goal is building an audience through consistent content, spending three months mastering advanced features delays the feedback loop that actually teaches you what works. You learn faster by publishing frequently and iterating based on performance than by perfecting technical skills in isolation.
Start making your first viral shorts today with Crayo. Turn your ideas into polished videos in minutes and tap into the TikTok Creator Fund without struggling through traditional editing workflows. The platform removes the technical friction that keeps most beginners from shipping content consistently, so you can focus on creativity rather than complex tools.
Related Reading
- Best Drone Video Editing Software
- Best Video Editing Software For Music Videos
- Best Video Editing Software For Sports Highlights
- Best Video Editing Software For Content Creators
- Best Video Editing App For Pc
- Best Paid Video Editing Software
- Best App for Video Editing on iPad
- Best Songs For Video Editing
- Best Video Editing Software For Vlogging
- Autopod Alternative