Transforming raw footage into a polished video demands more than just technical skills. Mastering various types of video editing—from basic cuts and transitions to precise color grading and audio mixing—is essential for building a strong foundation. A systematic approach helps beginners quickly learn useful techniques and build confidence in their craft.
Streamlined workflows can boost creativity by shifting focus from cumbersome technical tasks to engaging storytelling. Automated solutions not only simplify the editing process but also free up time to experiment with different styles and refine one’s portfolio. Crayo’s clip creator tool accelerates editing by handling repetitive tasks, enabling users to focus on creative decisions and secure future projects.
Summary
- Video editing can feel overwhelming to beginners due to decision fatigue, not to the difficulty of the task. When you search for editing software, you're confronted with dozens of options spanning wildly different complexity levels, from Adobe Premiere Pro to smartphone apps, with no clear signal about which matches your current skill level. HubSpot's 2023 research found that 80% of beginners abandon video projects early because they feel intimidated by technical aspects, which is a decision paralysis problem disguised as a skill barrier.
- Most beginners wait too long to show their work, practicing in private while convinced they need more polish before anyone should see their edits. The mistake isn't a lack of portfolio-worthy work; it's not recognizing that simple, well-presented projects signal competence to potential clients who aren't expecting perfection. A clean, tightly edited three-minute product demo demonstrates more capability than an ambitious five-minute narrative piece that drags in the middle.
- Audio quality determines whether people keep watching more than visual polish does. Viewers tolerate shaky footage or basic graphics, but they abandon videos with inconsistent volume, distracting background noise, or dialogue they can't understand. Treating audio as a distinct editing phase, separate from visual cuts, requires you to address sound design deliberately rather than hoping it works out by accident.
- The opening of any video determines whether viewers stay or leave. Wyzowl's research shows that 87% of video marketers report that video has increased website traffic, indicating that competition for viewer attention has intensified across all platforms. Videos that succeed hook viewers immediately through movement, surprise, or a clear promise, while those that open with logo animations or slow fade-ins lose viewers before the content begins.
- Freelance platforms like Upwork and Fiverr feel like the obvious starting point, but they're saturated with experienced editors competing on price. Your first client will come faster through direct outreach to local businesses with weak video content, offering to fix one specific problem they didn't know they could afford to solve. This approach works because you're solving a problem they have right now, not competing against fifty other editors in a bidding war.
- Crayo's clip creator tool addresses technical formatting bottlenecks that slow beginners by automating subtitle timing, transition selection, and audio balancing, allowing new editors to focus on storytelling decisions and deliver projects faster during the critical first weeks of building a client base.
Why Starting Video Editing Feels Overwhelming to Beginners
Starting video editing can feel overwhelming because beginners face many choices at once: which software to use, which features to learn first, and how to avoid mistakes that could waste hours of work. The path ahead isn't complicated, but it's obscured by technical terms, hard-to-use interfaces, and the misconception that you need to master everything before creating something good.The truth is easier: focus on one tool, learn the important basics, and start cutting clips. When users search for "video editing software," they find many options that differ in complexity. Adobe Premiere Pro is next to iMovie, while DaVinci Resolve sits beside smartphone apps. Each has different features, and none clearly indicates which one aligns with your current skill level.
This wide range of choices creates a specific kind of paralysis. There's a worry that making the wrong choice could waste time learning a tool you'll outgrow quickly, or worse, investing in software that feels too hard to use comfortably. According to HubSpot's 2023 research on content creators, 80% of beginners abandon video projects early due to intimidation from the technical aspects of editing software. This isn't a skill issue; it's decision fatigue masquerading as a technical barrier.
The usual approach is to research every option, read comparison articles, and watch tutorial previews, all to try to predict which tool will work for you six months from now.What often happens is that you spend weeks evaluating instead of editing, leaving the project you wanted to start untouched while you optimize a decision that is less important than just starting.
What is the next obstacle after choosing software?
Once you pick software, the next challenge is terminology. Terms such as frame rate, bitrate, keyframes, motion graphics, audio mixing, and color grading can be confusing. Each feature includes terms that assume you know concepts you haven't learned yet. You open DaVinci Resolve hoping to trim a clip, only to see tabs for Fairlight, Fusion, and Color.Each of these tabs stands for whole subjects that you've never studied. The feeling isn't just that it's hard to learn. Instead, it seems like you are facing a completely different language, one that you are supposed to already know. This idea makes video editing look like a skill meant for people with technical backgrounds. In reality, most of these words describe simple concepts when explained in plain language.
Many beginners react by trying to learn everything at once. They watch tutorials on color correction while still figuring out how to split clips. They look up advanced compositing techniques before mastering basic transitions. This scattered focus slows their progress and makes mastering this skill feel impossibly distant. However, with our clip creator tool, you can easily simplify your video editing experience.
How does fear impact beginners' editing process?
A quieter obstacle that often goes unacknowledged is the fear of ruining a project with a single misstep or unintended consequence. After spending hours putting together footage, the thought of making a mistake that cannot be fixed can feel paralyzing.Beginners often hesitate before every decision, second-guessing whether a transition is too abrupt, whether an audio level is too loud, or whether they have just destroyed something that cannot be recovered.
This fear often leads to over-editing. You tweak the same three-second segment for twenty minutes, trying to achieve perfection before moving on. Or it leads to giving up: the pressure to get everything right on the first try makes finishing feel impossible, so you stop before you complete the project.
What beginners often overlook is that professional editors make dozens of small mistakes with each project. The key difference is not perfection but rather developing workflow habits that make errors easier to fix, along with enough practice to spot problems more quickly. This skill set improves only by completing projects, not by avoiding mistakes.Our clip creator tool ensures a smoother editing process, helping you embrace creativity without the fear of irreversible mistakes.
How can automation help beginners?
Platforms like Crayo help by automating the formatting and styling choices that beginners often struggle with. When tasks such as subtitle timing, transition selection, and audio balancing are automated, creators can focus on the creative choices that really count: which clips tell their story and how they fit together. This removes the technical anxiety that keeps people stuck in endless revisions, enabling them to move forward.
Video editing has a reputation issue that comes from its professional background. For many years, editing required expensive equipment, specialized training, and extensive technical knowledge of codecs, rendering pipelines, and hardware specifications. That background still affects how people learn today, even though modern tools have made most of that complexity easier.
Beginners see terms like "rendering" and "export settings" and assume they need to understand the underlying technical systems before they can create anything good. They believe creativity comes after technical mastery, but often the opposite is true: knowing what you want to create makes the technical aspects easier to understand because you have context for why they are important.
What is the most effective learning path?
This often creates unnecessary delays. People tend to wait to start until they have finished courses, read manuals, and feel ready by some unclear standard. Meanwhile, the best way to learn is usually the opposite: begin with a simple project, encounter a specific problem, identify the one technique that fixes it, and then move on to the next challenge. Skills are built through iteration, not preparation.
The learning curve worsens as beginners use more advanced software. Tools like Adobe Premiere Pro and DaVinci Resolve offer advanced features, but their layouts reflect that complexity. Menus are nested within menus, and features are hidden behind tabs and panels. What should be a simple task, like adding text to a video, often requires navigating layers of options that beginners don’t yet understand.
This complex interface sends a wrong message: that it takes weeks or months just to learn the basics. In reality, it's possible to make compelling videos using maybe 10% of any professional editing software's features. The other 90% is for special situations that won't be faced until much later. However, when looking at an overwhelming interface, that difference isn't easy to see. Our clip creator tool simplifies the process, allowing you to focus on the essential functions of video editing.
What common mistakes do beginners make?
A common pattern is that beginners often get stuck in tutorial loops, watching hours of training content before trying their first edit. They aim to front-load knowledge to avoid feeling lost later. However, what really helps build skills faster is limiting the scope: pick one project type, like a simple vlog, a product demo, or a short montage, learn only the features needed for that specific project, and then finish it. Confidence comes from completed work, not just consumed content.
The main mistake is treating video editing as a technical skill to master before creating, rather than a creative skill developed through making. There's no need to know every feature, memorize every keyboard shortcut, or produce perfect work on the first try. The key is to create something, review it, identify what doesn't work, and learn the specific technique that solves that particular problem.
This method changes the way of learning. Rather than studying editing in general, beginners face real challenges in real projects. That context helps techniques stick, as people come to understand not just how they work, but also when and why to use them. For example, a tutorial on keyframe animation might seem unimportant until you're trying to move text across the screen and run into problems.
Why is starting simple important?
Starting simple means choosing tools that match your current skill level, not the level you want to reach later. A beginner-friendly editor like our clip creator tool helps you finish projects and can create more excitement than professional software that might leave you stuck while setting things up. You can always switch to more advanced tools later, once you have developed enough understanding to identify which features you need.
Knowing why it's important to start simple doesn't take away the frustration of making mistakes at first. This is especially true when you're trying to get your first client, as every mistake can feel like proof that you're not ready.
Related Reading
- Types of Video Editing
- Long Does It Take to Edit a YouTube Video
- How Long Does It Take to Edit a Music Video
- What Is an Overlay in Video Editing
- Is CPU or GPU More Important for Video Editing
- Can I Edit a YouTube Video After Posting
- Is Video Editing a Good Career
- Beginner’s Guide to Video Editing
- Video Editing Basics
The Mistakes That Keep Beginners from Landing Their First Project
The gap between learning to edit and getting paid to edit isn't about skill level. It's about visibility, positioning, and understanding that your first projects won't come from being the best editor; they'll come from being the most accessible one. This accessibility is supported by evidence that you can deliver value on time.
Most beginners wait too long to show their work. They practice in private, editing clips that never leave their hard drive. They are often convinced they need more polish before anyone should see what they've made.While this instinct protects their ego, it kills momentum. Clients can't hire someone whose work they can't see. The longer you delay building a portfolio, the longer you remain invisible in a field where visibility determines opportunity.
When you're stuck at square one, unable to prove your abilities without a portfolio, the frustration feels like a loop. You need experience to get clients, but you can't get clients without experience. This is the version everyone talks about. What often gets missed is that you already have the raw material for a portfolio sitting in your practice files.Those three videos you edited for fun? They count. That montage you made of vacation footage? It shows timing, pacing, and shot selection. Our clip creator tool can help you polish these projects and present them professionally.
The mistake isn't that you lack portfolio-worthy work; it's not realizing that simple projects, when shown well, signal competence to potential clients who aren't expecting perfection. A clean, tightly edited three-minute product demo demonstrates more capability than an ambitious five-minute narrative piece that drags in the middle.Clients hiring beginners aren't looking for your artistic vision; they're checking whether you understand cuts, transitions, and basic storytelling flow.
How to create an effective portfolio?
After working with creators who have gone from having no clients to getting regular work, it’s clear: portfolios don’t have to be impressive; they just need to be there. Upload your practice edits to a simple website or YouTube channel. Write two sentences about what you want to achieve with each piece. This method is sufficient to demonstrate the shift from "I'm learning to edit" to "here's what I can do." The way potential clients perceive you changes immediately.
Why does visibility matter?
Focusing solely on skill development without considering how to promote yourself can lead to discouragement. Great work often goes unnoticed, stored in folders labeled "Portfolio Ideas," and never gets shared. The belief is that quality speaks for itself and that if you become skilled enough, opportunities will come your way. Sadly, this isn't true.
Starting to market yourself as a beginner doesn't mean you have to run ads or create a fancy personal brand. It means getting involved in places where editing help is wanted. For example, you can join local business groups on Facebook, comment on Reddit threads that are asking for video work, or message small YouTube channels directly.You could offer to edit one video for free in return for a testimonial. These aren't difficult strategies; they are ways to get noticed because many beginners avoid them. The unease often stems from concern about bothering others or overstating your skills. This worry leads to silence, while less-skilled editors, who are more confident, take on projects you are ready to handle. Clients aren't looking for the best editor; they want someone who is reliable, responds to messages, understands their needs, and delivers files that work as expected.You can become that person right now, but only if people know you are out there. Our clip creator tool can help you showcase your work effectively.
How can tools help beginners?
Platforms like Crayo help reduce the technical anxiety that often leaves beginners unsure about taking on projects. When subtitle timing, transitions, and audio balancing are handled automatically, users can confidently take on work, knowing formatting details won't hold them back. This new confidence improves communication with potential clients, which is more important in early conversations than one's edited resume.
Why is underpricing a common mistake?
Many beginners underprice their services, thinking that lower rates will help them get more clients. The logic seems reasonable: since you're just starting out, you charge less to make up for your lack of experience. What actually happens is that you create expectations that are difficult to meet. A 2019 study by freelancers union found that over 60% of freelancers who underpriced their services at the start ended up working more hours and earning less than those who priced their work at market value from the beginning.
Charging $20 for a video that takes six hours to edit doesn’t make you more appealing to clients. Instead, it shows clients that your time isn't valuable. This view leads clients to take deadlines lightly and ask for endless revisions. As a result, you might feel like you’re working harder for less money than if you had just set a fair rate and taken on fewer projects.
What is the better pricing approach?
The better approach is to research what local editors charge for similar work. After gathering this information, price yourself at the lower end of that range as you build experience. For example, if standard rates for a two-minute promotional video are $200 to $400, consider charging $150. Our clip creator tool can help streamline your editing process and improve efficiency.
This price is low enough to show that you're building your portfolio, but high enough to attract clients who respect your time. Clients willing to pay $150 are very different from those seeking $20 editors; they typically have budgets, deadlines, and professional expectations that support a more sustainable working relationship.
How does perfectionism hinder progress?
The desire to achieve perfection before delivering can create a specific paralysis. You may spend twenty minutes tweaking a three-second transition, trying to achieve something hard to define. As a result, the project feels never-ending because you always find small details to change. This endless loop of revisions stops you from finishing your work, so you don't get the practice that actually helps improve your skills.
Clients experience your edits differently from how you do. They do not see the transition you worried about or notice the audio adjustment you spent an hour perfecting. Instead, they focus on whether the video clearly communicates their message and keeps people’s attention. Delivering a good project on time builds greater trust than delivering a perfect project late, because reliability matters more than polish in professional relationships.
What happens when you don’t finish projects?
Among beginners, the pattern is that many have edited numerous practice videos but have never completed a single client project because nothing was ready to deliver. On the other hand, editors with weaker technical skills but stronger completion habits create portfolios, secure testimonials, and build reputations. Finished work, even if it’s not perfect, helps them move forward. In contrast, pursuing unfinished perfection can lead to getting stuck. To support this process, consider using our clip creator tool to streamline your editing.
Why do you need to accept smaller projects?
Expecting high-paying projects right away can lead to disappointment. Many people believe that if a freelancer is good enough, clients will recognize their value and pay accordingly. However, that’s not how trust works in creative fields.Clients with large budgets want to see evidence of prior success, references from previous work, and assurance that freelancers work professionally. Without that proof, it can be hard to earn their trust from the beginning.
Declining smaller jobs because they seem below one's skill level slows the development of the experience needed to take on bigger projects. For example, a $100 job editing a local restaurant's promotional video helps develop crucial skills such as communicating with clients, managing feedback, delivering files, and meeting deadlines under pressure.
These workflow skills are often more valuable than technical skills when moving into larger roles. Additionally, the restaurant video can serve as a portfolio item, a reference, and proof that the freelancer can handle projects professionally.
Small projects are steps forward, not distractions. Doing three $150 projects provides a better understanding of the editing business than waiting three months for a single $1,000 project that might never come. The reputation built from steady, small work creates referrals that can lead to bigger opportunities.Clients talk to each other; for instance, someone hired to edit their YouTube intro might mention the freelancer's name to another person planning a commercial shoot. Our clip creator tool helps freelancers streamline their workflow, making it easier to manage multiple smaller projects effectively.
How to choose the right small projects?
Knowing which small projects to take on and how to turn them into portfolio pieces that attract better clients requires a strategy most beginners lack. Using our clip creator tool can streamline the process and help you showcase your work more effectively.
10 Ways to Start Editing Videos
The fastest way to start editing videos is to focus on workflows, not features. Choose software that matches your current needs instead of your future goals. Learn the five core functions that are common to every project: import, cut, arrange, export, and basic audio adjustment. Complete your first edit within 48 hours.Most beginners waste weeks comparing tools or watching tutorials instead of making cuts and learning from what doesn't work.
1. Master the Timeline Before You Touch Effects
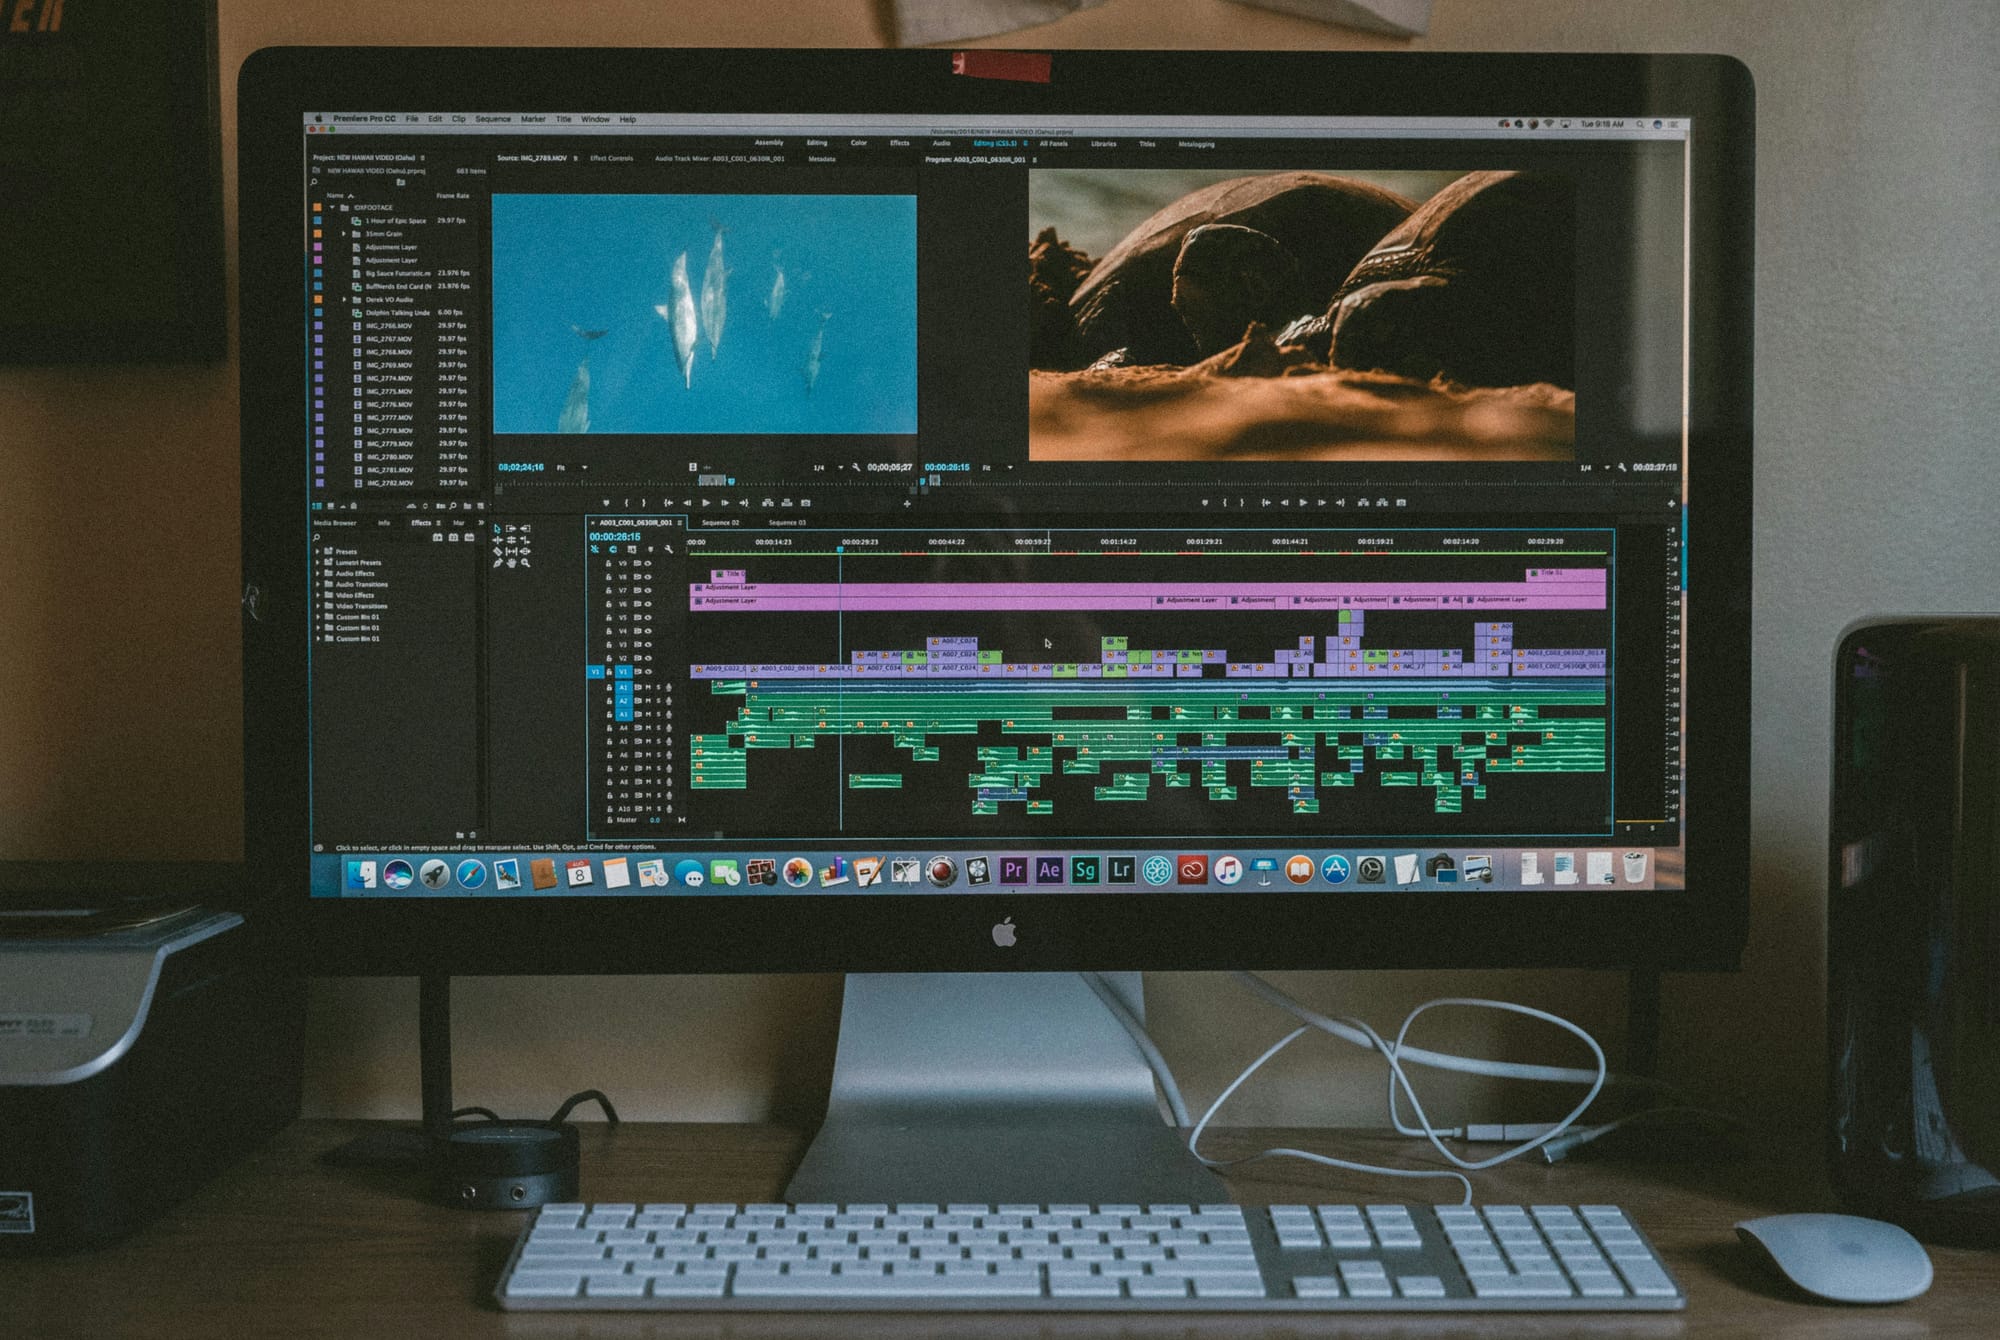
The timeline is where all edits are placed. It is the horizontal strip that shows clips in order, so understanding how it works is more important than knowing any specific transition or filter. When you first open editing software, ignore the effects library and color grading panels. Focus on becoming comfortable with moving clips along the timeline, splitting them at specific points, and adjusting their lengths.
This may sound simple, and it is. However, beginners often skip this important foundation. They jump straight to effects and transitions because those seem more creative. In doing so, they make edits on weak ground and struggle with pacing and flow because they have not learned to control clip duration and arrangement. Remember, the timeline represents rhythm, while everything else acts as decoration.
Practice by taking a single three-minute video and cutting it down to 90 seconds. Focus solely on cuts, without effects or music. This exercise teaches more about pacing than any tutorial on advanced techniques. The time limit forces you to decide what really matters, helping develop the editorial instinct that sets good editing apart from just putting clips together at random.
2. Use Keyboard Shortcuts From Day One
Mouse-based editing feels easy at first. You click the split tool, drag it to the right spot, and click again to cut. It works, but it becomes very slow when you're working on real projects with many cuts. Keyboard shortcuts change editing from a careful process into a smooth one, where your hands move faster than your thoughts.
The five most important shortcuts are: play/pause (usually the spacebar), split clip (often Cmd+K or Ctrl+K), undo (Cmd+Z or Ctrl+Z), zoom timeline in/out (+ and - keys), and save (Cmd+S or Ctrl+S). Learn these in your first session.Make yourself use them even when clicking seems faster. You will build muscle memory in a few hours, and the speed you gain will carry over to every project you work on afterward.
Many beginners avoid shortcuts because remembering commands feels like extra work when they are already too busy. That is the wrong way to think. Shortcuts reduce cognitive load by automating simple actions, allowing you to focus more on creative decisions.An editor who can split clips without thinking about the mechanics is the one who sees when a scene is too long or when a cut feels awkward. To enhance your editing experience, consider using our clip creator tool, which streamlines video editing and helps you manage clips smoothly.
3. Build a Simple Template for Recurring Projects
If you're making similar videos repeatedly, such as weekly vlogs, product reviews, or tutorial series, using a template saves setup time and keeps content consistent.A template is a project file that’s already set up with your usual intro, lower-third text style, background music, and export settings. You can copy this template for each new project instead of starting over each time.
This method is important because decision fatigue builds up faster than people think. Every time you think, "Which font should I use for this title?" or "What export resolution should I pick?", you’re using mental energy that could go towards storytelling. Templates change those repeated choices into defaults, speeding up production and helping create a consistent style in your work.With our clip creator tool, you can streamline your editing process even further. It enables you to focus more on creativity rather than getting bogged down in repetitiveness.
A common mistake beginners make is thinking that templates limit creativity. In reality, they do not. Templates handle the consistent, routine tasks, allowing you to focus your creative energy on areas that should change, such as pacing, shot selection, and narrative structure.According to Wyzowl's 2025 video marketing report, 86% of businesses use video as a marketing tool. This shows the growing need for consistent, professional-looking content. Templates help you meet this need without changing your workflow each time. Our clip creator tool allows you to effortlessly apply creative ideas while maintaining a professional touch.
4. Learn to Edit Audio Separately From Visuals
Audio quality is what keeps people watching, more than how nice the video looks. Viewers can handle shaky footage or basic graphics, but they will leave videos if the volume is inconsistent, there is distracting background noise, or they can't understand the dialogue. However, many beginners think about audio last and only adjust levels when something sounds obviously wrong.
A better approach is to treat audio as its own track during editing. After you arrange your visual cuts, mute the video track and listen only to the audio. This will help you quickly find issues you might have missed while watching. For example, awkward silences can feel longer than they are; volume levels can vary significantly between clips; and background noise can clash with dialogue. Resolve these issues before adding music or sound effects.
This separation helps you think more carefully about sound design. For example, consider how background music adds emotion without overwhelming the speech. Consider when to use background sounds instead of silence. These questions aren’t just technical; they are about storytelling and how they affect how viewers see your work. Treating audio as a separate editing phase helps you think through these questions rather than leaving them to chance.
5. Use Jump Cuts to Fix Pacing Problems
Jump cuts, where a section of footage is removed, and the remaining pieces are joined directly, can feel unnatural to beginners. They create a noticeable shift in the subject's position or in the scene's continuity. Traditional film editing taught that these breaks should be hidden through cutaways or transitions.However, modern short-form content has flipped that rule. Now, jump cuts signal energy and pace. They keep viewers engaged by removing dead air and hesitation. When editing interview footage, vlogs, or tutorial content, jump cuts can compress ten minutes of rambling speech into three minutes of focused information.This approach doesn’t hide mistakes; it respects the viewer's time by eliminating pauses, filler words, and tangents that naturally occur in unscripted speech, but can drag when watching edited video. The technique is simple: watch your footage and mark every spot where the speaker pauses for longer than two seconds or repeats themselves. Then cut those sections out. Don't worry about smooth transitions; the abrupt cuts maintain forward momentum.Platforms like Crayo automate this process for short-form content by identifying natural cut points and removing dead space. This allows you to focus on arranging the best moments instead of hunting through footage for unnecessary pauses.
6. Start With One Video Type and Repeat It
Trying to edit every kind of video at once: tutorials, vlogs, montages, and interviews, can spread learning too thin across many areas. This makes it hard to get really good at any one type, since you're always adapting. A faster way to improve is to choose one video type, edit it five times, and see what improves from the first version to the fifth.
This repetition helps you develop pattern recognition. By the third tutorial video, you will naturally know where to place text callouts, how long to show screen recordings, and when to speed up sections that might bore viewers. These instincts don't come solely from learning techniques; they are built by completing projects and seeing what works.A beginner who has edited five product reviews understands the format better than someone who has edited only one review, one vlog, one montage, and two tutorials. Additionally, using our clip creator tool can enhance your editing workflow, making it easier to apply the techniques you've learned.
Additionally, this focus encourages deeper problem-solving rather than quick fixes. If your first tutorial video has unclear audio, you can learn how to clean it up for your second. If your third video's pacing is slow, you can try tighter cuts in the fourth. Each version builds on the previous one, leading to real skill growth rather than just a basic understanding of different formats.
7. Export Low-Resolution Previews for Feedback
Waiting for full-resolution exports before sharing work with clients or collaborators causes long delays. A five-minute 4K video might take 20 minutes to export and another 10 minutes to upload. If the client requests changes, which they likely will, you're looking at another 30-minute cycle. Three rounds of revisions can suddenly eat up two hours of wasted time where you're just waiting for files to process.
The solution is to export low-resolution preview files for feedback rounds. A 720p version of that same video exports in three minutes and uploads in two. The quality is sufficient to review pacing, content, and style, and the file size is small enough to make changes quickly. You export the final high-resolution version only after all feedback has been incorporated and approved.
This workflow change may seem small, but it significantly improves your efficiency when working with clients. Instead of one feedback cycle per day (limited by export and upload time), you can manage three or four. That responsiveness makes you easier to work with, which is more important for retaining clients than technical skill alone.The editor who delivers revised versions within hours builds better relationships than the one who takes days because they're waiting for 4K exports. Our clip creator tool further enhances the process by streamlining multi-resolution exports.
8. Study the First Ten Seconds of Viral Videos
The opening of a video determines whether viewers stay or leave. According to Wyzowl's research, 87% of video marketers report that video has increased website traffic. This shows that competition for viewers' attention has intensified across all platforms.Successful videos grab attention right away with movement, surprise, or a clear promise of what to expect. Watch the first ten seconds of videos that have millions of views in your field. Focus only on those opening moments, not the whole video. Consider what is shown first and how quickly something happens.Notice the questions or tension created that make you want to keep watching. This step is not about copying specific techniques; it’s about training yourself to notice what grabs attention before viewers scroll past.
Use that understanding to inform your edits. If your video starts with five seconds of a logo animation or a slow fade-in, you risk losing viewers before your content even begins. Instead, cut that introduction. Start with action, a provocative statement, or the most interesting moment from your footage.Once you have the viewer’s attention, you can set the context and create the right mood. With our clip creator tool, you can seamlessly integrate these strategies to optimize viewer engagement.
9. Learn One New Technique Per Project
Trying to master everything at once creates overwhelm and doesn't help you become competent. You might watch tutorials on color grading, motion graphics, audio mixing, and advanced transitions, but when it's time to edit, you might struggle to remember which technique to use. The information doesn't stick because you're consuming it faster than you can practice.
A better approach is deliberate, step-by-step learning. Focus on one new technique for each project. For instance, if you're on project three and haven't used keyframe animation yet, make that your main focus for this edit. Watch just one tutorial on keyframes, then find a specific spot in your current project to apply it.You could animate text sliding in from the side; that's enough. For your next project, pick another technique to learn. Our clip creator tool simplifies the process by guiding you through each stage.
This method helps build skills that grow over time. By project ten, you've practiced ten techniques in real situations, which helps you remember and see how useful they are. The beginner who tries to learn ten techniques before starting project one ends up stuck in tutorial watching, never developing the deeper understanding that comes from using knowledge in real work.
10. Track What Takes Longest and Automate It
After completing three or four projects, it becomes clear that some tasks take up too much time. This could include adjusting subtitle timing, selecting appropriate background music, or exporting versions for different platforms. Any task that requires many hours without adding creative value may be a good candidate for automation or tool support.
You only notice these issues after you finish projects and track where your time goes. Beginners often guess what takes too long by what feels boring, but that's not always accurate. A task that seems dull might only take five minutes, while one that seems quick could actually take 30 minutes without you realizing it. Tracking actual time, even with rough notes like "spent 45 minutes on audio levels", helps show the true problem areas.
Once the slow tasks are identified, you can tackle them effectively. For example, if it takes an hour to time-stamp subtitles for each video, using tools that automatically create and sync captions could save 50+ hours per year.Also, if searching for music takes 20 minutes per project, assembling a collection of pre-cleared tracks can eliminate that decision-making burden. These improvements might not seem important for the first or second project; however, they can become critical by the twentieth project, when the buildup of inefficiencies can cost you days of productive time.
What challenge do editors face in marketing their skills?
While knowing these techniques is valuable, it means little if one cannot convince others to pay for them. This task requires a different skill set: one that most tutorials overlook.
Related Reading
- Video Editing Workflow Checklist
- PC Specs for Video Editing
- How To Practice Video Editing
- Mac Vs Pc For Video Editing
- How To Make A Video Editing Portfolio
- Video Editing Tips And Tricks
- How To Make Money Video Editing
- Best Free Video Editing Apps For Android
- How To Organize Video Files For Editing
- How To Edit Video In Google Drive
- Creative Video Editing Techniques
How to Land Your First Video Editing Client in 7 Days
Getting your first client isn't just about being the best editor; it's about being visible, responsive, and clear about what you can do. If you focus on action rather than preparation, you have seven days to create a basic portfolio, contact 20 potential clients, and complete at least one small project. Our clip creator tool can help streamline this process, allowing you to showcase your work efficiently.
The real problem isn't your skills; it's that no one knows you are out there, and you haven't made it easy for them to say yes.
Build a Portfolio That Proves You Can Finish Work
Your portfolio doesn't need to show award-worthy creativity; it should show that you understand pacing, can deliver clean exports, and are committed to finishing a project. Three completed videos are more important than one ambitious piece that shows every technique you know.
Choose simple formats that businesses really need, like a 60-second product showcase, a social media announcement, or a testimonial edit. If original content is unavailable, consider using stock footage. The goal is to show that you can take raw material and turn it into something watchable within a clear structure. Clients hiring beginners value reliability more than artistry.
Upload these videos to YouTube or Vimeo as unlisted links. Write two sentences under each video to explain what you were trying to achieve. This is your portfolio: it exists, is accessible, and provides potential clients with enough evidence to consider hiring you. Additionally, using our clip creator tool can help you craft engaging content from raw footage, enhancing your portfolio.
Offer a Specific Service to a Specific Audience
Positioning yourself as a video editor makes you less noticeable in a crowded market. However, if you position yourself as the person who edits real estate walkthrough videos for agents in Phoenix, you become memorable to those who need that service. A narrower focus doesn’t limit your chances; it creates clarity that makes it easier for potential clients to decide.
Pick one type of video you’ve practiced and one local industry that needs it. For example, real estate agents need property tours, fitness coaches need workout demos, and local restaurants need menu highlight reels. While these projects may not seem exciting, they reflect consistent client needs with both budgets and deadlines. With Crayo's clip creator tool, you can easily establish a strong online presence tailored to your specific audience.
When you reach out, your message becomes specific: "I edit 90-second property walkthrough videos that help listings get more views on Zillow." This clarity helps you stand out from the noise of generic pitches. The agent doesn’t have to guess how you might help; you've already explained exactly what you do and who it’s for.
Use Direct Outreach Instead of Waiting for Platforms
Freelance platforms like Upwork and Fiverr may seem like the obvious starting point, but they are filled with experienced editors competing on price. Your first client will likely come faster through direct outreach to those who aren't actively looking for editors yet. Find local businesses with weak video content and offer to solve one specific problem.
Scroll through Instagram accounts for gyms, salons, or retail shops in your area. Look for businesses posting videos with no captions, poor audio, or awkward pacing. Send a direct message: "I noticed your recent product video. I edit short-form content for local businesses and could add captions and tighten the pacing to boost watch time. Would you be open to a quick call?" Half may not respond, about a quarter will say no, leaving the rest as potential clients.
This approach is effective because it solves a problem they didn’t know could be fixed affordably. They are not comparing you to fifty other editors; instead, they are weighing your offer against doing nothing, which makes your pitch much more attractive.With Crayo's clip creator tool, you can efficiently enhance your video content and address these issues.
Price Low Enough to Remove Risk, High Enough to Signal Value
Charging $50 for a video that takes four hours to edit does not make you hireable. It makes clients wonder what is wrong with your work. Pricing too low shows inexperience, which can scare off the clients you actually want, those with budgets and professional expectations.
Research what local editors charge for similar work. Then price yourself at 60% of that rate while you build testimonials. For example, if standard rates for a two-minute promo video are $300, charge $180. This price is low enough to show that you are gaining experience, yet high enough for clients to take the project seriously and respect your time. The psychology of pricing matters more than beginners expect.
Tools like Crayo help you deliver faster by automating subtitle placement, transitions, and audio balancing. This means you can confidently accept projects, knowing the technical formatting won't delay your timeline. Such speed allows you to take on more clients in your first month without sacrificing quality, accelerating your reputation-building.
Deliver Faster Than Expected and Ask for Testimonials Immediately
Underpromise on the timeline and overdeliver on speed. If a project is expected to take three days, tell the client it will take five and deliver it in two. This gap creates goodwill that leads to referrals and repeat work. Clients remember editors who make their lives easier; delivering early is the easiest way to achieve that.
As soon as the final file is sent, ask for a testimonial, not next week or after they've had time to look it over, but right then, while they feel relieved that the project is done and are happy with the result. Write the request simply: "If you're happy with the video, would you mind writing two sentences about working together? I'm building my client list, and testimonials help a lot."
Most clients will say yes because the request is small and the timing is right. These testimonials become the social proof that makes your next five pitches easier. A portfolio shows editing skills, while testimonials highlight your ability to work with clients professionally, which is an important factor when someone is deciding whether to trust you with their project.
Related Reading
- Best Drone Video Editing Software
- Best Video Editing Software For Music Videos
- Best Video Editing Software For Sports Highlights
- Best Video Editing Software For Content Creators
- Best Video Editing App For Pc
- Best Paid Video Editing Software
- Best App for Video Editing on iPad
- Best Songs For Video Editing
- Best Video Editing Software For Vlogging
- Autopod Alternative