Skilled editing can transform hours of raw footage into a compelling story by refining transitions and pacing. A well-executed sequence engages audiences, turning casual viewers into loyal followers. Recognizing the different types of video editing boosts storytelling and ensures every cut and effect contributes meaningfully to the narrative.
Modern tools simplify tasks that once required intricate manual tweaks, handling everything from automatic captions to smart cuts. Advanced techniques paired with practical video editing tips and tricks allow creators to produce polished videos without excessive technical hurdles. Crayo’s clip creator tool streamlines the editing process, freeing up creative energy while ensuring professional results.
Summary
- Modern video editing software removes the technical barriers that once required months of training. Tools like DaVinci Resolve, CapCut, and iMovie offer intuitive interfaces that let beginners trim clips, add music, and apply effects without a manual, making polished content achievable in days rather than months. A 2023 Skillshare study found that learners gain confidence in video editing after just 20 to 40 hours of practice, proving the learning curve flattens quickly when you focus on repeating core actions like cutting, transitioning, and adding audio rather than memorizing complex features.
- Inconsistent audio levels destroy otherwise strong videos faster than visual imperfections. When background music drowns out dialogue or sound effects punch louder than narration, viewers click away within seconds because constantly adjusting volume breaks immersion. Mixing with headphones instead of laptop speakers catches these imbalances, and watching audio meters as you scrub through your timeline prevents levels from spiking into distortion before you export.
- According to Insivia, viewers retain 95% of a message when watching a video, compared to 10% when reading it in text, making subtitles critical retention tools rather than just accessibility features. Positioning captions so they don't block faces or key visuals, and keeping font choices simple (two typefaces maximum) prevent visual clutter while keeping viewers engaged even when they're watching on mute.
- Syncing edits to music beats transforms how videos flow, but most creators edit footage first and then add music, hoping it fits. When cuts miss the beat by even half a second, the disconnect jars viewers out of the experience. Dropping markers on every major beat before cutting and aligning transitions to those points takes five extra minutes upfront, but saves hours of frustration spent nudging clips frame by frame to retrofit rhythm into a structure that wasn't built for it.
- The video editing AI sector is growing at an annual rate of 17.2% according to Electro IQ, driven by creators who want speed without sacrificing quality. This growth reflects how accessible editing has become as tools meet creators where they are, collapsing the barrier to entry for people who never would have tried editing five years ago, when professional software and steep learning curves dominated the landscape.
- Crayo's clip creator tool applies proven short-form editing techniques automatically, generating captions with proper timing, syncing effects to audio without manual keyframing, and formatting content for TikTok, Reels, or Shorts so creators focus on strategy instead of spending hours executing the same techniques frame by frame.
Is Video Editing Easy for Beginners
Video editing is easier for beginners now than ever before. Modern tools like DaVinci Resolve, CapCut, and iMovie offer user-friendly interfaces that let users trim clips, add music, and apply effects without needing to read a manual.Because of this, you can create polished content in just days instead of months, with the software handling the tricky parts while you focus on storytelling. Our clip creator tool simplifies this process even further, allowing you to focus on your creativity.
This change occurred as faster platforms began replacing complex professional software. According to the ClipShort Blog, 90% of beginners struggle with video editing in their first month; however, this difficulty stems from outdated ideas about what you need to edit.You don't require a film degree or expensive equipment anymore; what really matters is knowing your message and being open to trying out a few basic techniques.
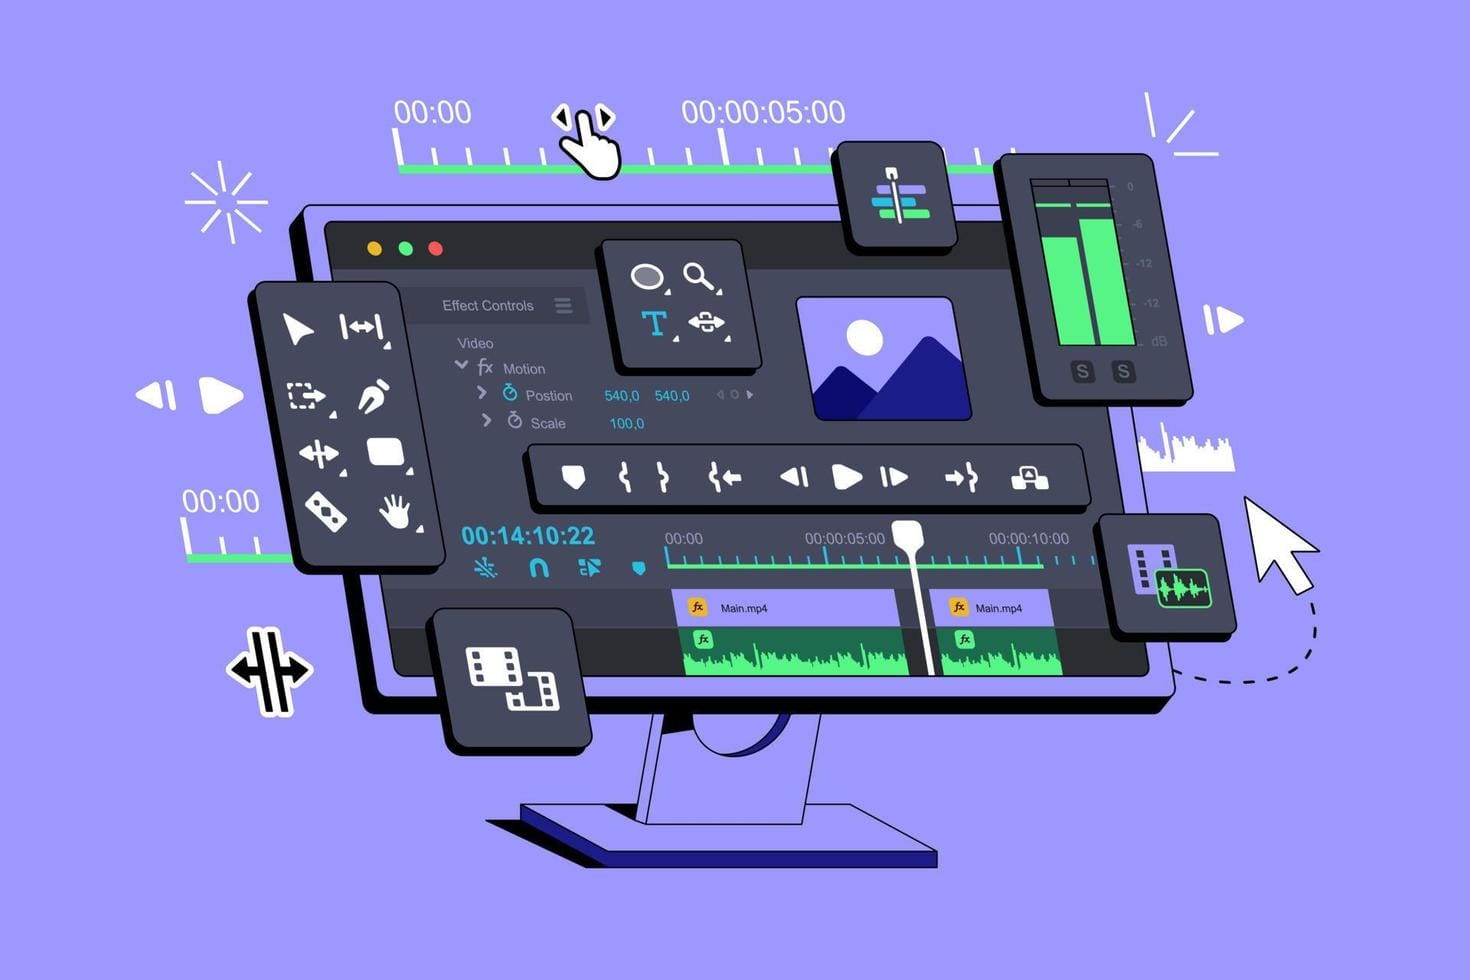
Most editing apps now help you through the visual process. Footage is shown on a timeline, making it easy to drag clips into place and see changes as they happen.CapCut and iMovie reduce confusion by providing templates that show exactly where to put your intro, B-roll, and call to action. This means you aren't just staring at a blank screen, unsure of where to start.
How can quick wins help beginners?
Quick wins build confidence faster than theory ever could. For example, trimming a clip to remove dead air, adding a song that matches your video's energy, or layering text over an important moment can be done in just minutes.These actions quickly improve how your content feels. Seeing real progress instead of feeling frustrated keeps you motivated to keep going, preventing you from quitting your project halfway through.
What is text-based editing, and how does it work?
Text-based editing has changed how people who think in words, rather than waveforms, work with video content. Users can upload their videos, and the software changes them into text. This makes it easy to edit by deleting sentences or rearranging paragraphs. If someone says "um" three times in a row, they can just highlight those words and hit delete.The video updates automatically, which makes the process much faster than going through the footage to find mistakes. This method feels less technical because it uses language that users already understand.
What can we learn from successful creators?
Peter McKinnon started with simple tools and a camera. He built an audience of millions in just two years by focusing on storytelling rather than on perfecting every detail. His early videos might not have been perfect, but they resonated with viewers because he valued energy and pacing more than getting the colors just right. This trend is common among successful creators: they learn enough to communicate clearly and get better as they continue.
How long does it take to build confidence in video editing?
A 2023 Skillshare study found that learners gain confidence in video editing after just 20 to 40 hours of practice. This amount of time translates to a few weeks of evening work rather than a long-semester course.The learning process gets easier quickly because people often repeat a small set of actions: cut, transition, add audio, and export. Mastery is achieved through repetition, not by memorizing many keyboard shortcuts.
Why are video editing skills relevant for marketers?
Marketers report that 72% see higher engagement when using video. This means that beginners are not just practicing a hobby: they are building a skill that drives results. Knowing how to capture and hold attention helps in making money from content faster.Editing teaches important techniques. These include knowing when to cut to keep the momentum, when to add music to shift the emotion, and how to shape a story so viewers stay engaged until the end.
How does free software impact entry barriers?
Free software eliminates the cost barrier that previously blocked entry. DaVinci Resolve offers top-quality color correction and audio mixing without a subscription fee. CapCut offers popular templates and automatic captions that help your videos feel up to date without design skills. iMovie makes it so easy to use that you can edit on your phone while commuting.
What common mistakes do beginners make?
A common approach involves downloading software, watching a 45-minute tutorial, and trying to remember every feature before starting to edit. As the project grows and more clips, transitions, and effects are added, it's easy to forget many steps. Rewinding the tutorial and pausing a lot leads to spending more time learning the tool than making the video. This can slow down the process because you try to master everything at once rather than fixing problems as they occur.
How can tools simplify the editing process?
Platforms like the clip creator tool make boring tasks easier by automatically making captions, cutting out silences, and adding effects very quickly. This lets creators focus on finding the best clips and trends rather than manually adjusting every single frame. Because of this, creators can turn hours of editing into just a few minutes, since the tool removes the hassle between the idea and thefinished video.
What Should Beginners Focus on for Their First Video?
Beginners need three important things: a clear idea of what they want to say, good footage to support it, and the willingness to publish something that isn't perfect. Many newcomers spend too much time on their first video, trying to make it perfect before sharing it with anyone. This perfectionism can slow down their progress. It's better to learn quickly by finishing and shipping, rather than changing things over and over.If you're looking to streamline your process, our clip creator tool can help enhance your video's quality with ease.
How do short projects benefit beginners?
Starting with short projects is beneficial. For example, editing a 30-second clip before working on a 10-minute video lets you learn in a focused way. You'll see how cuts affect pacing, how music can change the tone, and how text highlights ideas without overwhelming the viewer.Each short project teaches lessons that you can use right away in the next one. Plus, you get feedback quickly because you're not waiting days to see the results. If you're using a clip creator tool, you'll find that refining your skills becomes even easier with immediate editing options at hand.
What trends are emerging in AI-powered editing?
The growth happening in AI-powered editing shows how easy this skill has become. Electro IQ reports that the video editing AI sector is growing at an annual rate of 17.2%. This is driven by creators who want speed without giving up quality.This growth is happening because people who would never have tried it five years ago are now editing. The tools are designed for everyone, and the barrier to entry has dropped.
What are the limitations of learning video editing?
Knowing the basics only gets a person so far. Continuous repetition of mistakes can lead viewers to click away. Using a clip creator tool can significantly streamline this learning process, helping users produce more engaging content while mastering editing skills.
Common Mistakes of Editing to Avoid
Cutting too often creates visual chaos. When you splice every pause, every breath, and every half-second of silence, your video starts to look like a strobe light. Jump cuts can be effective when they improve pacing or humor, but overuse them, and viewers will get worn out.They can't get into the rhythm because you never give them one. What begins as dynamic energy quickly becomes annoying, making people leave before they fully understand your message.
Beginners often mix up speed with engagement. They think tighter edits mean better quality, leading to aggressive cuts that eliminate natural pauses needed for ideas to resonate. Silence has a purpose; it gives your audience a moment to process a point, laugh at a joke, or enjoy a visual. According to BubbleCow, editing mistakes often happen because of not knowing when to hold back, and the same idea goes for video editing.Knowing when not to cut is just as important as knowing where to cut. To help create smoother edits, explore our clip creator tool.
How important is consistent audio?
Visuals can look perfect, but if the audio changes suddenly, viewers will click away quickly. Inconsistent sound levels force people to adjust their volume frequently, ruining the experience. When background music is too loud for the dialogue, or when sound effects are louder than the narration, it feels unprofessional, no matter how well the editing looks.
Mix audio with headphones, not laptop speakers, to notice problems that you might miss. Pay attention to moments when the music gets louder during important dialogue, or when your voice becomes quieter than the background noise. Most editing software provides audio meters that indicate when levels enter the red zone. Keep an eye on these meters while you move through the timeline, and make adjustments before you export.
What does color correction do for your video?
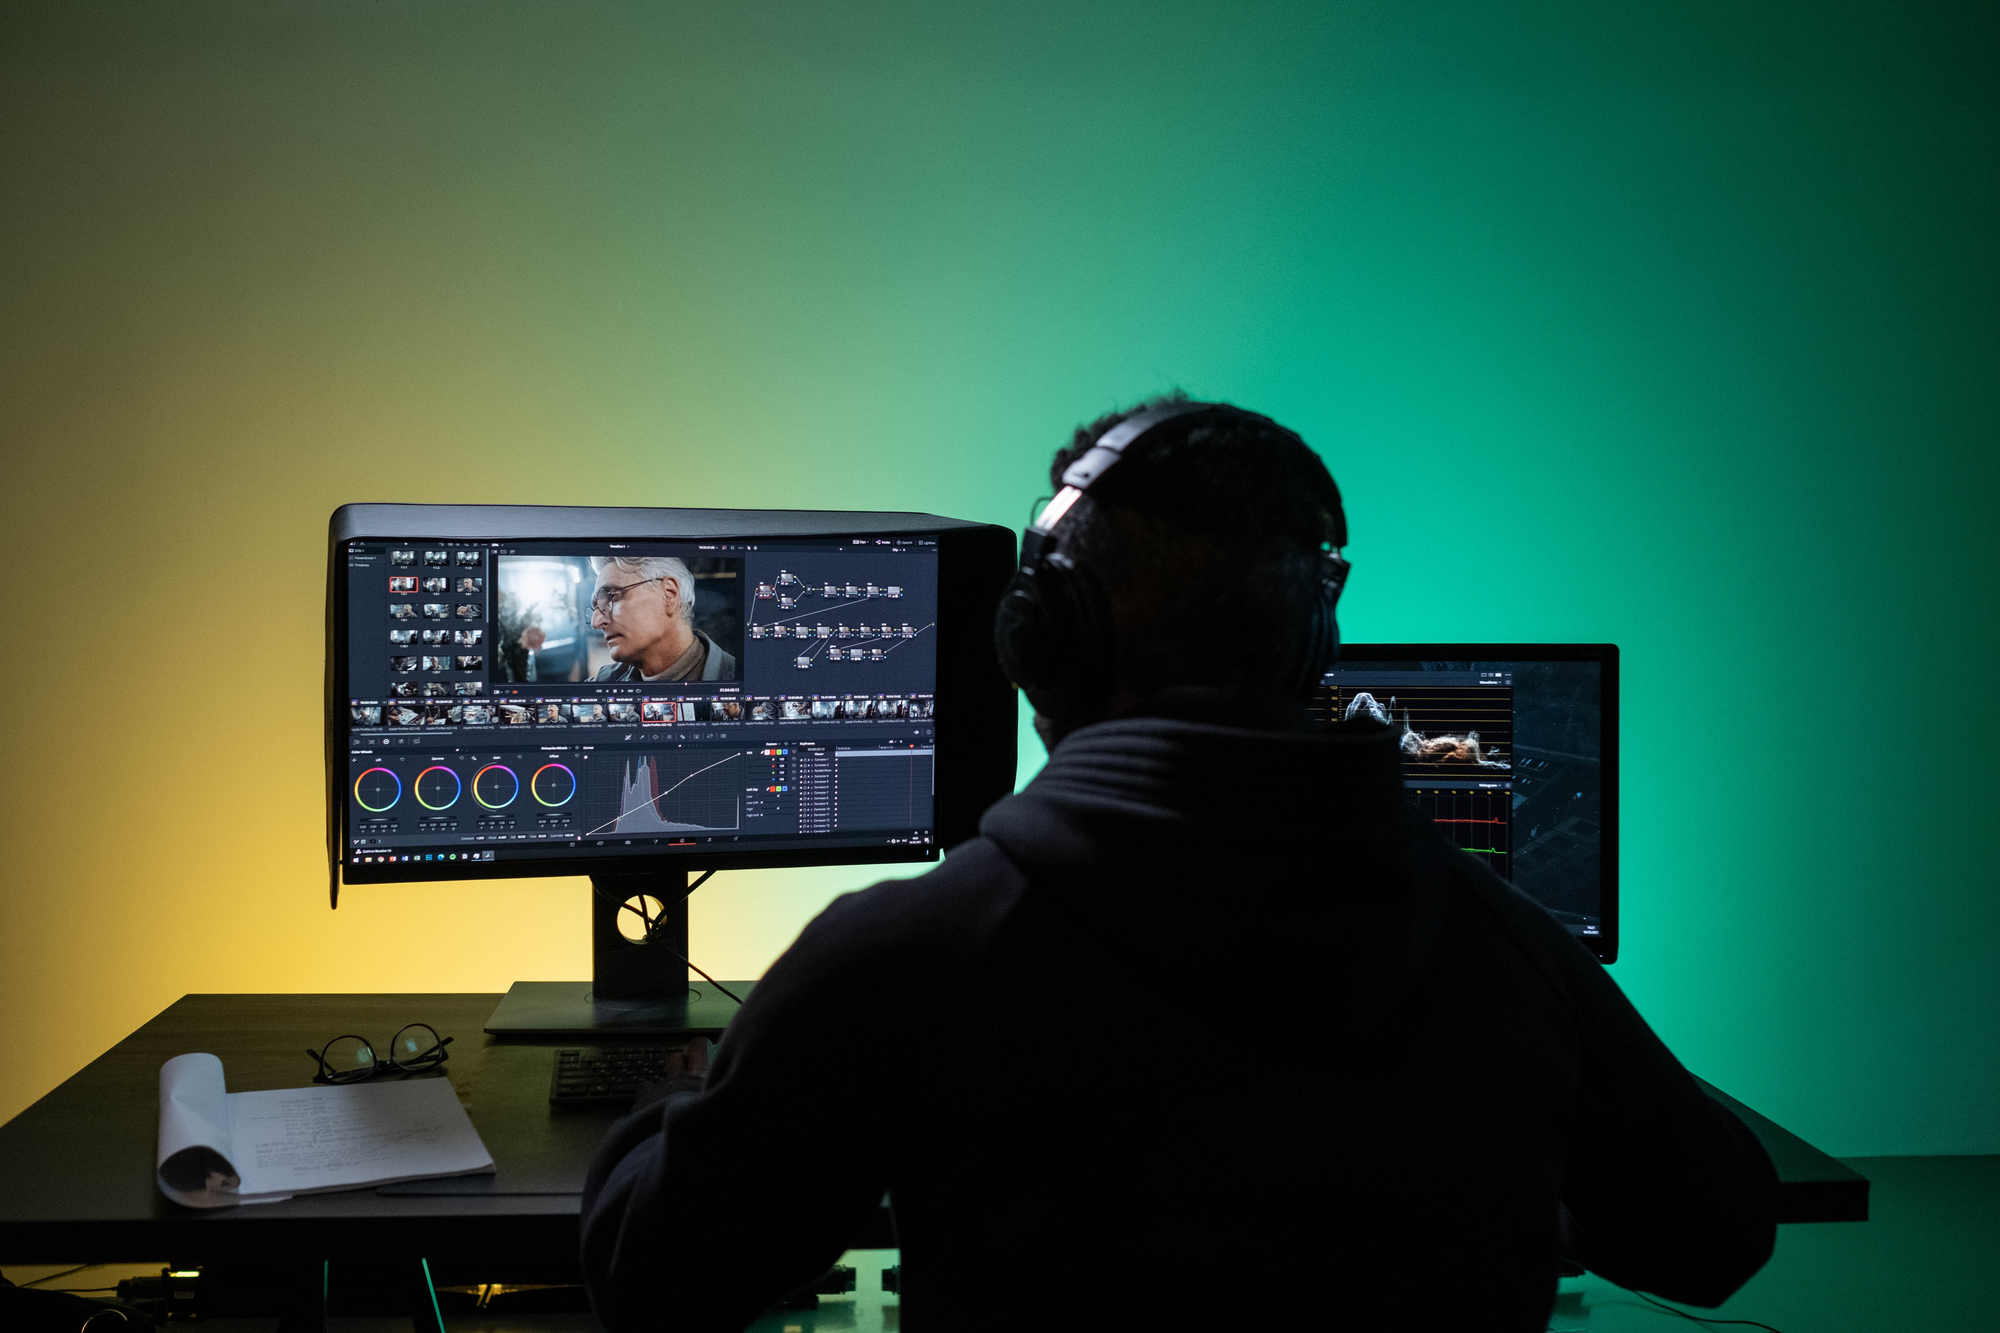
Flat, washed-out footage shows that low effort is faster than almost anything else. When creators skip color correction, their videos often look unfinished, even if the rest of the video is well done.Color affects mood, directs attention, and makes footage from different cameras or lighting look connected. Ignoring color correction leads to dull visuals, while bright, polished footage is just a few slider adjustments away.
Every major editing platform has color tools, but many beginners think they're only for advanced users. This is a costly misconception. You don't need to know color theory to improve your footage.Start with presets or auto-correct features, then change highlights and shadows until the image stands out. The difference between raw footage and color-corrected footage is like the difference between a rough draft and a finished product.
How to sync cuts with music effectively?
When edits seem off, viewers notice right away. They can feel that something is not right, even if they can't explain why the video feels wrong. Music sets expectations; if a beat drops and nothing visually happens, or if a cut occurs between beats, the rhythm falls apart. Syncing cuts to music isn't about perfection. It's about respecting the viewer's sense of timing.
Use markers to plan out beats before you start editing. Place a marker on every snare hit or bass drop, and then line up transitions with those points.This adds just five extra minutes, but it greatly improves how your video flows. When cuts match the music, everything feels intentional; when they don't, everything feels random.
Why should you plan your audio and visuals together?
The familiar approach involves editing footage first and then adding music later, hoping it fits. As the project progresses and the pacing doesn't align, the need arises to shift clips frame by frame to try to sync them. This process can become tedious because it involves fitting the rhythm rather than building it from the start.Platforms like the clip creator tool automatically sync effects and transitions to music, so cuts can land on the beat without needing manual adjustments. This lets creators focus on finding trending audio and clips instead of counting frames.
How to choose transitions wisely?
Every transition should have a good reason to be there. A dissolve shows a change in time or feeling. A hard cut keeps the energy and urgency up. A wipe can be used for stylistic emphasis, but only if it fits the style of your video.If transitions are switched around just because they look cool, they won't help your story; they will only distract from it.
Stick to one or two types of transitions in each video unless you are going for a deliberate, chaotic, high-energy style. Consistency helps create visual trust, so viewers can learn your style; they will stop noticing the transitions when the flow feels natural. If they start thinking about your transitions instead of your content, you have lost their attention.
What are the pitfalls of exporting a video?
After finishing editing and hitting export, creators often walk away, only to discover an hour later that the file is huge, the resolution is wrong, or the codec doesn’t work with the platform they want to upload to. This leads to a frustrating process of re-exporting, waiting again, and hoping the settings are right this time. Export settings are crucial because they decide whether the video looks sharp on Instagram or pixelated on YouTube.
Platform requirements vary a lot. TikTok likes a vertical resolution of 1080x1920, while YouTube Shorts accepts both vertical and square formats, and Instagram Reels is best at 9:16. Exporting in the wrong aspect ratio can lead to videos being cropped or letterboxed, cutting off important text or faces.Codec compatibility is also very important; for example, H.264 works almost everywhere, but some platforms apply heavy compression if the exported settings don’t match their preferred settings. Spend two minutes verifying these specifications before export instead of two hours fixing mistakes later.
Many creators rush through the final export step, thinking editing is done once the timeline is locked. However, this is exactly when technical mistakes are most likely to occur. A video that plays smoothly in the editor might stutter, lose sync, or lose quality during export if the settings don't match the source footage. It's very important to check your export presets every time, especially when switching between platforms or trying out a new format.
How does editing strategy impact viewer experience?
Even perfect exports won't save a project if the editing strategy doesn't align with how people actually interact with short-form content.
Related Reading
- Types of Video Editing
- Long Does It Take to Edit a YouTube Video
- How Long Does It Take to Edit a Music Video
- What Is an Overlay in Video Editing
- Is CPU or GPU More Important for Video Editing
- Can I Edit a YouTube Video After Posting
- Is Video Editing a Good Career
- Beginner’s Guide to Video Editing
- Video Editing Basics
12 Video Editing Tips and Tricks for Beginners

The organization determines if editing feels easy or too much. Before you start working with any clips, make a folder structure that groups your footage by type: raw clips, B-roll, audio files, graphics, and exports. Make sure to name everything clearly.For example, "Interview_Take3_Final" is better than "VID_0042" when you're looking through 50 files at 11 PM for the one take you can use. This method can save you hours on a project by preventing you from having to rewatch footage to remember what's in it.
Beginners usually put everything in one folder and depend on memory to keep track of what's what. This might work for the first video. But by the third project, endlessly scrolling to find files for previews can get frustrating. This can break your focus, and what should take two minutes might take ten.That stolen time adds up quickly.
1. Choose Shots That Serve the Story, Not Your Ego
Cut anything that doesn't help your message. That beautiful sunset you spent an hour capturing? If it doesn't fit the story, it needs to go.Tough editorial choices separate compelling videos from meandering compilations. Your job isn't to keep every frame you shot; it's to keep attention, and that requires ruthlessness.
Mix shot types intentionally for dynamic storytelling. Close-ups create intimacy and focus; however, using too many close-ups in a row can make viewers feel cramped. On the other hand, wide shots set the scene and provide breathing room, but using too many can lead to a loss of emotional connection. Alternating between tight and wide views improves visual rhythm.For example, show a face reacting, then pull back to reveal the environment that triggers that reaction. This contrast helps keep eyes engaged.
2. Use Transitions to Guide, Not Distract
Every transition should be either invisible or intentional. A straight cut keeps the energy up and keeps viewers interested. A dissolve shows time passing or changing moods, while a wipe can add style if it fits well with the video's look.Using every effect in your software's library, just because they are there, is not a good idea. That kind of approach screams amateur louder than shaky footage ever could.
It's best to stick to two transition types per video unless chaos is the style you're going for. Consistency builds trust, letting viewers focus more on the story than on the cut. If they start thinking about how you're cutting instead of what you're saying, you've effectively broken the spell.
3. Control Pacing to Match Emotional Intent
Fast cuts build urgency, while slow, lingering shots create space for reflection. Pacing isn't random; it's the heartbeat of the video. Creators control it through clip length and cut frequency.Action sequences need quick cuts to match the excitement viewers feel. On the other hand, emotional moments need space to breathe so viewers can fully process their feelings.
Keep an eye on your timeline's rhythm. If every clip runs exactly three seconds, the pattern quickly becomes boring. Changing clip lengths can make it more interesting.A two-second clip followed by a five-second hold creates tension and release, keeping viewers engaged as their brains struggle to guess what will happen next.
4. Color Grading Sets Mood Before Dialogue Starts
Flat, untouched footage looks unfinished, no matter how sharp the cuts are. Color grading changes raw clips into cohesive visual experiences.Warm tones signal comfort or nostalgia, while cool blues suggest detachment or professionalism. This process goes beyond just correcting exposure; it actively shapes how viewers feel before they even realize why.
Most editing platforms offer one-click presets that do 80% of the work. By applying a preset and then adjusting highlights and shadows, the image can really stand out.The difference between graded and ungraded footage is huge, showing the contrast between a polished product and a rough draft. Skipping this step will make your video signal inexperienced right away.
5. Balance Audio Layers So Nothing Fights for Dominance
Background music should support dialogue, not compete with it. If viewers have trouble hearing what you're saying because a loud soundtrack is playing in the background, they are likely to lose interest. Mix with headphones to catch imbalances that laptop speakers might hide. Keep an eye on your audio meters; when levels spike into the red, you're distorting. Distortion can create an unprofessional sound.
Dialogue stays front and center while music fills the surrounding space. Sound effects highlight moments without overwhelming the audience. Layer these parts carefully, adjusting volume so each one has enough space. When a key line is said, duck the music slightly so that the words stand out clearly. This small change makes everything feel intentional rather than accidental.
6. Match Music to Your Cuts, Not the Other Way Around
Syncing edits to beats changes the flow of your video. When a cut lands exactly on a snare hit or bass drop, the rhythm feels locked in. If it misses by even half a second, the disconnect jolts viewers out of the experience. They may not be able to say why it feels off, but they will definitely sense it.
Drop markers on every major beat before starting your cuts. Align your transitions to those points; this takes five extra minutes at the beginning but saves hours of frustration later. By setting this foundation, you're creating rhythm from the start instead of forcing it afterward.
The common method is to edit the video first, then add music and hope it matches. As the timeline gets longer, nothing seems to align. You might end up moving clips frame by frame to fit the rhythm into a layout that wasn't made for it at the start.Tools like the clip creator tool automatically sync transitions and effects to the audio, making sure that cuts hit the beat without needing to adjust them by hand. This new approach helps creators focus on finding popular clips rather than counting frames.
7. Add Text Elements That Enhance, Not Clutter
Subtitles make content easier to understand and keep viewers interested, especially when they're watching without sound. According to Insivia, viewers remember 95% of a message when they see it in a video, compared to only 10% when they read it in text. This means that your captions are not just helpful for accessibility; they are also tools to help viewers remember what they've seen.Place them in spots where they don't cover faces or important visuals, and use simple font choices. Stick to two typefaces at most; more can create visual confusion.
Annotations help focus on specific details without needing long explanations. A quick label that shows where something is or what a product is keeps things clear. But using too many can make a video look like a cluttered mess.It's important to add text only when it clarifies or highlights something viewers might otherwise overlook. Every word on the screen should have a good reason to be there.
8. Remove Distracting Noises That Break Immersion
Breathing sounds, mouth clicks, and awkward pauses are common audio problems that can distract viewers from your content. In most videos, these noises serve no purpose other than reminding the audience that they are watching a recorded piece.Trim them out to make the pacing tighter and the audio cleaner. This will lead to a more polished overall experience.
Using high-quality microphones for voiceovers is very important. Remove any unintentional hesitations during editing, since clean audio shows professionalism better than perfect lighting.While people may put up with average visuals if the sound is clear, even amazing footage cannot make up for unclear, inconsistent audio.
9. Integrate B-Roll Strategically, Not Randomly
B-roll adds context and visual variety, but randomly inserting it disrupts the story's flow. It should show things that your main video cannot explain.For example, if you are talking about a process, use B-roll that shows it. When discussing a location, include opening shots that help viewers understand the space.
Using too much B-roll makes it just filler. Viewers can tell when a video is longer than necessary. Every B-roll clip should answer a question or help with understanding. If it doesn't do this, it should be removed.
10. Master Keyframing to Add Motion Without Complexity
Keyframing lets you animate elements over time. You can gradually zoom in on a photo, pan across a landscape, or fade text in and out. These small movements add polish without needing advanced skills. Just set a starting position, move forward in your timeline, set an ending position, and the software will fill in the motion between them.
Start simple by animating one element per project until the process feels more natural. Keyframing becomes second nature quickly; once it does, users will rely on it to add dynamism to static elements.
11. Use Dynamic Backgrounds to Fill Empty Space
Removing a bad background improves how things look. However, leaving nothing behind can make subjects seem disconnected, as if they are floating in a void. Dynamic backgrounds can effectively solve this problem. They fill space without taking attention away.Also, you can stretch them across your whole timeline, so you don’t have to put static images in place over and over. When picking backgrounds, choose options that complement your subject without overpowering it. Subtle motion or texture works better than busy patterns that can distract from what you are focusing on.
12. Review Export Settings Before You Hit Render
Export presets determine whether your video looks sharp on TikTok or appears pixelated on YouTube. Different platforms have their own needs: vertical 1080x1920 for TikTok and Reels, and horizontal 1920x1080 for YouTube. If the aspect ratios are wrong, they might get cropped or letterboxed, hiding faces or text you carefully placed.
Codec compatibility is also important. The H.264 format works almost everywhere, but some platforms compress videos a lot if your settings don't match their preferences. Take two minutes to check your settings before exporting, instead of spending two hours re-rendering after finding out that the file doesn't work.
What tools facilitate efficient editing?
Knowing these techniques is valuable only if users have access to tools that help them work efficiently, such as a reliable clip creator tool.
8 Best Video Editing Tools for Beginners
Choosing the right editing software can determine whether you publish your first video this week or give up in frustration. Beginners need tools that remove technical barriers while keeping their creative potential. The best options strike a good balance between simplicity and depth, offering clear interfaces that guide users through the editing process rather than hiding important features under complicated menus. You want software that lets you focus on storytelling, not figuring out complicated controls.
According to That Creative Hub, the right software choice depends on your specific content goals and platform needs. Short-form social creators need different features than family video editors or people aiming to become professionals. Choose your tool based on what you want to create, not just on what sounds impressive.
1. Crayo
Crayo eliminates the timeline complexity that stops most beginners before they start. Instead of wrestling with layers, keyframes, and manual captioning, you begin with a simple idea and let the platform generate polished short-form content automatically. It handles subtitle placement, visual effects, background footage selection, and music synchronization without requiring you to understand how any of those elements work technically.
The platform targets TikTok, Instagram Reels, and YouTube Shorts specifically, optimizing templates and pacing for vertical, fast-attention formats. Auto-generated captions match viral-style edits that perform well on social platforms, removing the guesswork around what trends currently work. You can build a portfolio quickly because the tool compresses hours of manual work into seconds of automated generation.
Who It's For
Beginners overwhelmed by professional software find Crayo accessible because it skips the technical learning curve entirely. You create publishable content without understanding timelines or transitions, which matters when speed determines whether you stay consistent or quit.
Short-form content creators get templates and captions optimized for the platforms they actually post on. If your goal is building an audience on TikTok or Reels, Crayo's structure matches that workflow exactly.
Career starters and freelancers use it to produce portfolio pieces fast. You practice storytelling and timing without technical friction slowing you down, which lets you test ideas and iterate quickly instead of spending weeks perfecting a single video.
Marketers and solopreneurs prioritize speed and consistency over cinematic complexity. Crayo delivers promotional clips and product videos efficiently, keeping content flowing without requiring dedicated editing time.
Pros
Extremely beginner-friendly interface with no timeline complexity. AI auto-generates captions, effects, music, and visuals. Fast turnaround produces videos in seconds. Optimized specifically for TikTok, Reels, and Shorts. Great for building portfolios quickly. No advanced editing skills required.
Cons
Limited to short-form content. Less control over manual adjustments. Not designed for long-form projects or cinematic storytelling.
2. PowerDirector
PowerDirector packs professional-level features into an interface that doesn't punish beginners for not yet knowing what keyframing means. You get multicam editing, motion tracking, and support for VR footage, alongside AI-powered tools like auto-captioning, text-based editing, and automatic face-blurring. The software adds new effects and format support quickly, staying current with platform requirements without forcing you to switch tools.
Despite its massive capability set, the interface remains clear and less intimidating than alternatives aimed at Hollywood studios. You can apply effects, trim clips, and adjust audio without hunting through nested menus or consulting documentation every five minutes.
Who It's For
Business video producers need polished presentation videos for proposals and project updates. PowerDirector provides the tools to make corporate content look professional without requiring a production team.
Video enthusiasts who want to maximize footage potential benefit from the range of effects, transitions, and color tools. If you're making home videos for family but want them to look better than raw phone footage, this is for you.
YouTubers gain access to AI video and audio generation tools, plus included stock media. You can create compelling content without hiring actors or renting studio space, which matters when you're building an audience on limited resources.
Pros
Fast project rendering. Clear, usable interface. Loads of effects and AI tools. Multicam and motion tracking support. Screen recording included.
Cons
The number of options can overwhelm beginners initially. Subscription pricing adds up over time.
3. Apple iMovie
iMovie strips editing down to essential actions without making you feel limited. Storyboard features guide you through crafting digital movies from scratch, showing exactly where to place your intro, main content, and closing. If you shoot with an iPhone, the app maintains proprietary Cinematic mode effects in your footage, preserving depth-of-field adjustments you made during recording.
Advanced tools like audio filters, chroma keying, and picture-in-picture sit alongside basic trimming and transitions. The learning path to Final Cut Pro feels smooth because iMovie introduces concepts you'll use in professional software without overwhelming you with options you don't need yet.
Who It's For
Family video sharers with Apple devices get a free tool that turns vacation footage and kids' soccer matches into shareable memories. The interface feels familiar if you already use other Apple software.
Video hobbyists find sufficient editing tools and effects to stay satisfied without paying for professional suites. iMovie also serves as an on-ramp to Final Cut when you're ready to expand capabilities.
Pros
Simple interface. Good chroma-keying tool. Unique support for iPhone video features. Excellent movie templates with shot guidance.
Cons
Lacks multicam and motion tracking capabilities. Limited to two video tracks, which restricts layering options.
4. Adobe Premiere Pro
Premiere Pro sets the industry standard for professional video editing, offering collaboration capabilities, color tools, effects, and output options that studios rely on. Recent updates added AI audio auto-tagging, auto-captioning, text-based editing, and generative AI features that automatically extend clips. The unified Color Manager and improved import/export pages make complex workflows more intuitive than in previous versions.
Subscription-only access means higher long-term costs compared to one-time purchase alternatives, but you gain continuous updates and integration across Adobe's Creative Cloud ecosystem.
Who It's For
Collaborators working on team projects benefit from built-in review and approval workflows. If your team uses other Adobe applications, Premiere Pro integrates seamlessly.
Professional video editors get all the necessary tools plus compatibility with workplace ecosystems. The software handles everything from basic cuts to advanced compositing.
Serious amateurs looking to move beyond basic apps find streamlined interfaces that let them get started without prior studio experience. You don't need professional credentials to access professional tools.
360 VR media editors can work with cutting, effects, titles, and transitions for immersive content, though you'll need stitched 360 clips rather than stereoscopic 180-degree footage.
Pros
Clear, flexible interface. Responsive performance and fast rendering. Auto-transcribing and text-based editing. Excellent stabilization tool. Unlimited multicam angles. Many organizations and collaboration tools.
Cons
Some techniques require external applications. Subscription costs accumulate significantly over the years.
5. Final Cut Pro
Final Cut Pro's trackless timeline feels strange initially, but once you adjust to the magnetic editing style, you'll appreciate how it prevents accidental gaps and overlaps. The interface offers capabilities comparable to Premiere Pro while maintaining a more traditional Mac-native feel. The iPad version requires a $4.99 monthly subscription but dovetails smoothly with the desktop application, supporting multicam editing across devices.
Apple ecosystem integration runs deep. Extra support for iPhone input and Vision Pro output makes Final Cut the natural choice if you're already invested in Apple hardware.
Who It's For
Amateur video enthusiasts familiar with iMovie but wanting more advanced capabilities feel at home with Final Cut's design language and workflow logic.
Apple product users who work primarily on iPads, iPhones, Macs, and Vision Pros benefit from tight hardware-software integration that optimizes performance and simplifies file management.
Pro video editors have everything they need, including plug-in support. Top Hollywood movies and shows use Final Cut, which lends it professional credibility.
Pros
Superb organization tools. Fast performance. Magnetic, trackless timeline. Supports 360-degree footage and wide color spaces. Excellent multicam editing. Powerful masking and chroma keying.
Cons
Import and export experiences could be clearer. Some techniques require additional software, such as Motion and Compressor.
6. Adobe Premiere Elements
Premiere Elements makes complex effects achievable through Guided Edits and simplified features that hide advanced capabilities behind approachable interfaces. If you want compelling results without stressing over technical concepts, this consumer-level version delivers. Keyframes and timecodes remain available when you need them, but you're not forced to master them immediately.
The license limits usage to three years, which changes the cost calculation compared to perpetual licenses. Still, that timeline beats subscribing to Premiere Pro if you're editing occasionally rather than professionally. Cross-platform support covers both macOS and Windows.
Who It's For
Aspirants to Premiere Pro gain a lower-cost stepping stone that teaches the same fundamental concepts without the full professional price tag.
Beginners in video editing can quickly create compelling videos with intriguing effects. The accessible interface doesn't demand significant time investment in learning professional software conventions.
Memory keepers (Adobe's term for people who preserve family events and trips) get high-quality video creation tools designed for sharing with loved ones rather than for commercial distribution.
Pros
The interface resembles Premiere Pro, making eventual transitions easier. Ample video effects and control. Cross-platform support. 360 VR editing tools. Good rendering speeds.
Cons
Three-year license limit creates eventual repurchase requirements. No multicam support.
7. DaVinci Resolve
DaVinci Resolve offers professional-grade capabilities in a generous free version, which explains its appeal across skill levels. Node-based editing provides ultimate control over effects, though that power comes with complexity. The software includes comprehensive audio tools, color grading depth, and keyframing precision that rival paid alternatives.
Recent AI-powered additions, such as auto-captioning and text-based editing, compete directly with Premiere Pro's features. But the learning curve remains steep. You're trading ease of use for depth of capability, which works if you're willing to invest time upfront.
Who It's For
Hollywood wannabes and studio professionals already use DaVinci Resolve widely in production environments. Its industry prevalence and collaboration capabilities make it worthwhile to learn if you're aiming for professional work.
Video editors on a budget get remarkable value from the free version. None of the pro-minded alternatives offer comparable capabilities for free, though you'll eventually encounter features that require the paid upgrade.
Pros
Plenty of editing tools for precise control. Includes motion graphics and audio editing. Deep color-grading tools. AI features automate processes. Fast render performance.
Cons
Requires substantial system resources. Takes considerable time to learn effectively.
8. Microsoft Clipchamp
Clipchamp handles basic clip joining alongside sophisticated features like effects, captions, and background music without requiring software installation. The web-based platform works across all major operating systems, making it accessible on any device. Screen recording with optional webcam narration is built in, simplifying tutorial and presentation creation.
Templates for intros and outros give projects a cohesive form quickly. AI-powered speech-to-text creates auto-captions, while AI voice-overs convert captions into dialogue across multiple styles. Much of the functionality remains free, though subscriptions add cloud storage, additional stock content, brand kit features, and 4K output resolution.
Who It's For
Web-based video editors who prefer working in a browser rather than installing software get full editing capabilities without local storage requirements.
Anyone with a Windows PC can find Clipchamp ready immediately. Integration with OS photo and screen capture tools streamlines workflow for quick edits.
Marketers benefit from brand kits, extensive templates, and stock media libraries. Small businesses create eye-catching content efficiently without hiring designers.
Social creators posting to Facebook, Instagram, TikTok, or YouTube find templates and stock content that make videos feel current and professional without design skills.
Pros
Included with Windows. Slick interface. Generous template selection. Stylish effects and transitions. Good text and soundtrack options.
Cons
Some features require subscriptions. Templates tend to be short and don't specify shot types. Limited control over effects compared to desktop alternatives.
The familiar approach is downloading software, watching lengthy tutorials, and trying to remember every feature before starting your first project. As complexity grows and you add more clips, effects, and layers, you realize you've forgotten half the steps. You rewind tutorials, pause constantly, and spend more time learning the interface than creating content. Platforms like the clip creator tool automate caption generation, silence trimming, and effect application in seconds, compressing what traditionally takes hours into minutes so you focus on finding trending clips instead of manually adjusting frames.
But owning the right tool matters only if you know how to use it, without wasting hours on tasks that shouldn't require your attention.
Related Reading
- Video Editing Workflow Checklist
- PC Specs for Video Editing
- How To Start Editing Videos
- How To Practice Video Editing
- Mac Vs Pc For Video Editing
- How To Make A Video Editing Portfolio
- How To Make Money Video Editing
- Best Free Video Editing Apps For Android
- How To Organize Video Files For Editing
- How To Edit Video In Google Drive
- Creative Video Editing Techniques
Know the Editing Tips, Skip the Editing Headache
Even with the best video editing tips and tricks, creators still waste hours cutting clips, adding captions, syncing music, and exporting multiple versions. That's where Crayo turns editing knowledge into action. Creators know what good pacing looks like, understand how color grading changes mood, and know when cuts should land on the beat. However, knowing does not take away the tedious work of putting those techniques into practice frame by frame.
The usual approach involves applying everything learned by hand. This includes trimming silence, typing captions with the right timing, searching for background footage that matches the content style, and adjusting transitions until they sync with the music.As posting schedules get tighter and multiple versions are needed for different platforms, the process becomes even more difficult. What should take twenty minutes can stretch into two hours, as creators repeat the same techniques instead of concentrating on finding trending clips that will truly perform.
Platforms like the clip creator tool automatically apply proven short-form editing techniques. Captions are auto-generated with the right timing and emphasis. Scroll-stopping effects and transitions sync to audio without needing to manually set keyframes.Background visuals and music match the content style based on simple prompts. Creators can make multiple short clips at the same time without building timelines or adjusting layers, turning what usually takes hours of repetitive work into just minutes of smart decisions about which clips to publish.
Writing a simple outline or prompt that describes what to say is all that's needed. Choose an editing style that fits the content, whether it's a background video, a narrator's voice, or a specific music mood. Clean, platform-ready shorts are exported in minutes, correctly formatted for TikTok, Instagram Reels, or YouTube Shorts without the hassle of checking aspect ratios or codec settings. The tool handles technical details, allowing creators to focus on strategy rather than software mechanics.This is perfect for creators who know what good editing looks like but would rather not do it manually each time they publish.
Related Reading
- Best Drone Video Editing Software
- Best Video Editing Software For Music Videos
- Best Video Editing Software For Sports Highlights
- Best Video Editing Software For Content Creators
- Best Video Editing App For Pc
- Best Paid Video Editing Software
- Best App for Video Editing on iPad
- Best Songs For Video Editing
- Best Video Editing Software For Vlogging
- Autopod Alternative